
How to Use Queues in eoSocial
Queues in eoSocial let you create a group of social posts that publish automatically on the days and times you choose.
Instead of selecting a specific date and time for every post, you can set up your Queue schedule once, add posts to the Queue, and let eoSocial publish them according to the next available time slot.
Queues are especially useful for evergreen content or other posts that you want to publish consistently throughout the week.
Quick Facts
- Find Queues under eoSocial > Publish > Queues.
- Queues publish posts on specific days of the week and at specific times.
- You can add multiple posts without choosing a date and time for each one.
- Queues are useful for evergreen or recurring content.
- Queues can also be used with RSS feeds.
- Each Queue time slot can publish one queued post.
Even if your content is not evergreen, Queues can still be useful when you regularly post on the same days and times.
For example, if you normally publish a weekly tip every Monday and Wednesday, you can create those recurring time slots in a Queue and simply continue adding posts as needed.
Is a Queue the Right Fit?
You may be wondering whether you should queue, schedule, or repeat a post.
The main difference between a Queue and a Scheduled Post is whether the content needs to publish on a specific date.
A Scheduled Post is best when a particular message needs to go out on a specific date and time.
A Queue is better when you want posts to publish on recurring days and times but the individual posts are not date-sensitive.
For example, if you want to publish:
- Weekly business tips
- Product highlights
- Educational posts
- Motivational posts
- Industry updates
every Monday, Wednesday, and Friday, a Queue can make that process easier.
However, if you need a post such as a holiday greeting, event announcement, or webinar reminder to publish on a particular date, use the scheduling option instead.
Important
A Queue can publish only one queued post per time slot.
A single queued post can be published to multiple social profiles. However, if you create separate versions of the post for different social networks, those variations may use separate Queue time slots.
Set Up a New Queue
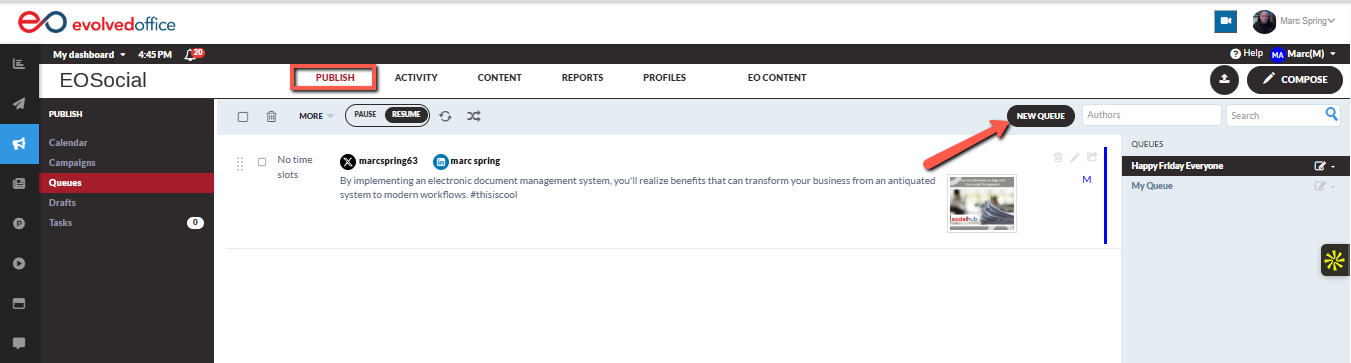
1. Open Queues
From your Evolved Office account, go to:
eoSocial > Publish > Queues
Then select New Queue.
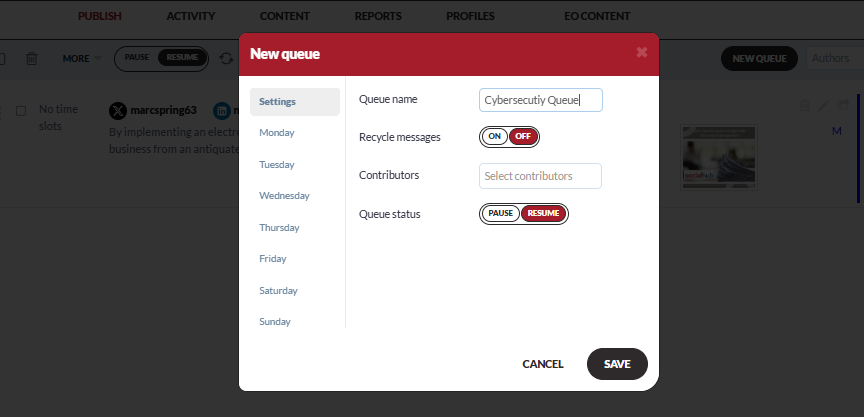
2. Name Your Queue
Enter a name that will make the Queue easy to identify.
For example:
- Weekly Tips
- Managed IT Content
- Product Highlights
- Evergreen Posts
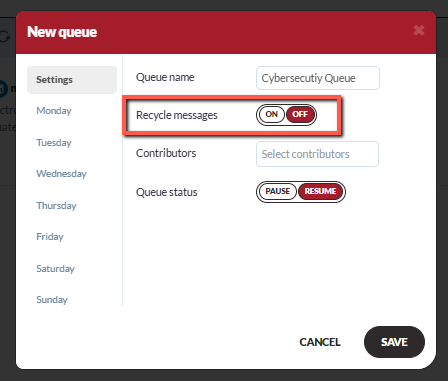
3. Choose Whether Posts Should Recycle
You can choose whether posts added to the Queue should be recycled.
When recycling is enabled, a post is moved back to the bottom of the Queue after it has been published so it can be published again in the future.
Important
Recycling works best when your Queue contains a good amount of content and you regularly add new posts.
If a Queue contains only a few posts and publishes frequently, the same content may repeat too often.
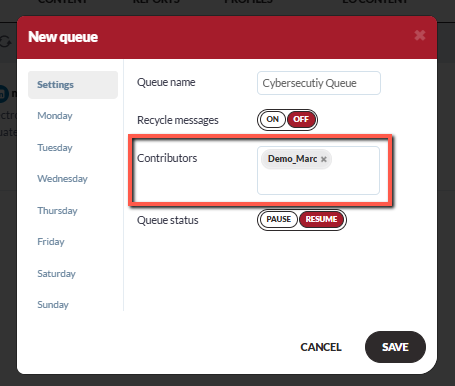
4. Add Contributors
You can add other users as Contributors.
Contributors can view the Queue and add posts based on their account permissions.
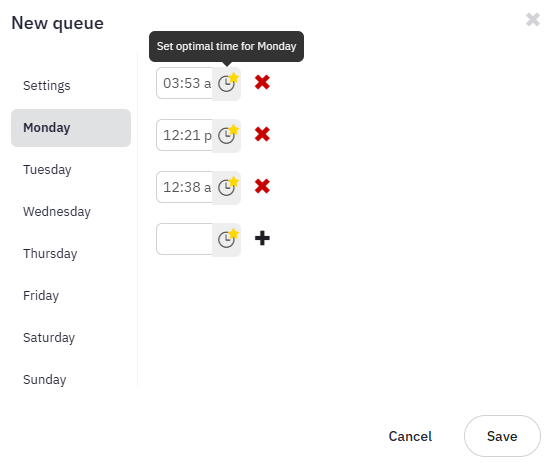
5. Add Publishing Times
Select a day of the week and add the time you want a post to publish.
Use the + icon to add additional time slots.
Repeat this process for each day you want the Queue to publish.
For example:
- Monday at 10:00 AM
- Wednesday at 1:00 PM
- Friday at 9:00 AM
Depending on the options available in your account, you may also see an Optimal Time option.
6. Remove a Time Slot
To remove a publishing time, select the X next to that time slot.
7. Save Your Queue
Once you have added your preferred days and times, select Save.
Your Queue is now ready for posts.
Edit a Queue
To edit an existing Queue:
- Go to eoSocial > Publish > Queues.
- Locate the Queue you want to update.
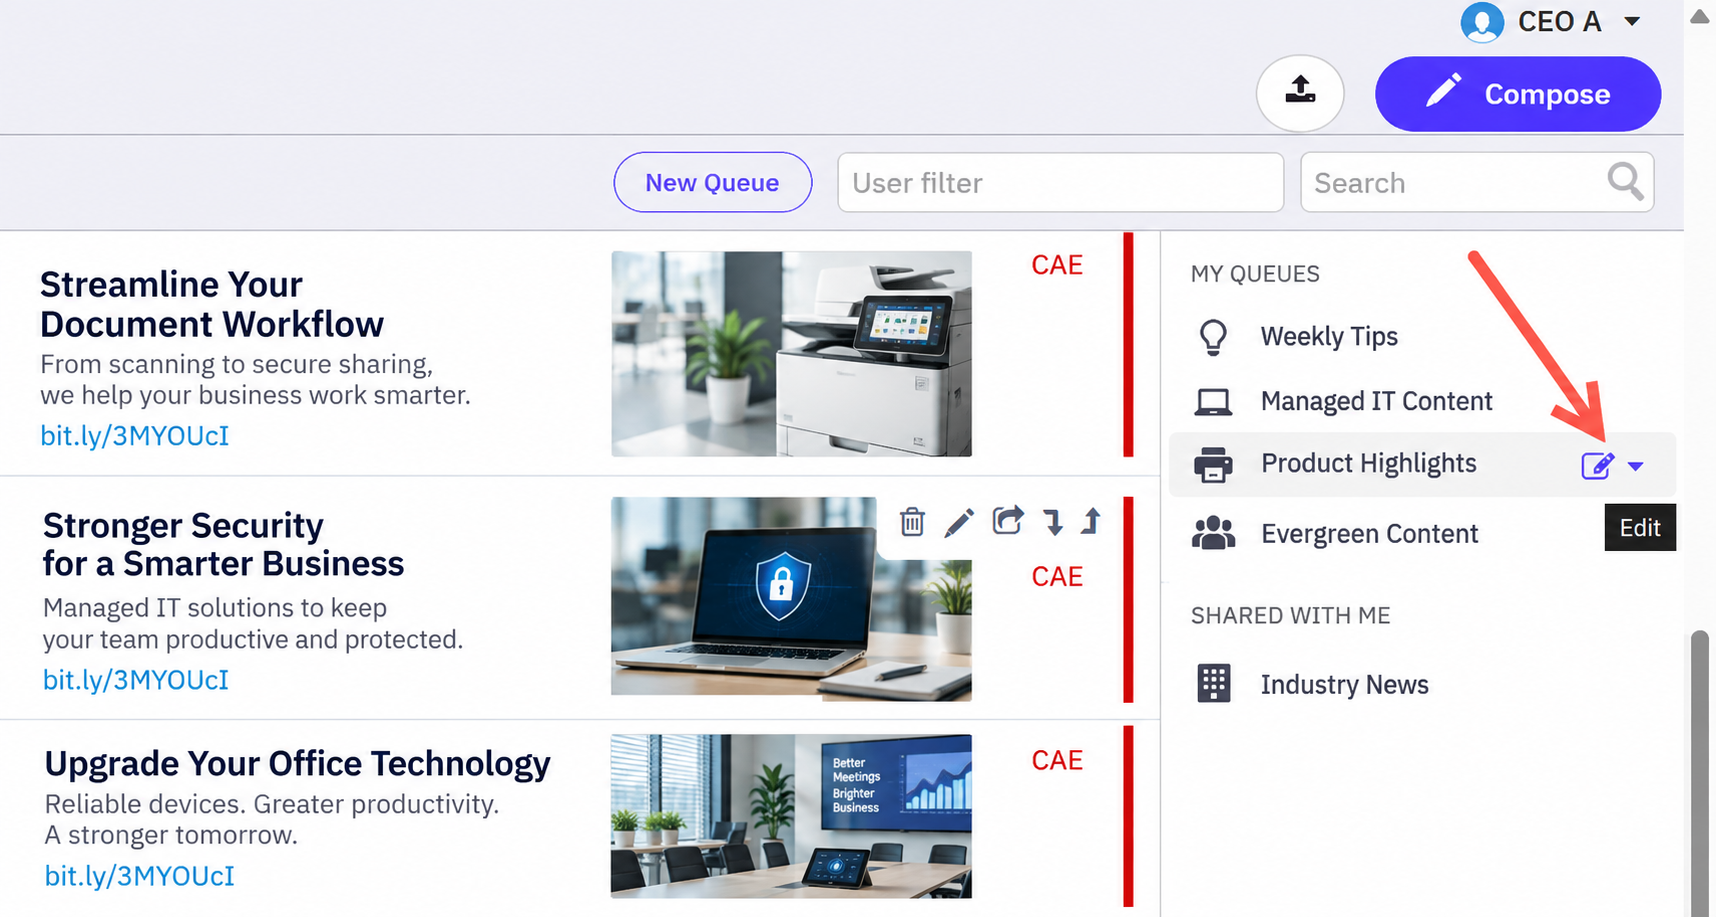
- Hover over the Queue name.
- Select the Edit icon.
- Update the settings as needed.
- Save your changes.
From the Queue settings, you may be able to update items such as:
- Queue name
- Contributors
- Publishing times
- Recycling
- Queue status
Add a Post to a Queue
When creating a post in eoSocial:
- Open the post composer.
- Create your social media post.
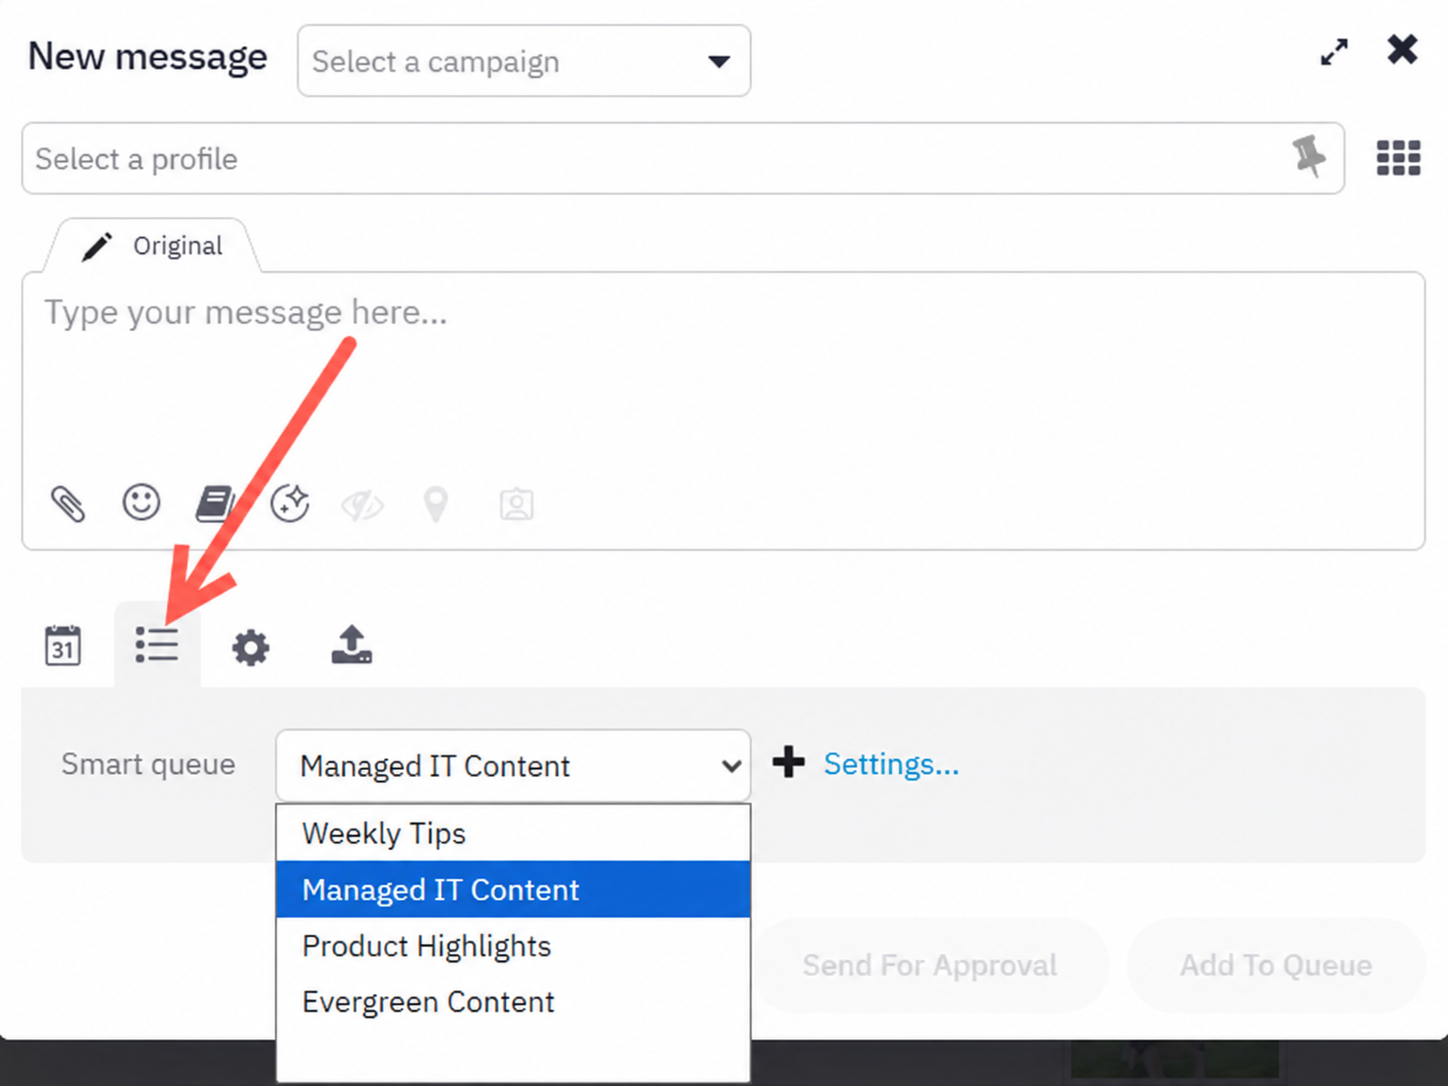
- Select the Queue option.
- Choose the Queue you want to use.
- Select the social profiles.
- Add the post to the Queue.
You may also be able to create a new Queue directly from the post composer.
Depending on your account setup, you may also have access to the Queue settings from this area.
Posts With Multiple Variations
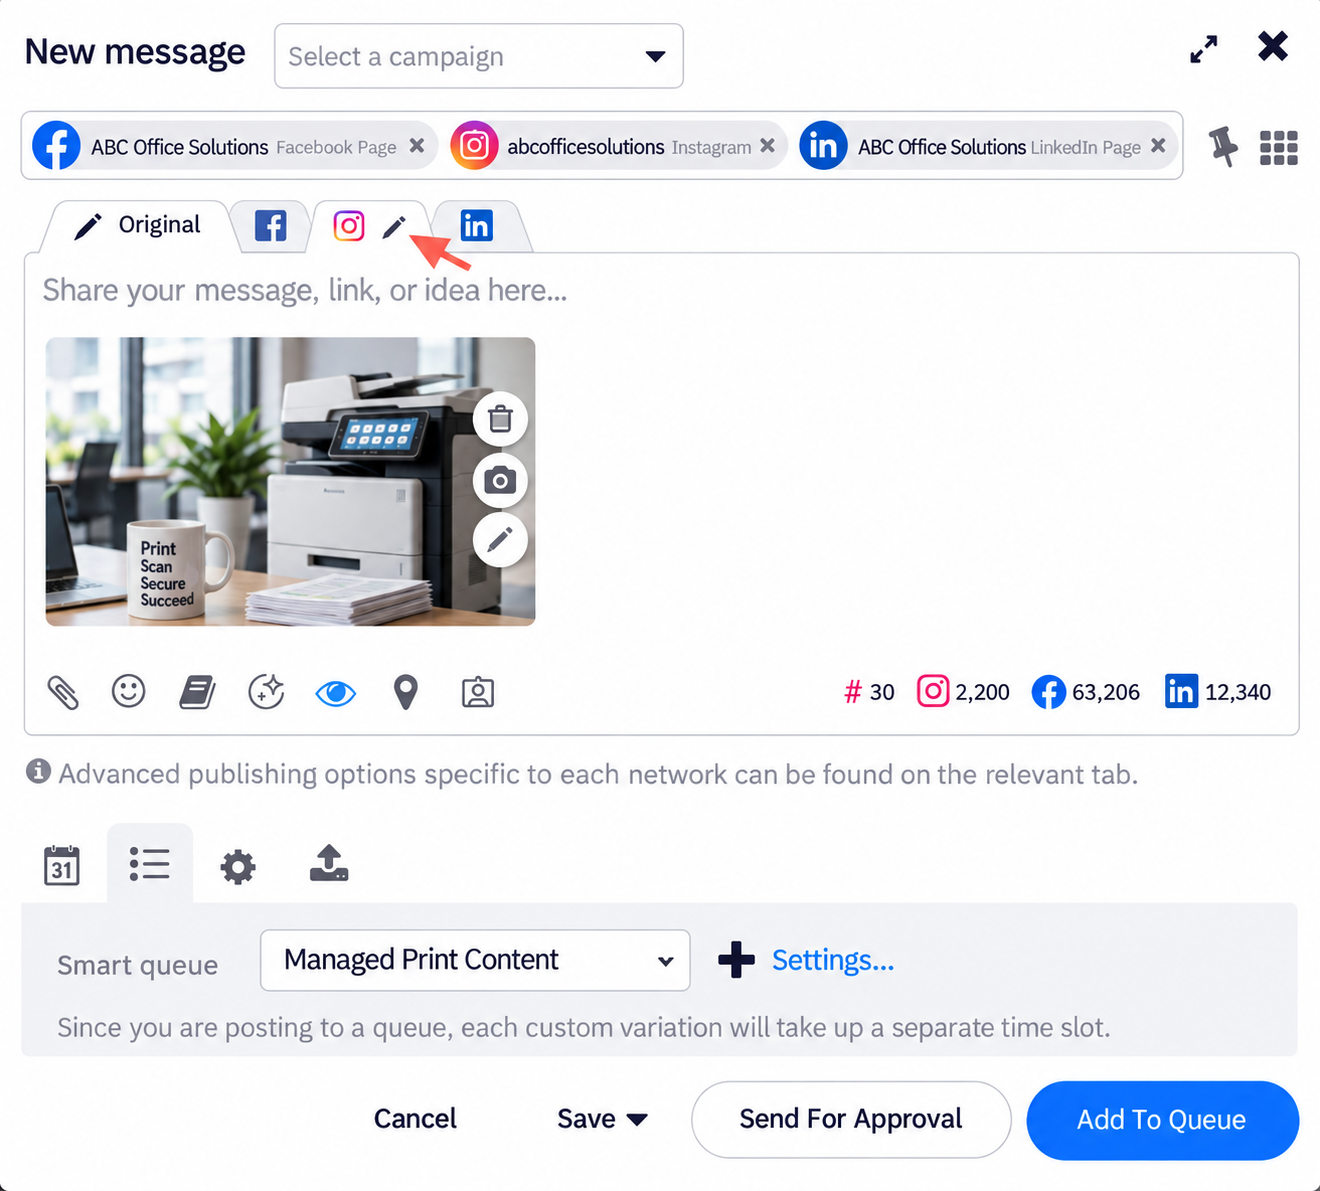
eoSocial allows you to customize posts for individual social networks.
For example, you might create a post for Facebook and Instagram and then make changes specifically to the Instagram version.
When you create separate platform variations, multiple queued posts may be created.
For example:
- The Facebook version may publish during the next available Queue time slot.
- The Instagram version may publish during the following Queue time slot.
This means that a post with multiple customized variations can use multiple Queue time slots.
If you select multiple social profiles but do not create separate versions of the content, the post can publish to those profiles using a single Queue time slot.
Tip: Publishing Variations at the Same Time
If you want customized versions for different social networks to publish at approximately the same time, you can create a separate Queue for each network and use the same publishing schedule.
You should periodically review those Queues to make sure the schedules remain aligned.
The Queues View
The main Queues view includes several options for managing your content.
Depending on your account permissions and setup, you may see options to:
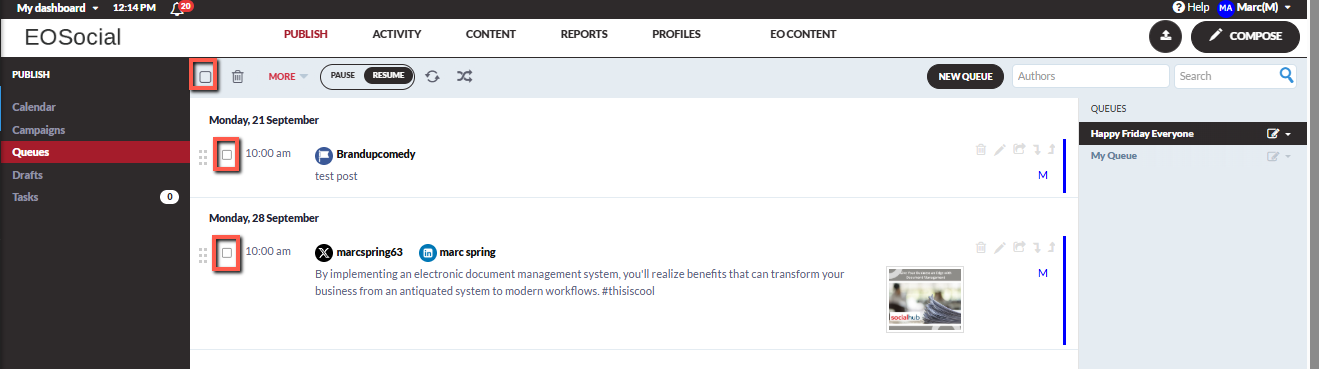
- Select posts
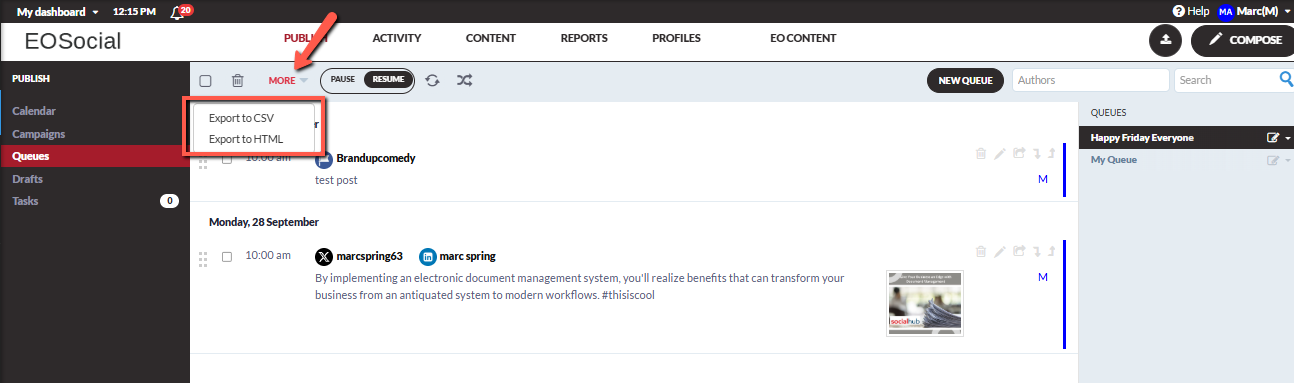
Use the checkbox to select individual posts or all visible posts. - Export posts
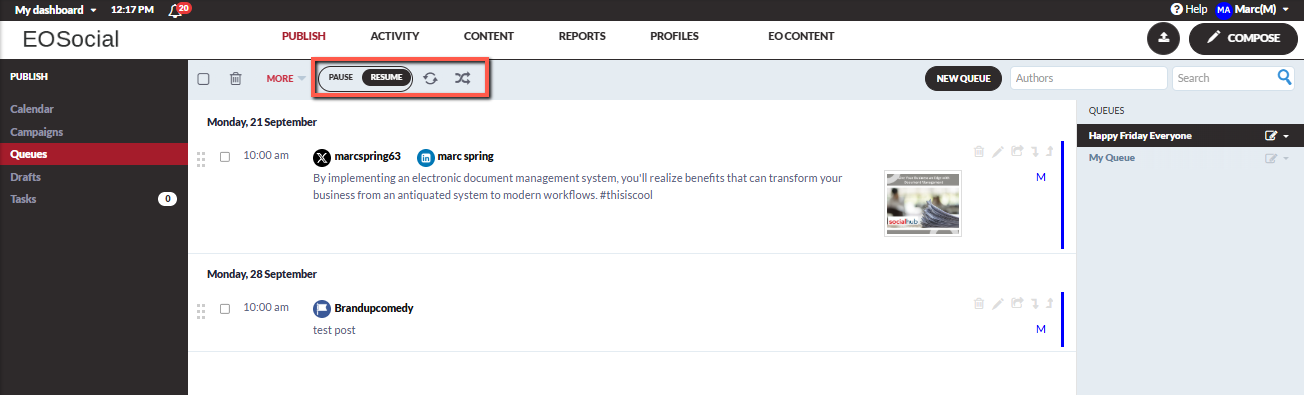
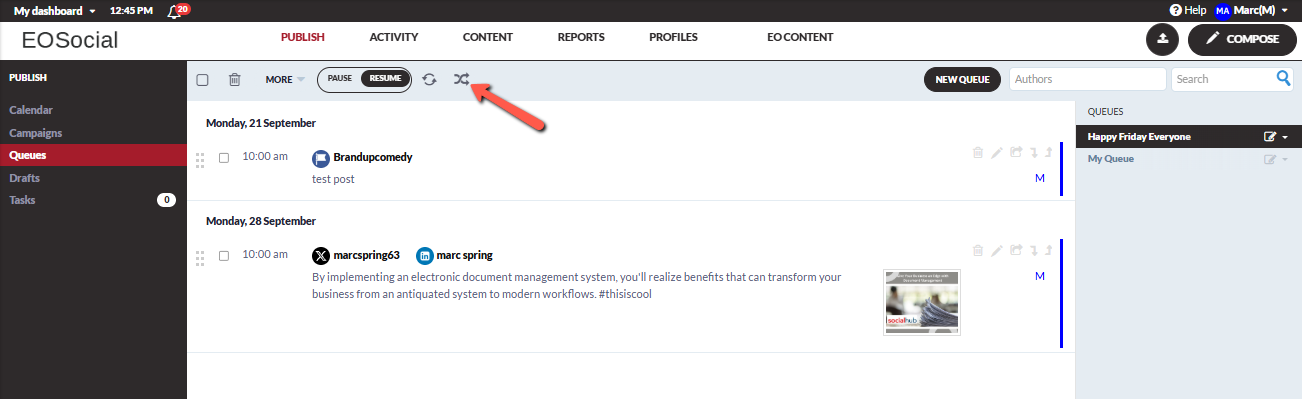
Selected Queue content may be exported for your records. - Pause, Resume, Refresh, or Shuffle
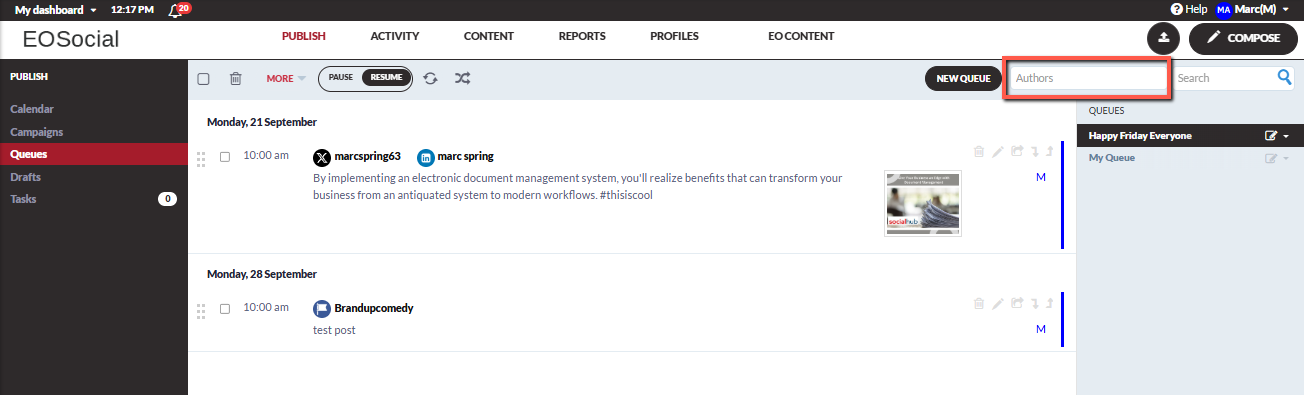
Use the Queue controls to temporarily pause publishing, restart it, refresh your view, or rearrange posts. - Filter by User
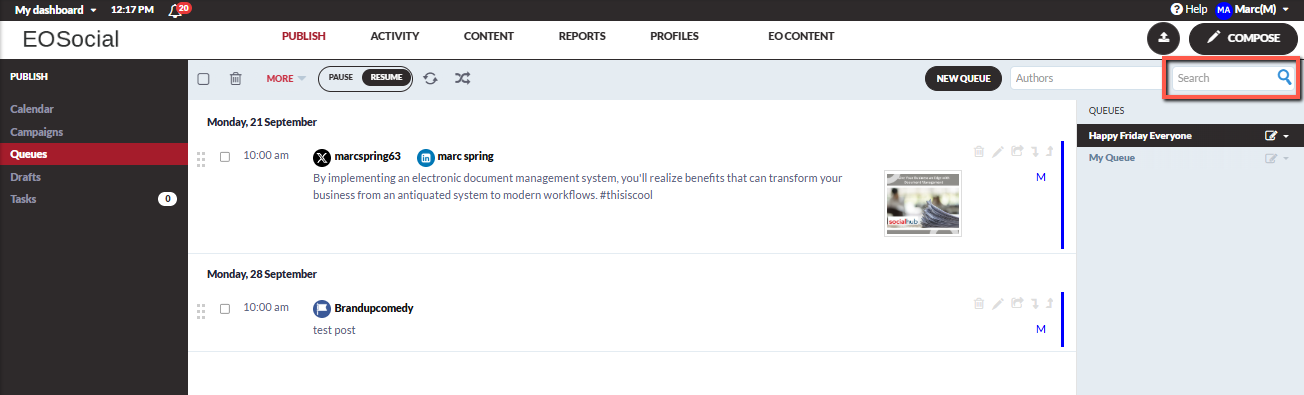
Filter posts based on the user who created them. - Search
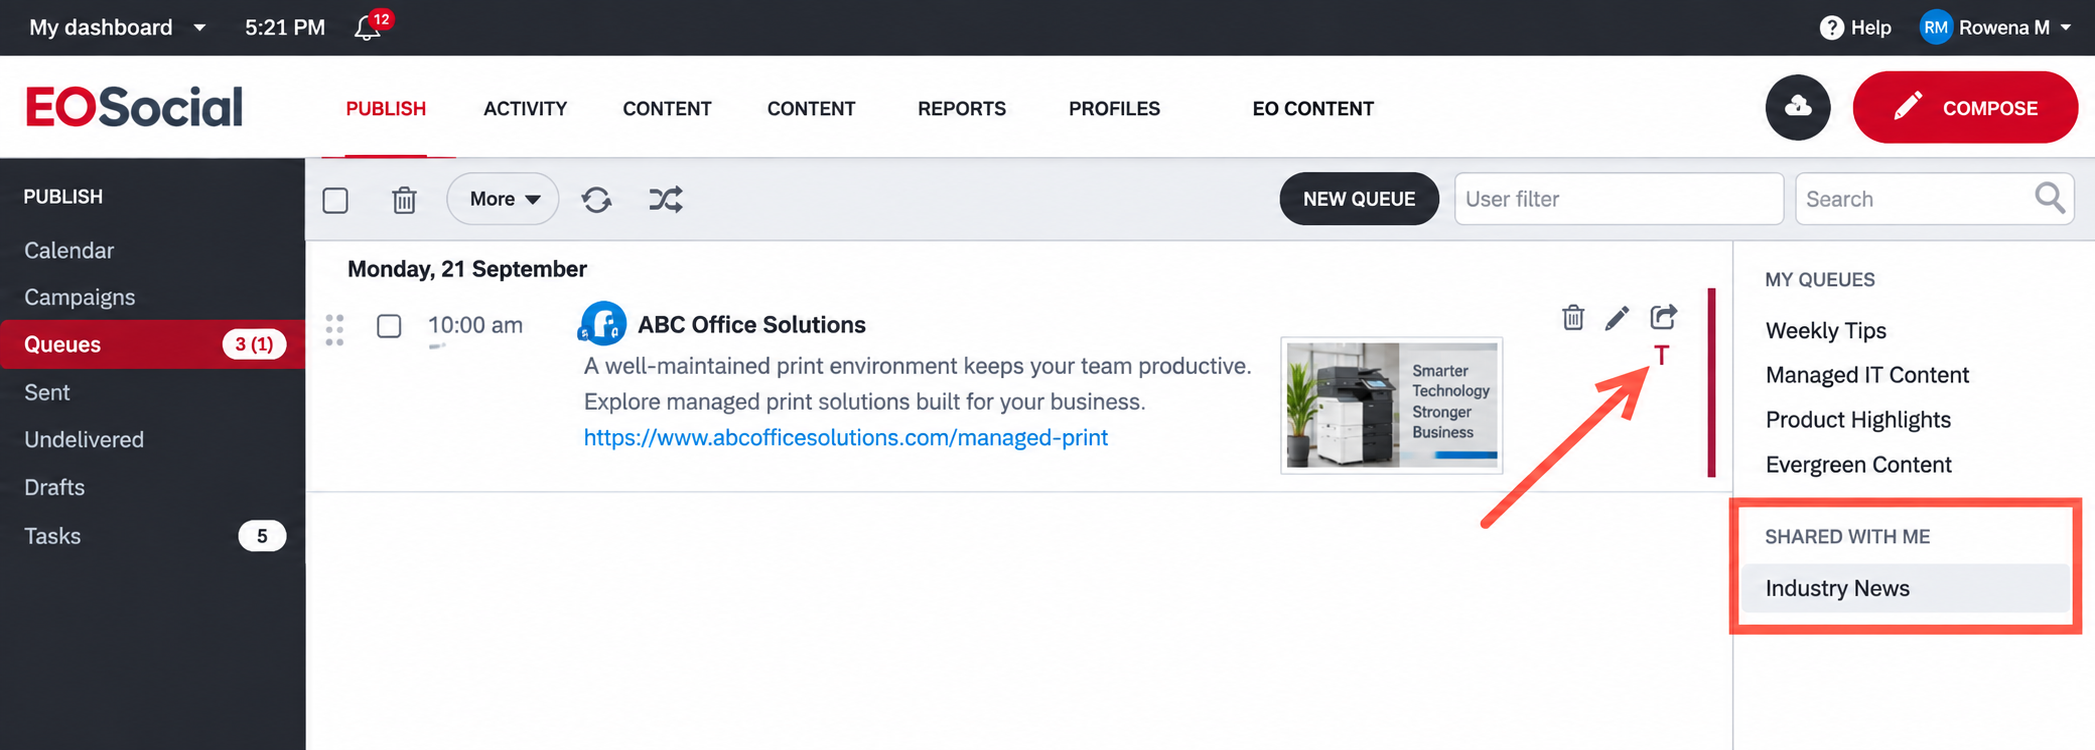
Search for text within a post or by social profile. - View Shared Queues
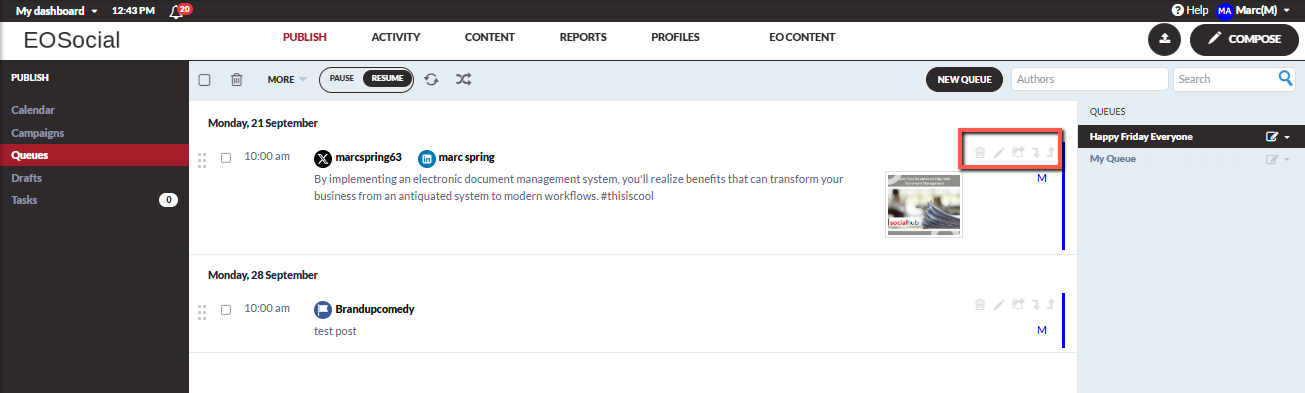
Queues created by another user may appear as shared with you when you have been added as a Contributor. - Manage Individual Posts
Depending on the available options, you may be able to edit, delete, or repost a message. - Rearrange Posts
Drag and drop posts to change their order in the Queue. - Identify the Post Creator
User initials may be displayed to indicate who added the post.
Tips and Tricks for Queues
Recycling Posts
When Recycle is enabled, a published post moves to the bottom of the Queue so it can be published again later.
How quickly it appears again depends on:
- The number of posts in your Queue
- How many times the Queue publishes each week
For example, if your Queue publishes once per day and contains seven posts, a recycled post may return approximately one week later.
If the same Queue contains hundreds of posts, it could take significantly longer before that post reaches the top again.
If recycling is turned off, each post will publish once. When all posts have been published, the Queue will remain empty until new posts are added.
Keep Your Queue Varied
If you recycle content, periodically review your Queue to make sure the posts do not become too repetitive.
You can keep your Queue fresh by:
- Adding new posts regularly
- Updating older posts
- Removing outdated content
- Using Shuffle to change the posting order
Repeatedly publishing the same limited set of content can also create a poor experience for your audience.
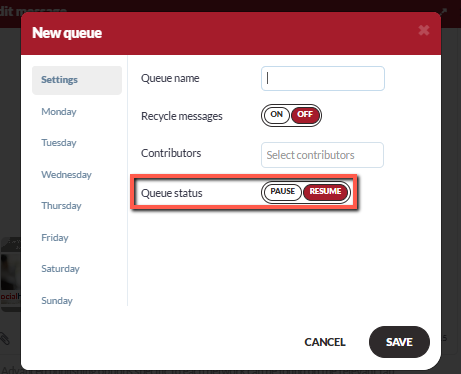
Pause a Queue
You can temporarily stop a Queue without deleting it.
To pause a Queue:
- Open the Queue.
- Select the Edit option.
- Change the Queue status to Pause.
When you are ready to start publishing again, select Resume.
Your existing posts will remain in the Queue while it is paused.
Using Queues With RSS Feeds
If you use RSS feeds in eoSocial, you can also use them with Queues.
For example, new RSS items can be added to a Queue so they follow your existing Queue publishing schedule instead of publishing immediately.
This can help you manage automated and manually created content within the same social posting schedule.
Need Help?
If you need assistance using Queues in eoSocial, please contact support@evolvedoffice.com.