
Suggested Journeys: How to Launch a Prebuilt Drip Campaign
Overview
Suggested Journeys are prebuilt drip campaigns designed specifically for office technology dealers and MSPs.
They provide proven messaging and cadence so you can launch automated campaigns in minutes — without building from scratch.
You can use them as-is or customize them to fit your business.
If you're new to Journeys in general, you may also want to review our
👉 Comprehensive Guide: Creating a Journey and Multi-Rep Journey with Multi-Assign Feature
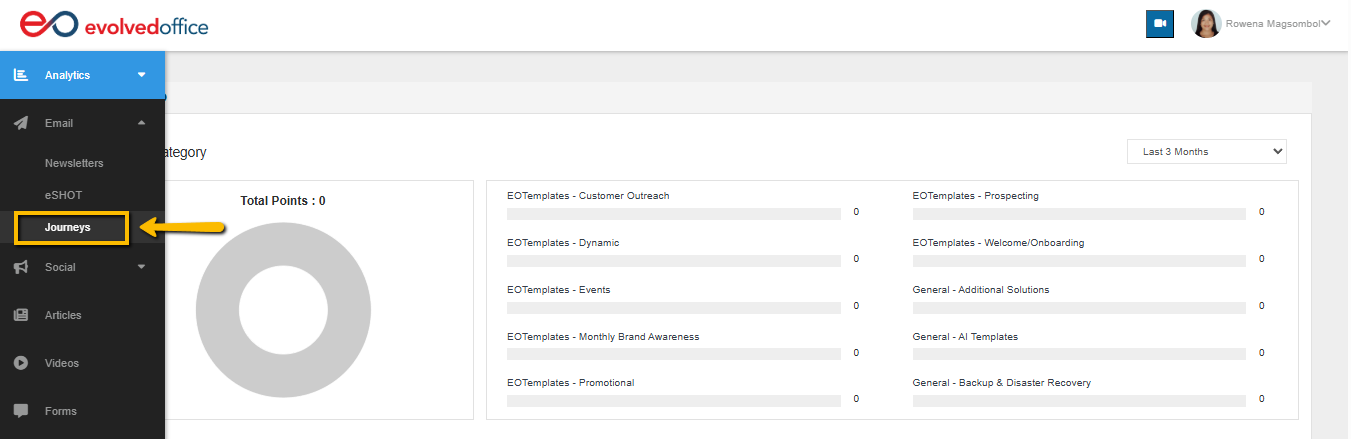
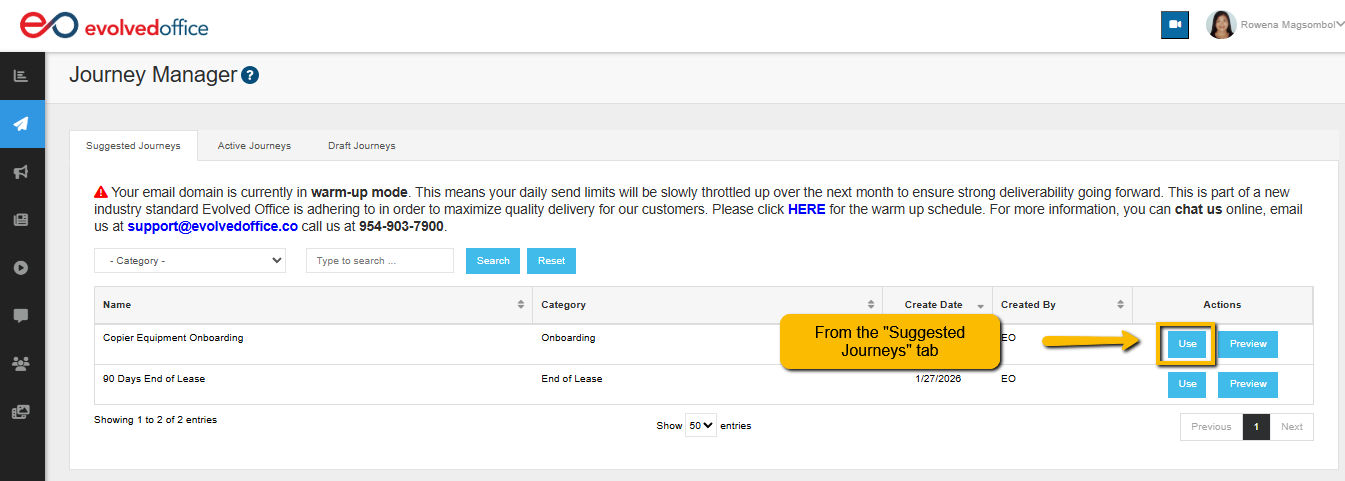
Where to Find Suggested Journeys
- Go to Journey Manager
- Click the Suggested Journeys tab
- Browse available campaigns (e.g., Onboarding, End of Lease, etc.)
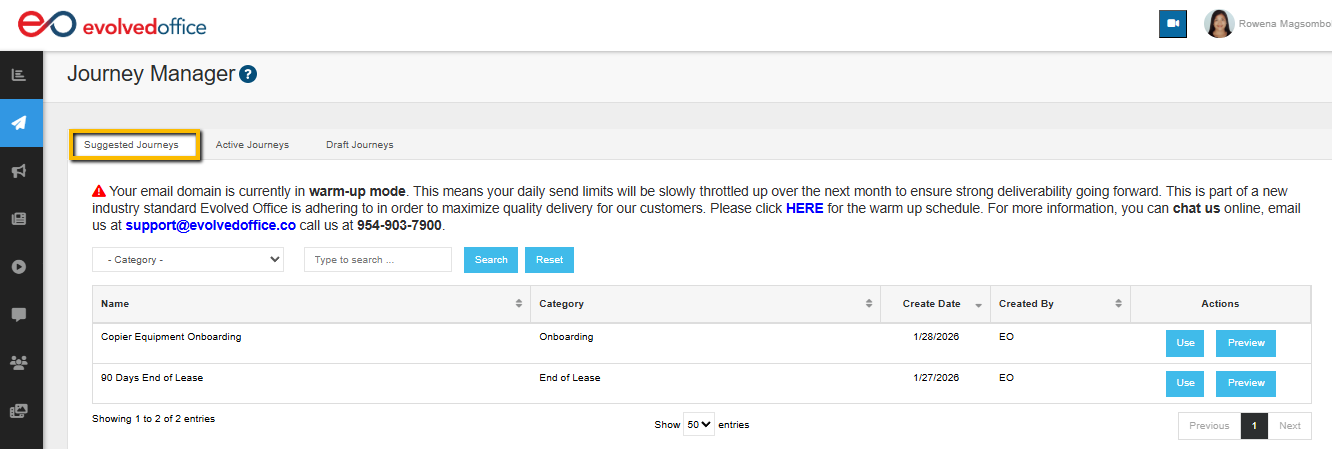
Each Journey is built with a specific goal and audience in mind.
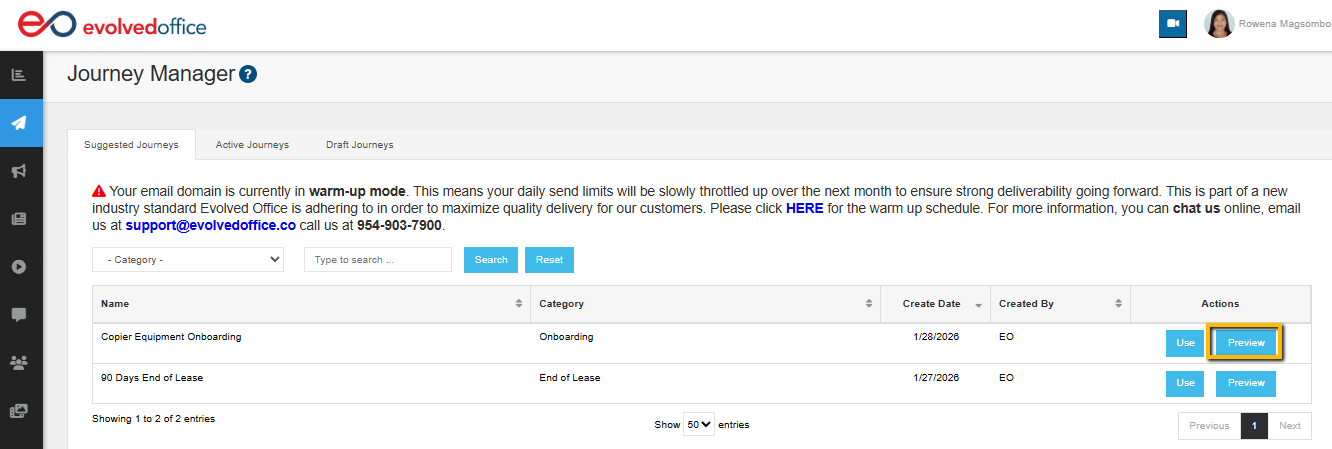
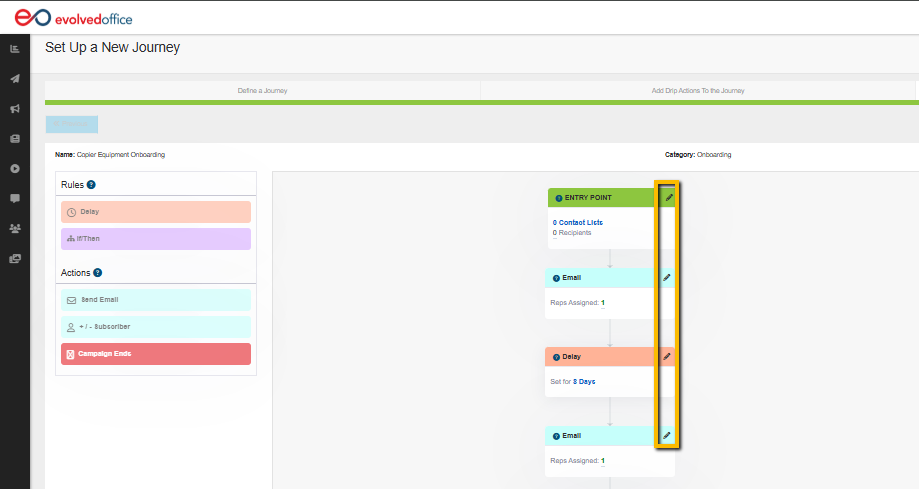
Step 1: Preview the Journey (Optional but Recommended)
Before using a Journey, click Preview to review:
- Email messaging
- Timing between emails
- Campaign flow
- Automation structure
Preview mode is read-only, so no changes can be made.
To explore individual steps in more detail, click the pencil icon on any Email or Delay block. This opens the step view so you can review messaging and timing without editing.
Previewing helps you confidently decide whether the campaign fits your needs.
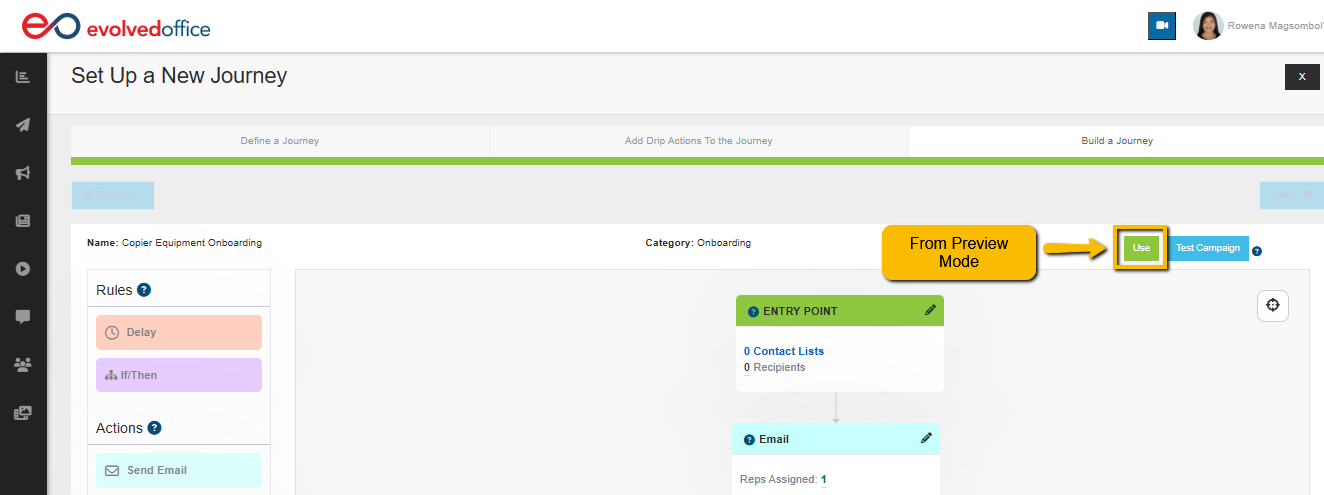
Step 2: Click “Use”
When you're ready:
Click Use
You’ll be taken to the setup screen
Nothing is activated at this stage.
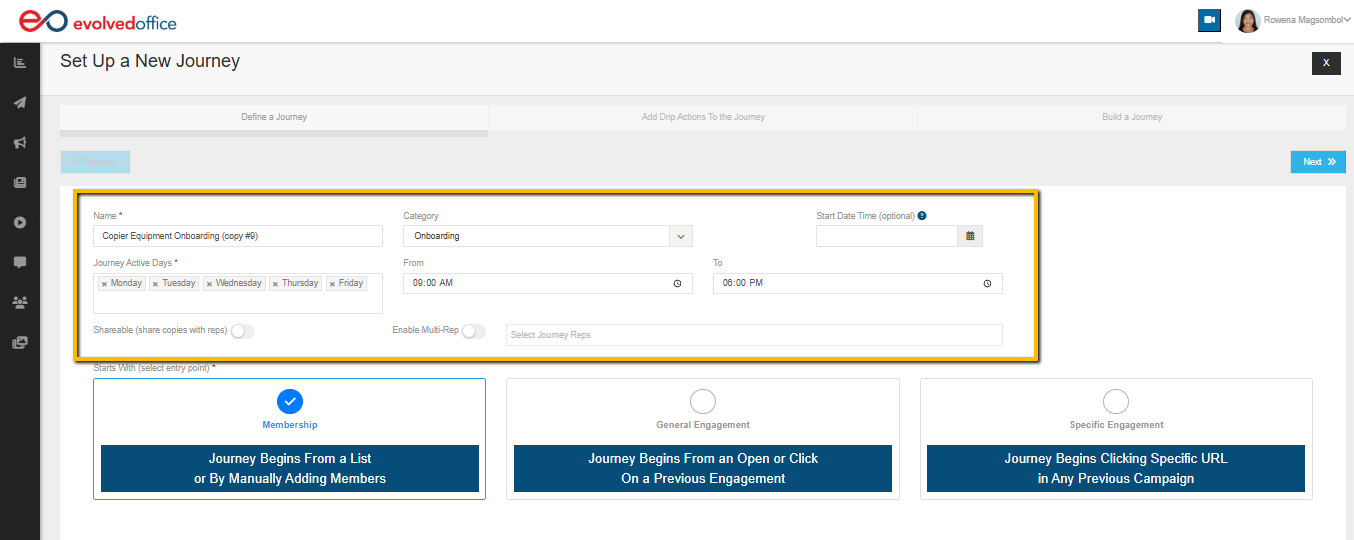
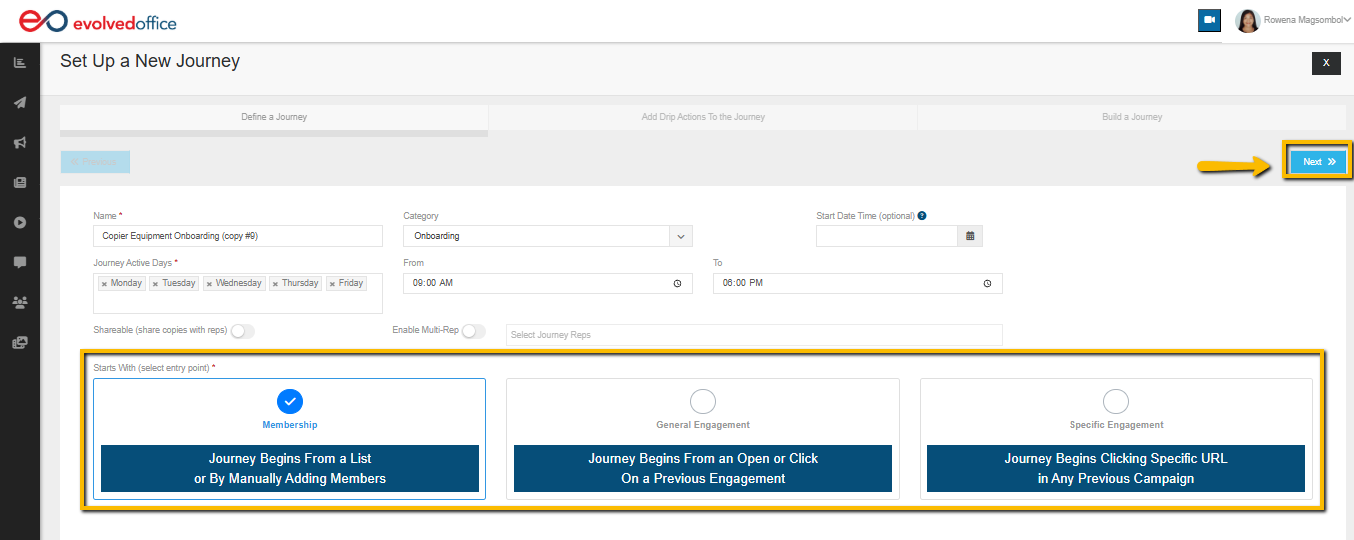
Step 3: Define Journey Settings
Before saving, you can customize:
- Journey Name
- Category
- Start Date/Time (optional)
- Active days and sending window
- Share copies with reps (optional)
- Enable Multi-Rep Journey (optional)
For a deeper explanation of Multi-Rep Journeys and assignment options, see:
👉 Advanced Features: Multi-Rep Journey with Multi-Assign
You’ll also choose how contacts enter the Journey.
Entry Point Options
Membership (Recommended)
The Journey begins when a contact is added to a selected list.
General Engagement
The Journey begins when a contact opens or clicks a previous campaign.
Specific Engagement
The Journey begins when a contact clicks a specific URL.
For most campaigns, Membership is the simplest and most reliable option.
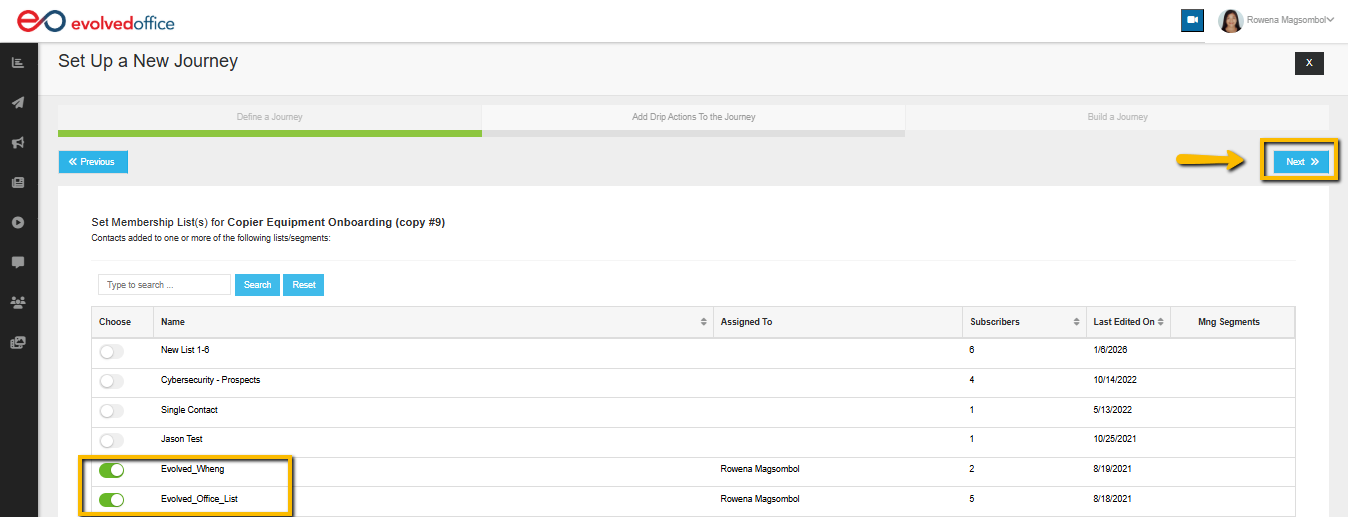
Step 4: Select Your Membership List(s)
If using Membership:
- Select one or more lists
- Contacts added to those lists will automatically enter the Journey
Choosing the correct list determines who receives the campaign.
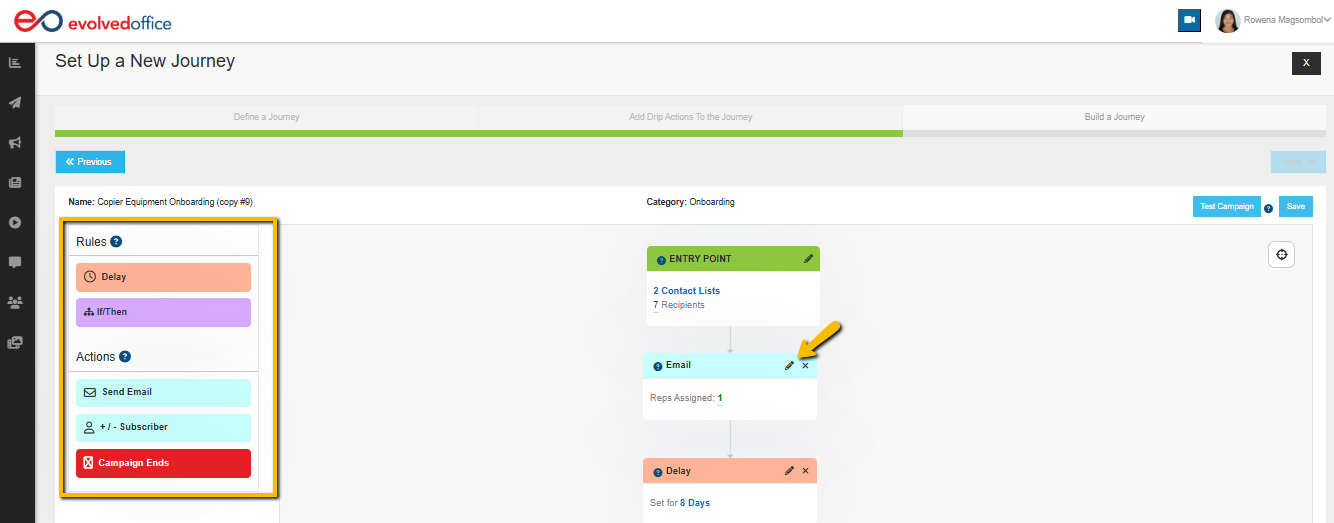
Step 5: Customize the Campaign Flow (Optional)
Inside the builder, you can:
- Click any Email block to edit messaging
Select the Email Block within your Journey to update the subject line, preview text, and body content. For detailed instructions on editing an email (eshot), refer to this guide:
How to Change or Edit an Email (Eshot) in the Journey Manager
- Click any Delay block to adjust timing
- Add additional Rules (Delay, If/Then)
- Add additional Actions (Send Email, Add/Remove Subscriber)
If you'd like a detailed explanation of how Rules and Actions work together, see:
👉 Understanding Rules and Actions for Creating a Journey or Drip Campaign
Editing is optional. Suggested Journeys are structured and ready to launch.
Step 6: Test the Campaign
Before activating, we recommend sending a test email.
Click Test Campaign to:
- Review formatting and layout
- Confirm links and buttons work correctly
- Confirm personalization fields populate correctly
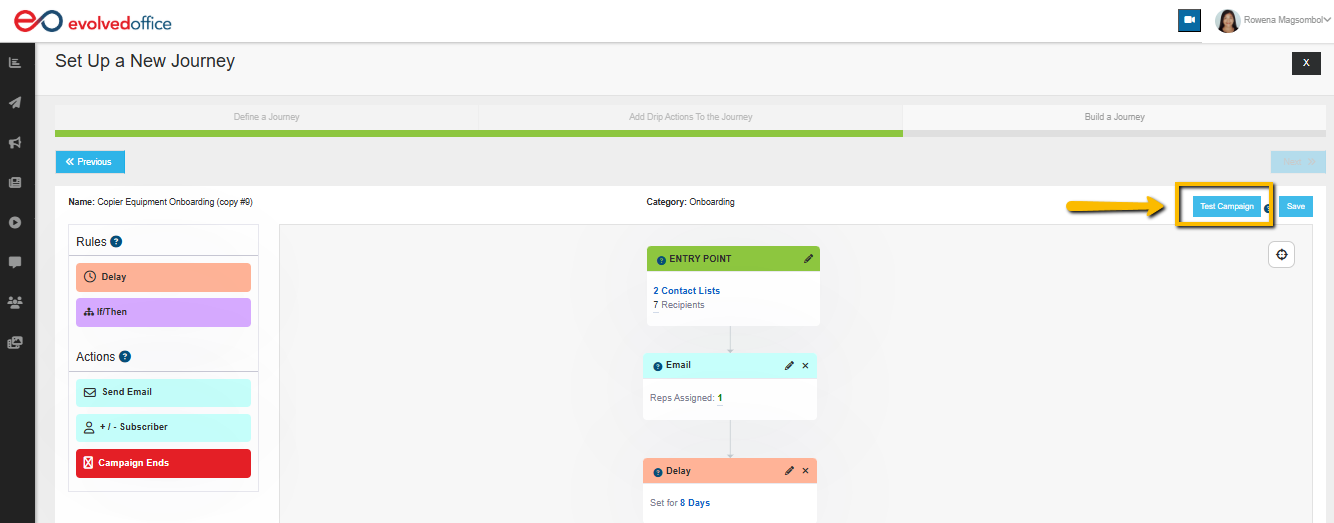
Testing does not activate the Journey.
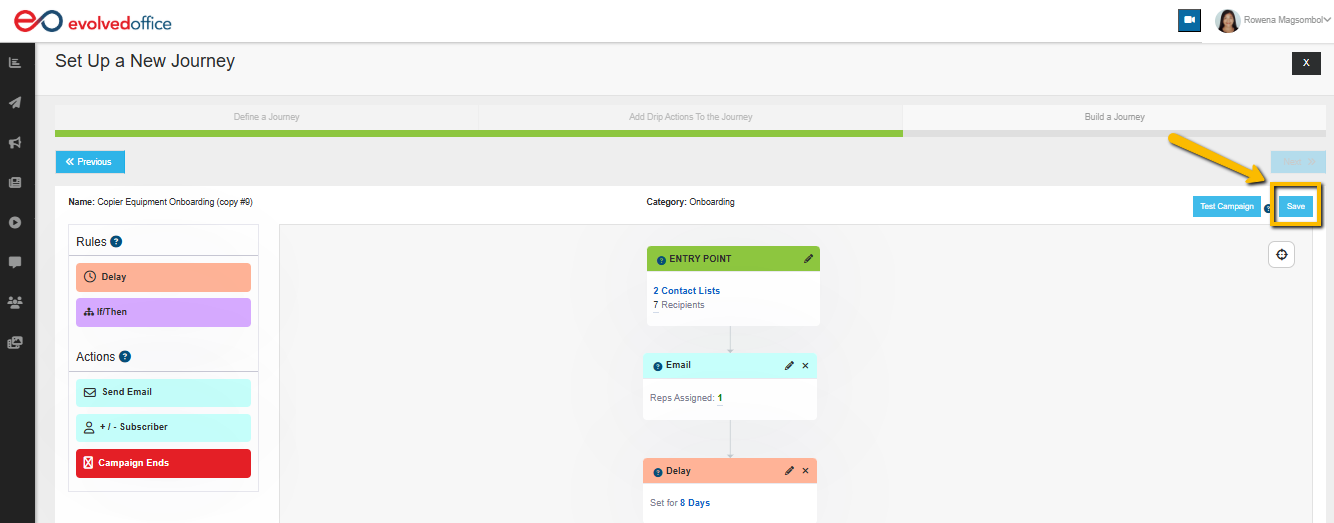
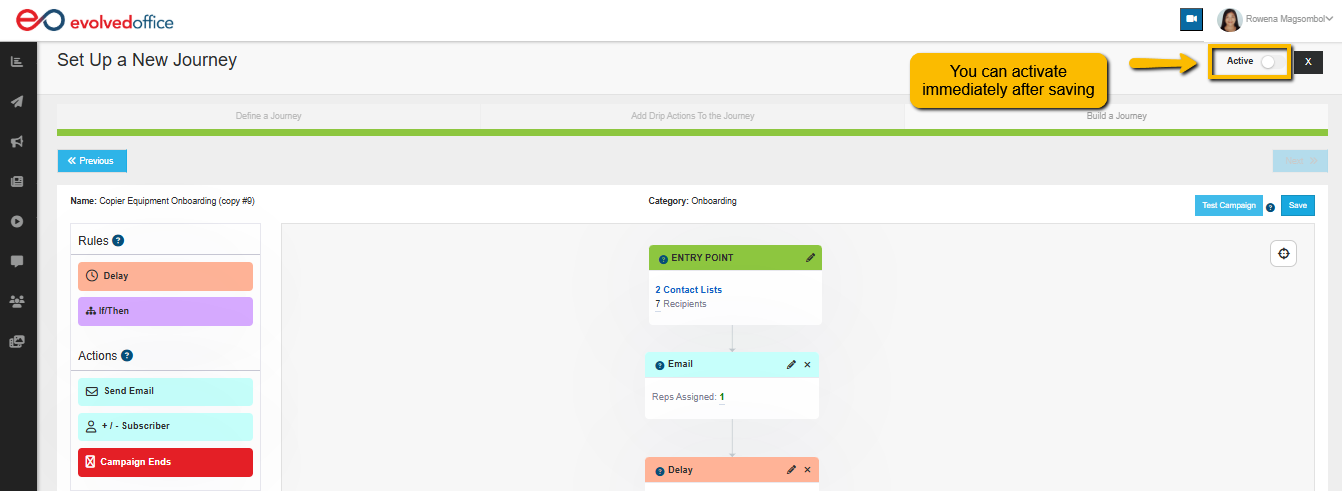
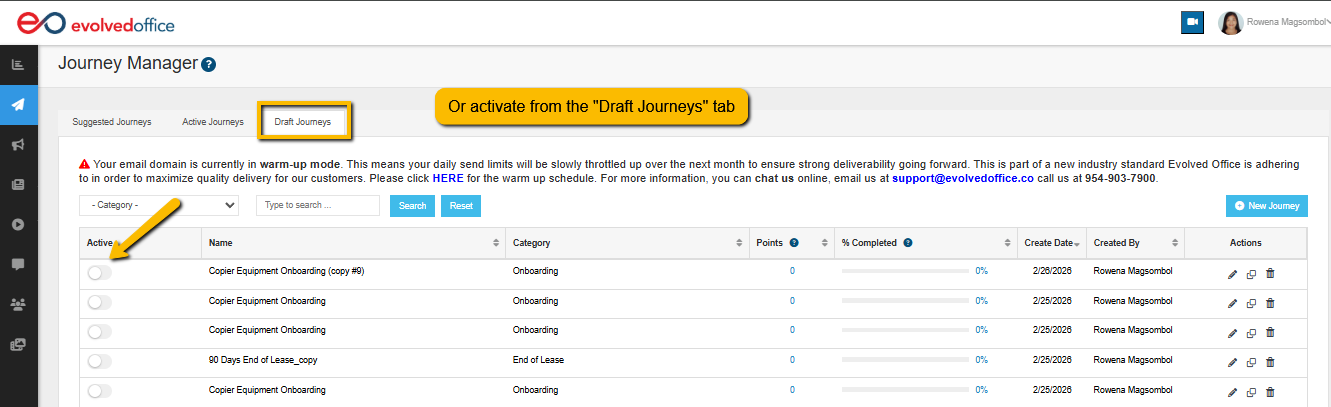
Step 7: Save Your Journey
Click Save to move the campaign into Draft Journeys.
Saving does not activate the campaign.
Step 8: Activate When Ready
Once finalized:
- Review your settings
- Confirm your list selection
- Activate the Journey
The campaign will begin running based on your selected entry point and timing.
Why Use Suggested Journeys?
- Launch faster
- Eliminate guesswork
- Professionally written messaging
- Designed specifically for MSPs and office technology dealers
- Maintain consistent marketing cadence
- Reduce setup friction