How to Update an Existing List
Access the List Section
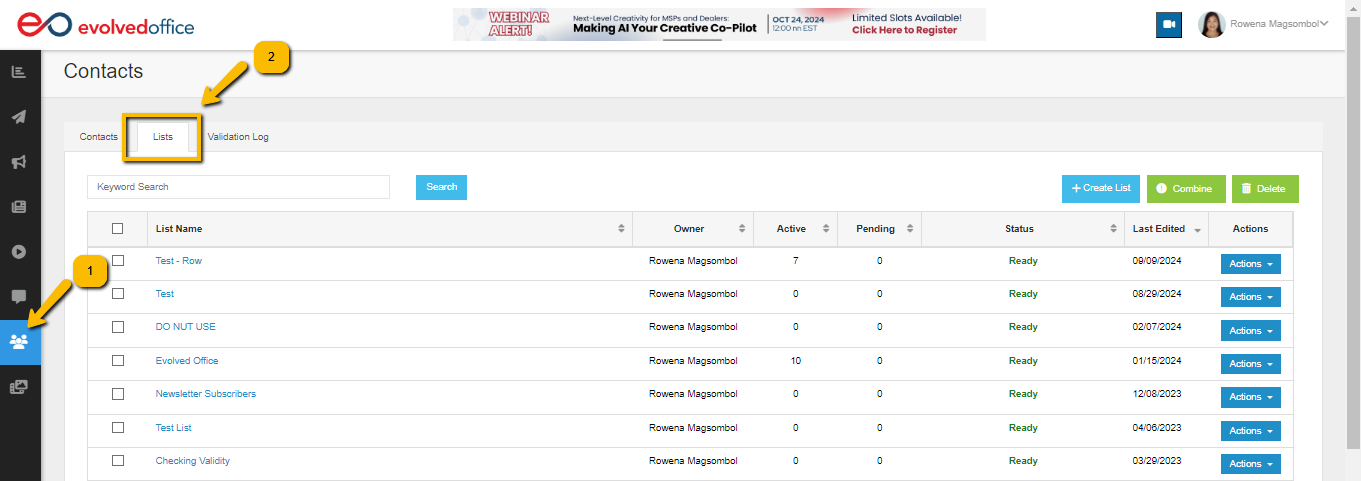
- Log into your account and navigate to the Contacts section from the main menu.
- Click on the Lists tab to view all your existing lists.
Select the List to Update
- Scroll through the available lists or use the search bar to find the specific list you want to update.
- Click on the name of the list to open it for editing.
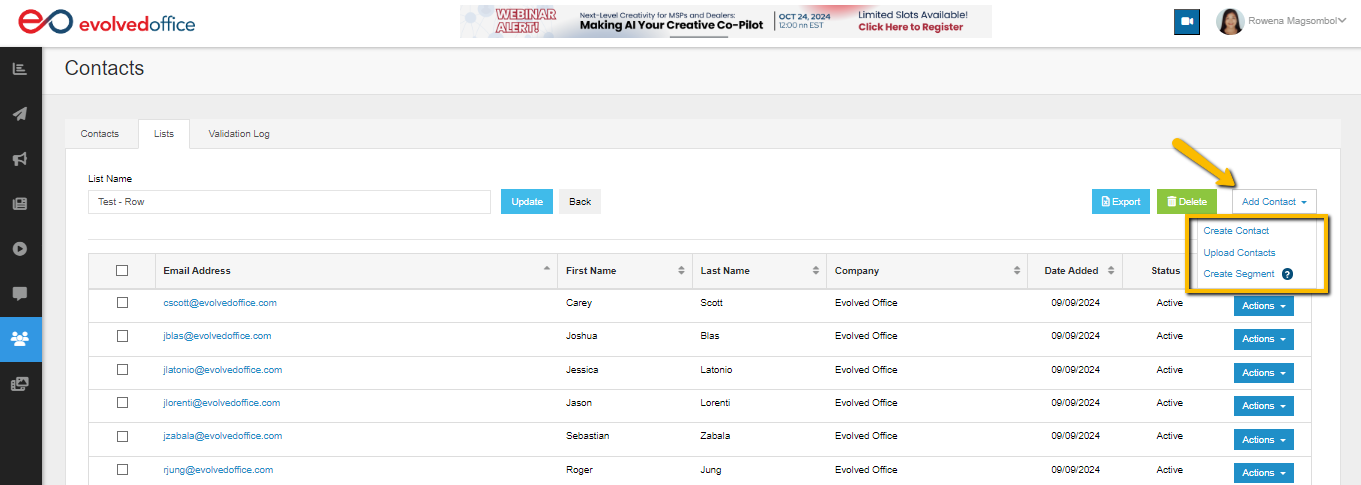
- Click the blue ‘Add Contact’ button on the upper-right corner of the Contacts page.
- From the dropdown, you have three (3) options:
- Create Contact: Add individual contacts manually by entering their details.
- Upload Contacts: Upload multiple contacts at once from a file.
- Create Segment: Option to group contacts based on specific criteria.
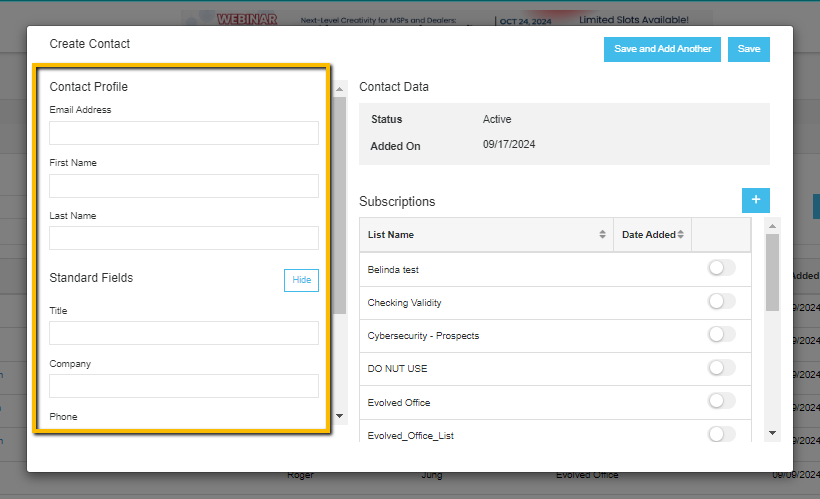
Option 1: Create Contact
- Fill in the contact’s information under Contact Profile.
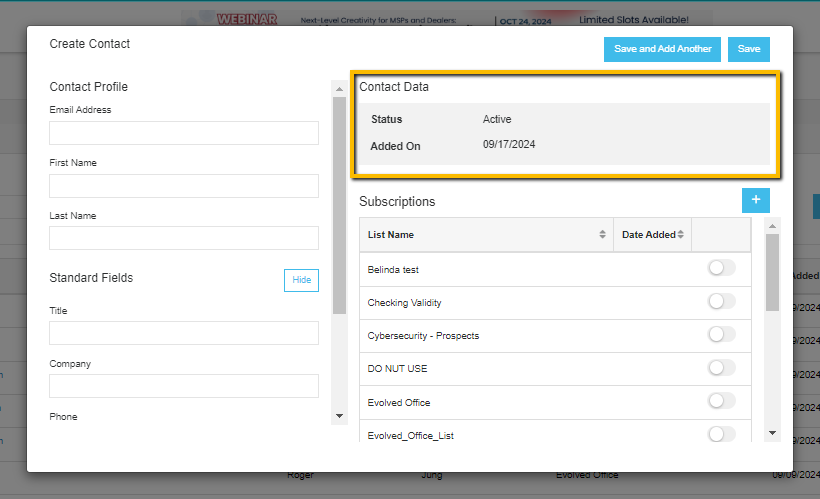
- In the Contact Data section, check the contact's status (Active) and the date they were added.
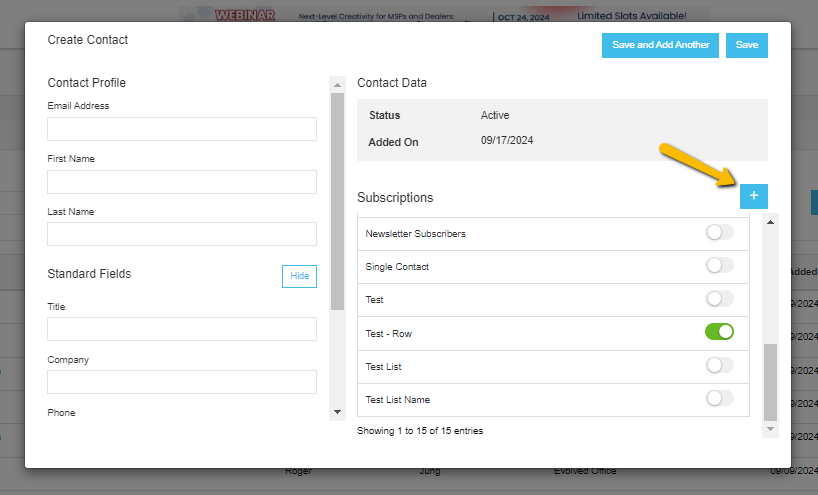
- Manage Subscriptions:
To subscribe the contact to a specific list, toggle the switch next to the List Name.
To add a new subscription list, click the + button, select the list from the dropdown, and toggle it on.
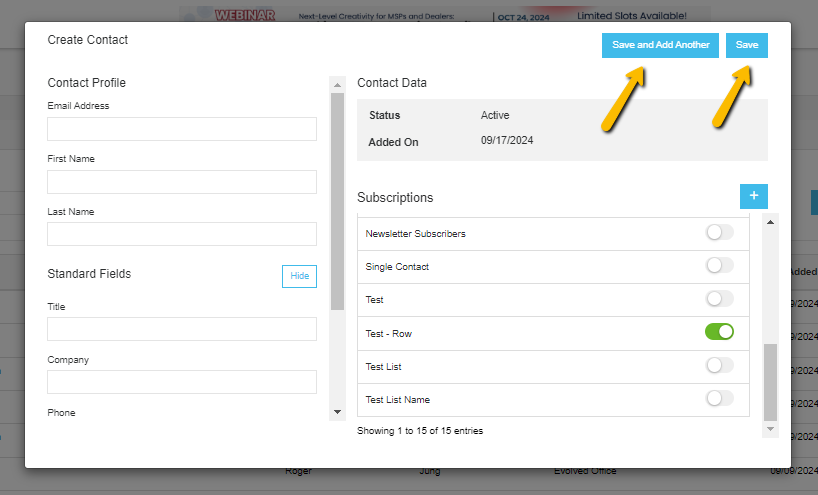
- Once all information is entered, choose Save to finalize the contact, or click Save and Add Another if you need to create multiple contacts.

Option 2: Upload Contact
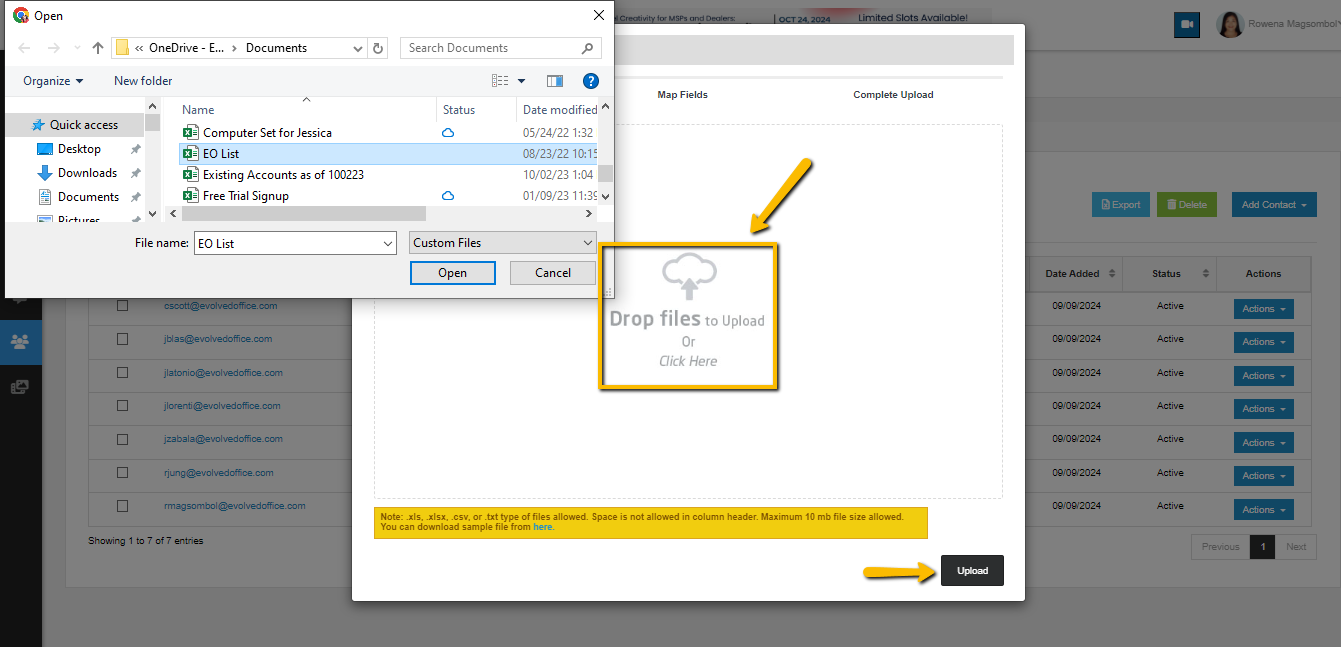
- Prepare Your File:
Export contacts from your CRM or ERP system into a spreadsheet. Ensure the first row contains column headers and save them as a .xls, .xlsx, .csv, or .txt file type.
- Upload Contacts:
Choose "Upload Contacts" and select your CSV file. Then click "Upload."
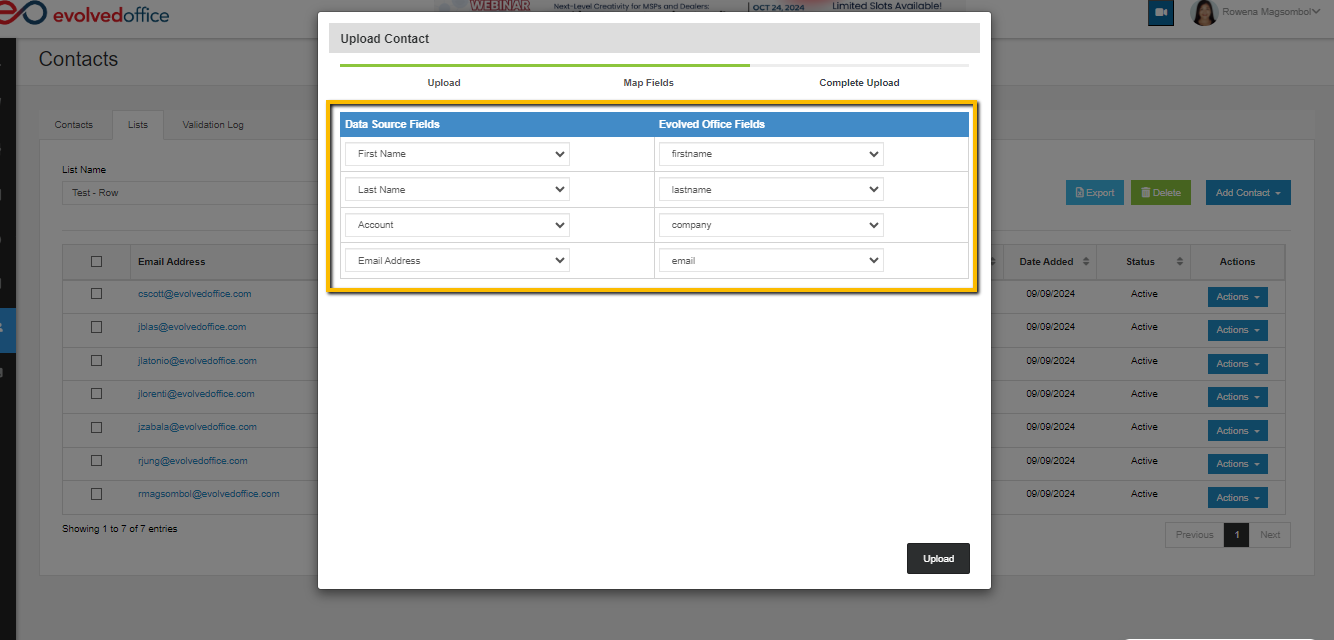
- Map Fields:
FieldsMatch your file’s column headers with Evolved Office’s headers through a process called mapping.
- Validation Process:
After mapping, click upload. The contacts will go through a validation process. You will receive an email once validation is complete.
- Broadcast-Ready:
Validated contacts will show a "Ready" status under the "List" tab, meaning they’re ready for broadcasting.
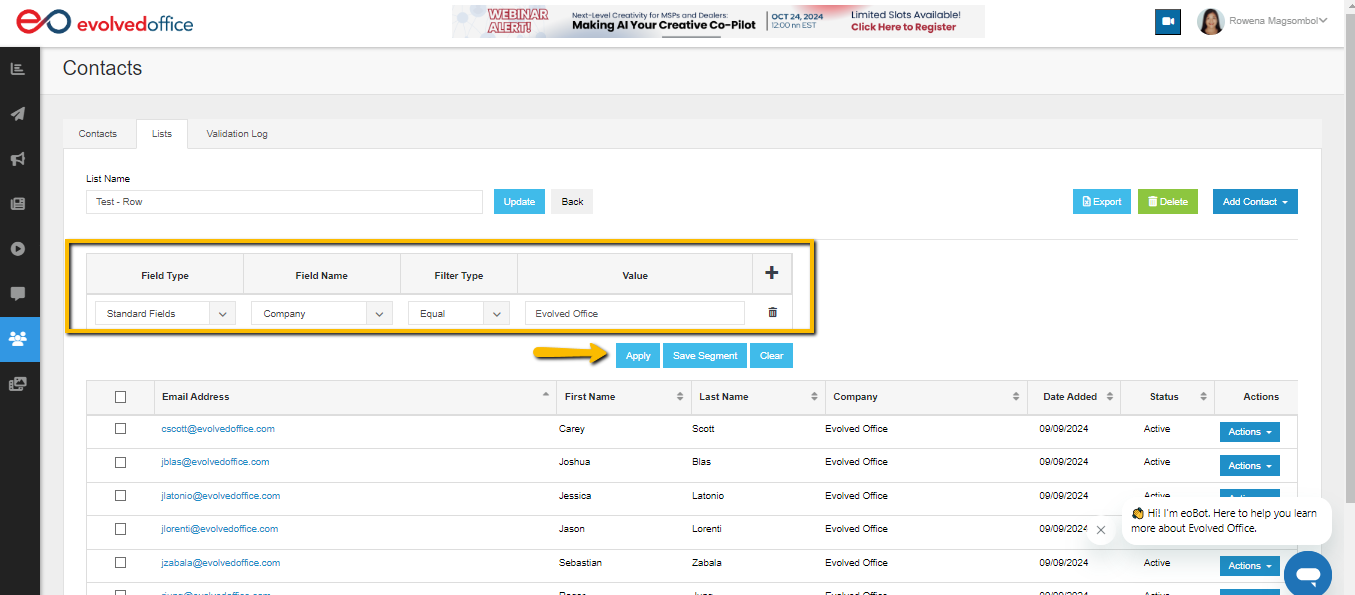
Option 3: Create Segment
To segment your contacts, you can apply filters based on criteria.
- Select the appropriate Field Type, Field Name, Filter Type and Value.
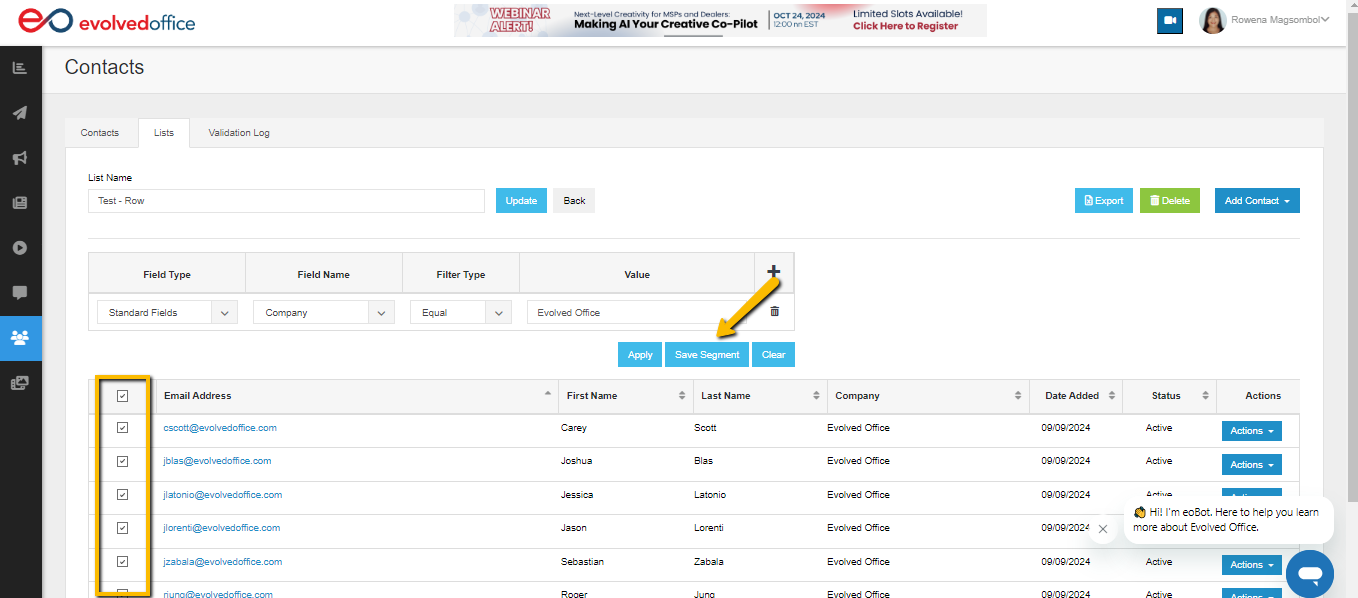
- Click Apply to view the filtered contacts.
- To save this filter as a segment, click Save Segment, enter a name for the segment, and save it for future use.