Lead Scoring Dashboard: How to Track and Prioritize Your Leads
The Lead Scoring Dashboard is a powerful tool designed to help you monitor and prioritize your leads based on their engagement with your content. By using this feature, you can easily identify high-value leads and tailor your outreach efforts for maximum impact. This guide explains how the Lead Scoring Dashboard works and how you can use it to enhance your lead management strategy.
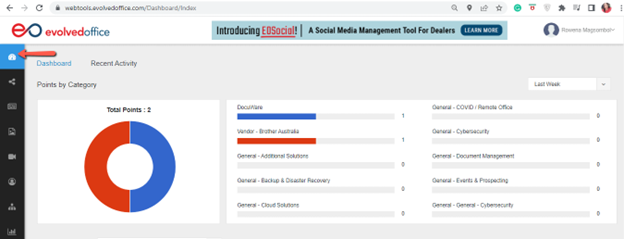
By going to the Dashboard on the menu bar, you can access your lead scoring.
Inside the Dashboard
Tagging your emails per category is an easy way to track down engagement.
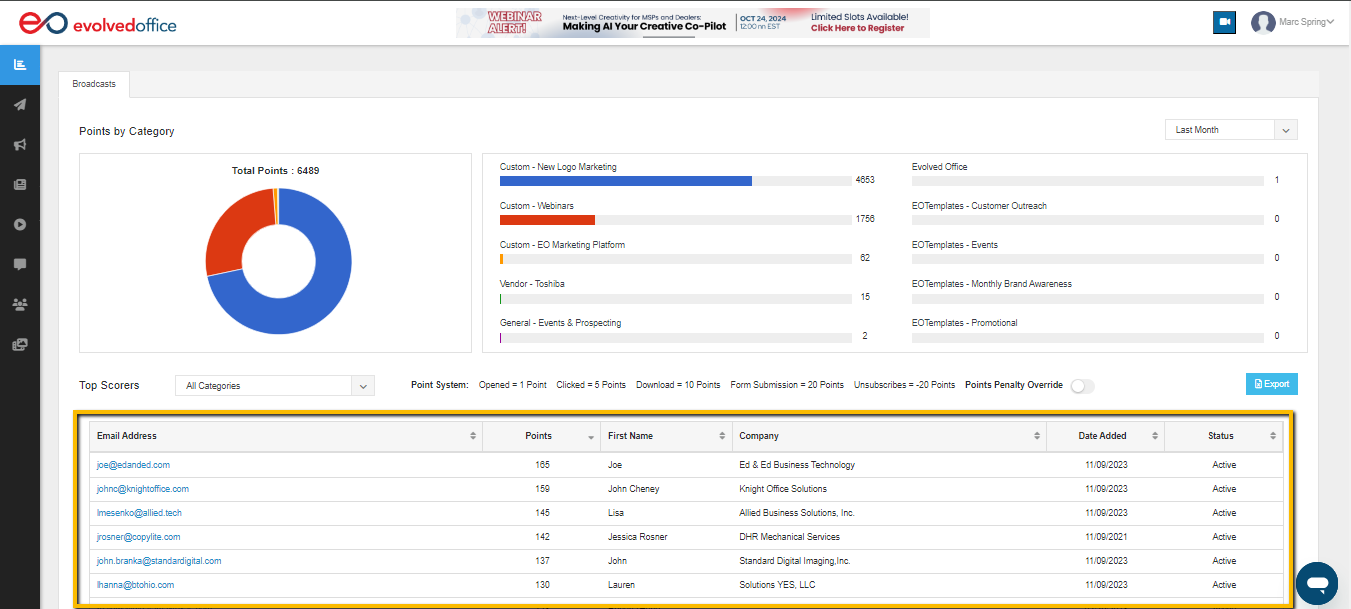
- The tags/categories that engage readers are shown here. All emails from Evolved Office are categorized, helping you track which topics drive the most engagement. Use existing categories or create your own to tailor your strategy and optimize future campaigns based on audience interests.
- You can see how your campaigns are going in a specific period, by choosing from the drop-down (see the below image in the red box).
It will provide your engagement information for different periods (Last Week, Last Month, Last 3 Months, Last 6 Months. Last 12 Months, and All Time).
- The Pie Chart is a representation of the different categories, with the respective colors identifying them.
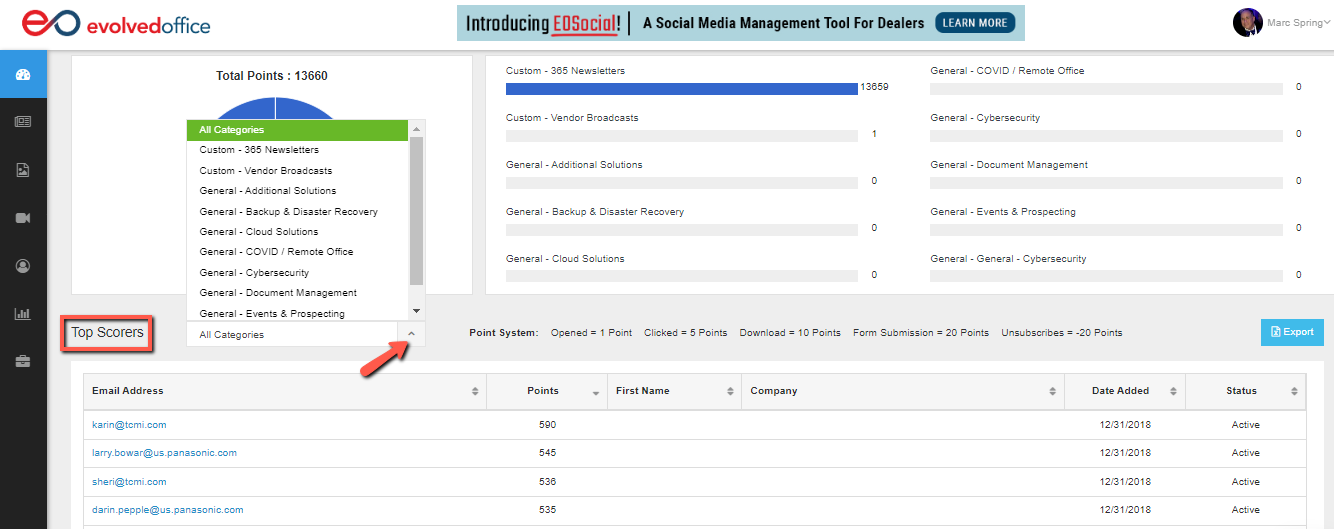
- To focus on specific interests, filter the top scorers by category using the drop-down menu beside 'Top Scorers.' This helps you quickly identify highly engaged leads within each area, giving you valuable insights into the topics that resonate most with your audience.
Every type of engagement with your content is assigned points. The more points a contact accrues, the more interested they are.
These actions allow you to measure which leads actively engage with your brand and which ones may need different approaches.
Point System: Opened = 1 point, Clicked = 5 Points, Download = 10 points, Form Submission = 20 points, Unsubscribes = -20 points
Accessing the Individual Contact Dashboard
To view detailed information about a specific contact, follow these steps:
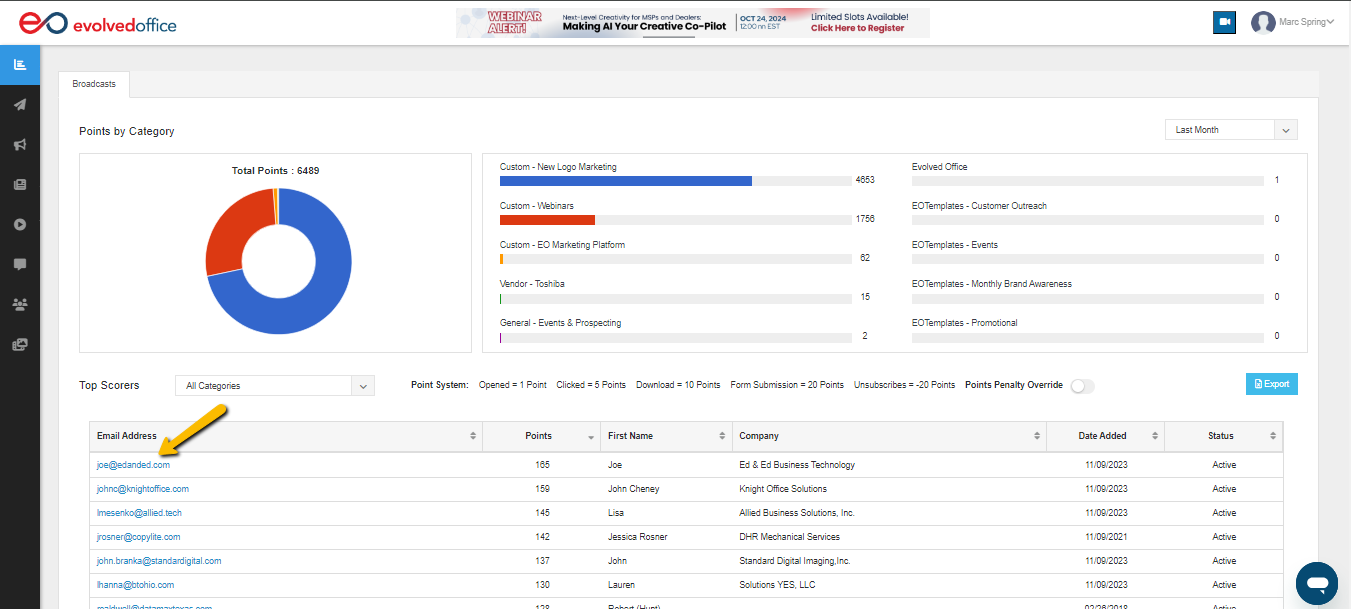
- Scroll Down to the Contact List: From the main dashboard, scroll down to the very bottom of the page to find the "Contacts" section. There, you will see a list of contacts, along with their lead score, name, company, and status displayed.
- Click on the Contact's Email Address: In the contact list, locate the contact whose details you wish to view, then click on their email address. This will take you to their individual contact dashboard, where you can see the details of their activity and engagement.
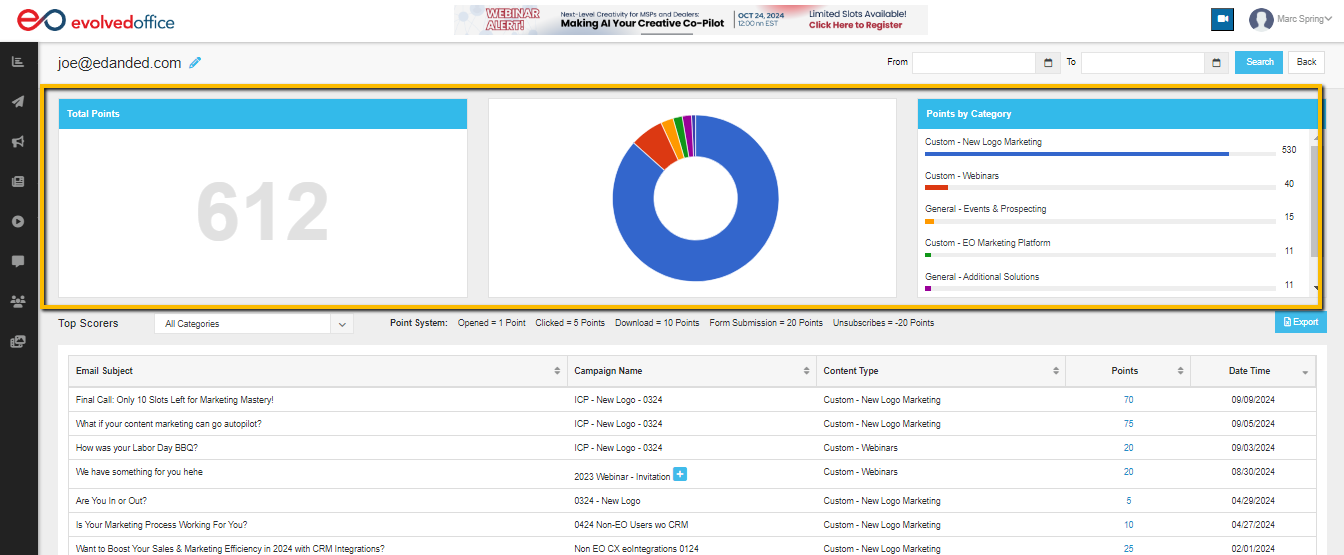
- View the Contact's Email Activity and Points Breakdown: Inside the contact’s dashboard, you will see a summary of the contact’s total points at the top, a pie chart, and a breakdown of points by category. This breakdown helps you understand which categories contributed to the contact’s overall engagement score.
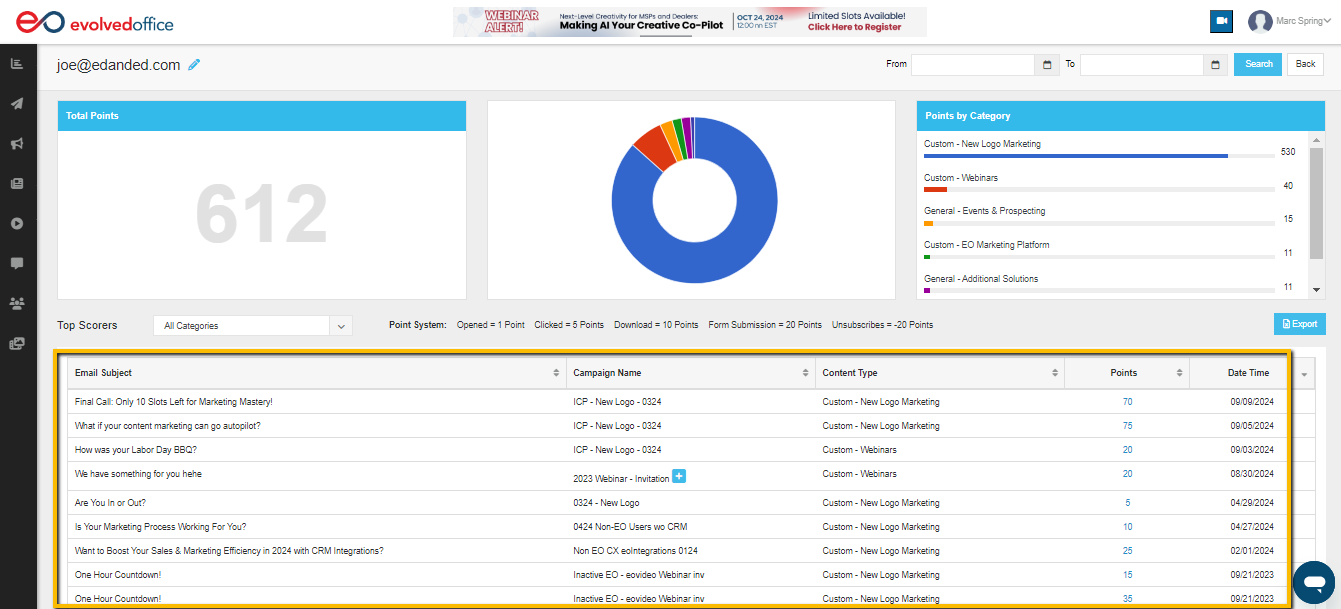
Additionally, below this, you'll find a list of specific email interactions, including the subject, campaign name, content type, points earned, and the date/time of interaction. This section provides valuable insights into the contact’s engagement history, helping you assess the impact of your marketing efforts.
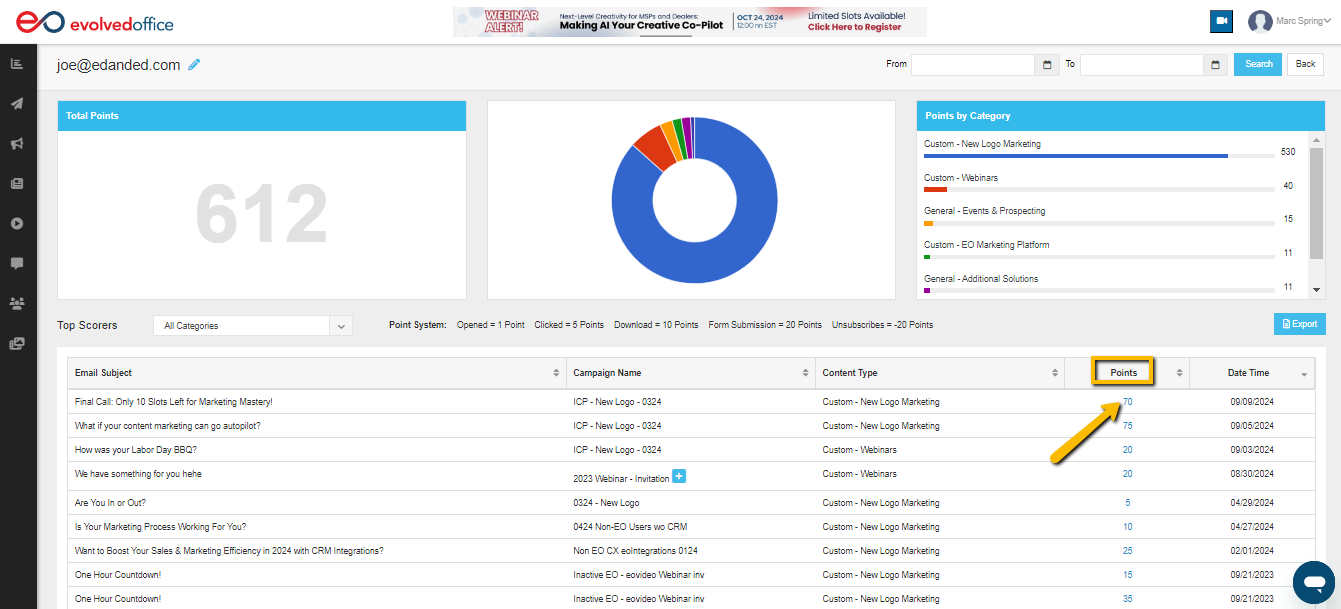
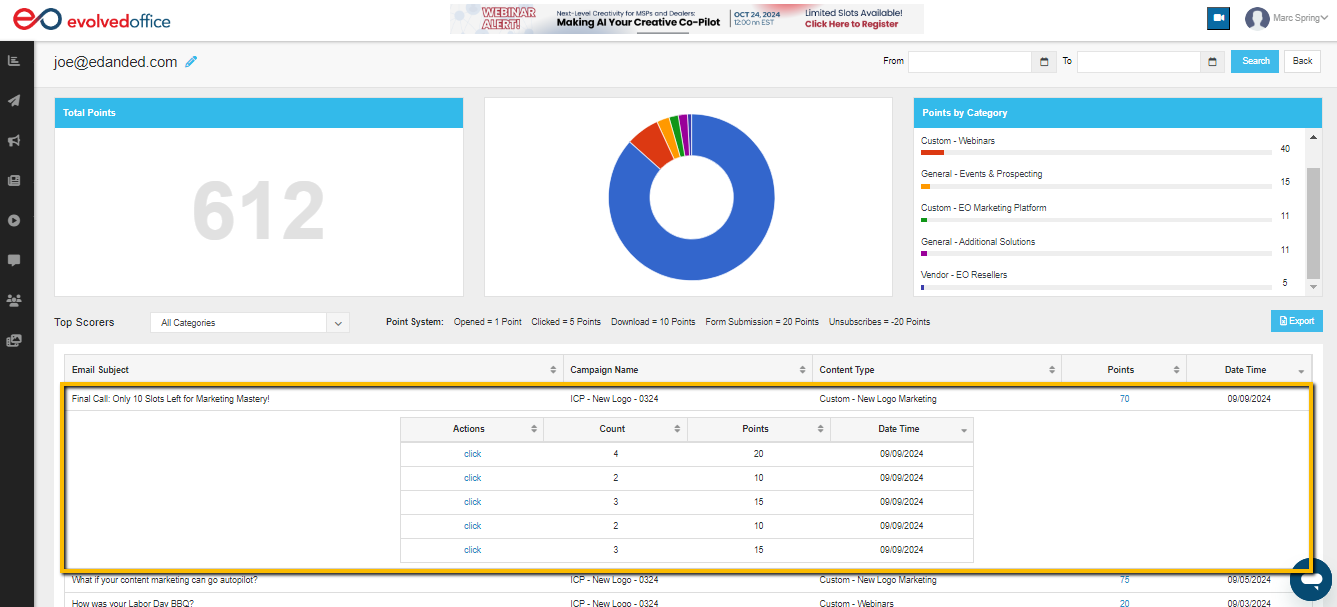
- Click on the Points for Detailed Information: Clicking on the points for any specific email will expand the section, revealing more detailed information about the contact’s interactions. For instance, it will display actions such as "open or click," the count of how many times the email was opened/clicked, the points accumulated for each action, and the date and time of each interaction.

