Getting Started with eoSocial
eoSocial is your all-in-one solution for managing social media profiles, creating and posting engaging content, and analyzing performance. Below, we explore the main features of eoSocial and how they can help streamline your social media strategy.
Follow this guide to set up and manage your social media marketing efficiently.
1. Signing In
Existing Webtools Account:
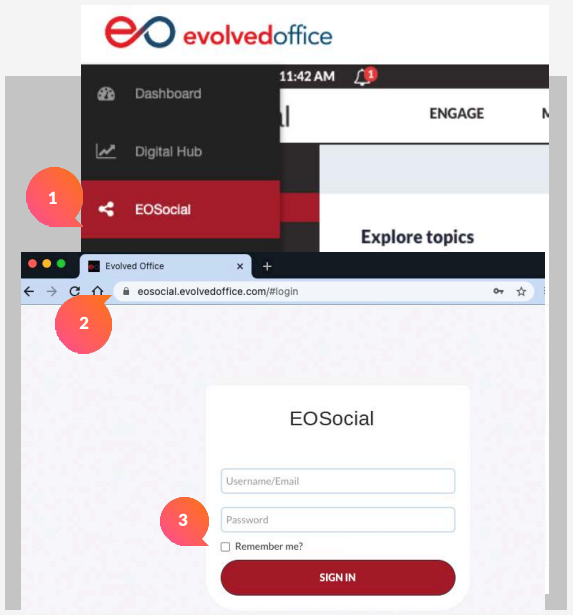
If you already have a Webtools account, access the EOSocial tab from the left-hand navigation panel (1).
Logging in to EOSocial for Delegated Management:
If you want someone else to manage your EOSocial account without granting access to the entire Webtools account, you can share your login credentials for EOSocial.
Visit EOSocial Login (2).
Enter the credentials from your welcome email.
Select "Remember Me" for automatic login (3).
2. The Dashboard Overview
The dashboard features key sections like Profiles, Composing Messages, Engagement, and Content Management. Each section includes tools to manage your social media presence.
3. Adding Social Profiles
Supported Platforms:
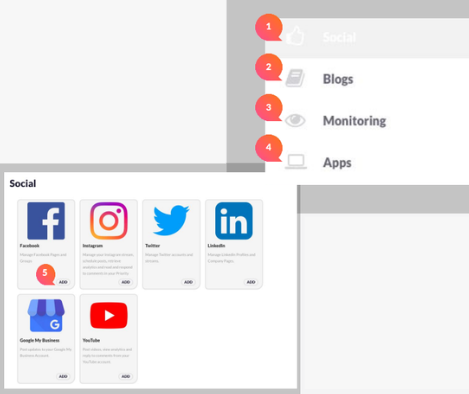
Facebook, Twitter, Instagram, LinkedIn (1)
Blogs, Monitoring Tools, and Apps (2, 3, 4)
Click the Add button (5).
Select a social platform.
Enter the login details to authenticate.
Grant permissions if prompted.
4. Composing Messages
Compose Button:
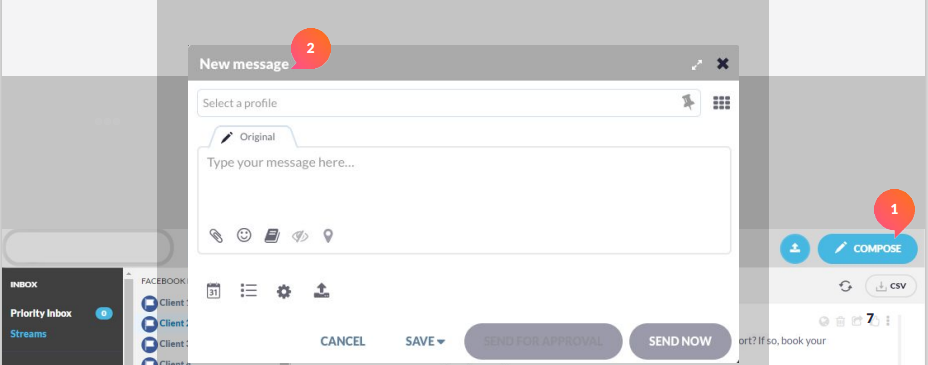
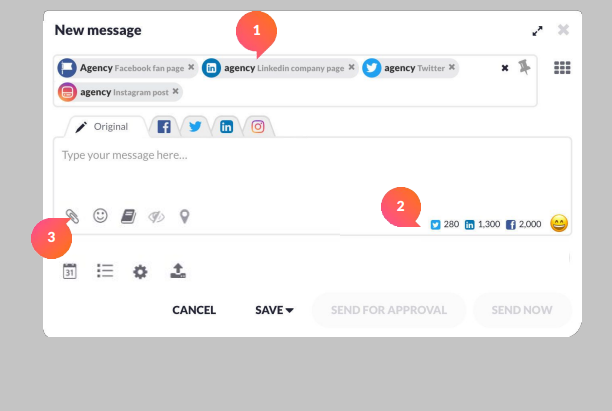
Found at the top-right corner of the dashboard (1).
Use it to create and schedule posts.
a. Basic Messages
Select the profiles you want to post to (1).
Compose your message (2).
Click Attach to add images or videos (3).
b. Adding Images & Videos
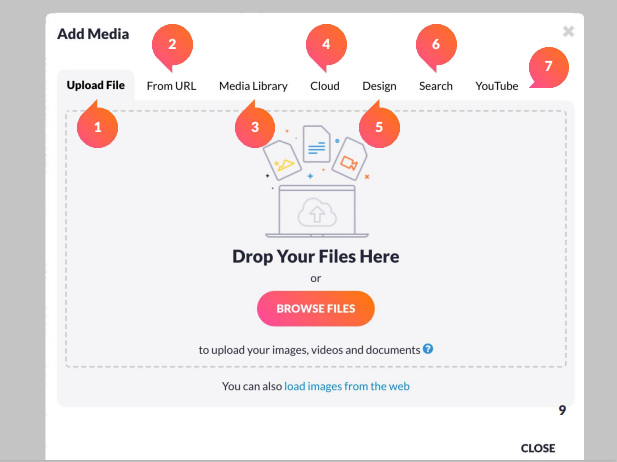
Upload files (1), source images from URLs (2).
Use the Media Library (3) or design in Canva (5).
Search for royalty-free images (6) or YouTube videos (7).
c. Scheduling Posts
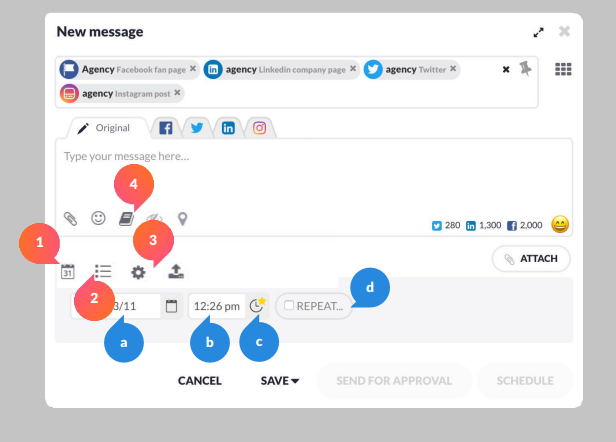
Schedule posts by date (a), time (b), or use the platform’s optimal posting time (c).
Use the Repeat option (d) to schedule recurring posts easily.
Add messages to the Queue (2) to avoid spamming and to manage multiple posts efficiently.
Use URL tracking with custom parameters (3) to enhance analytics.
Access RSS Feeds and additional content directly from the compose box (4).
d. RSS, Content, and Trends
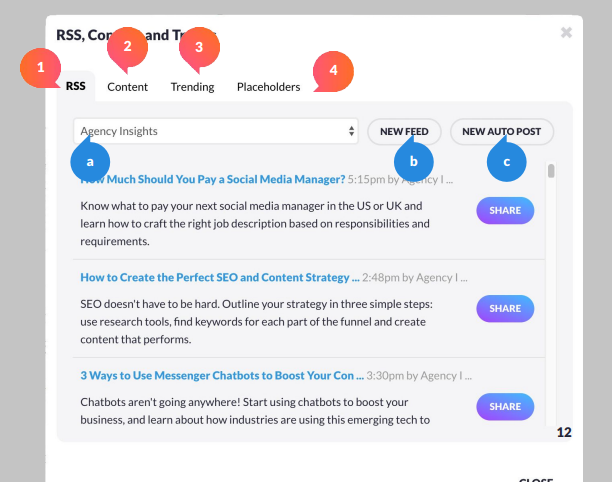
Share content from RSS feeds (1).
Select a saved RSS feed (a) or add a new feed to your account (b).
Auto-post from saved feeds (c).
Access your Content Library by clicking on Content (2).
Check trending hashtags and relevant topics by selecting the appropriate city or region (3).
Use Placeholders (4) to personalize social media messages and email campaigns.
5. Managing Social Media Engagement
Activity Monitoring:
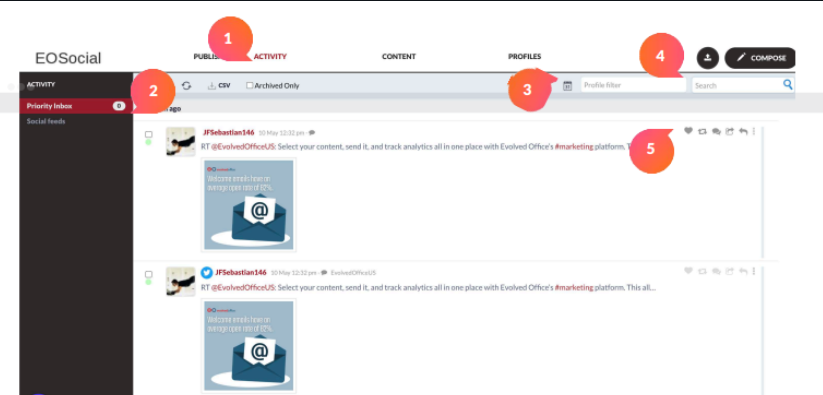
Use the Activity button from the top menu (1).
Manage messages from all platforms in the Priority Inbox (2).
Filter by channel (3) or use search (4) to locate messages.
a. Engagement Tools:
Like, Retweet, Repost, Reply, Translate, Assign Tasks (5).
b. Publish Section and Task Management:
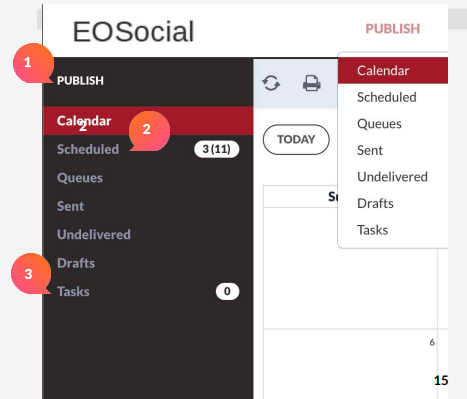
You will see this section on the left-hand side of your dashboard.
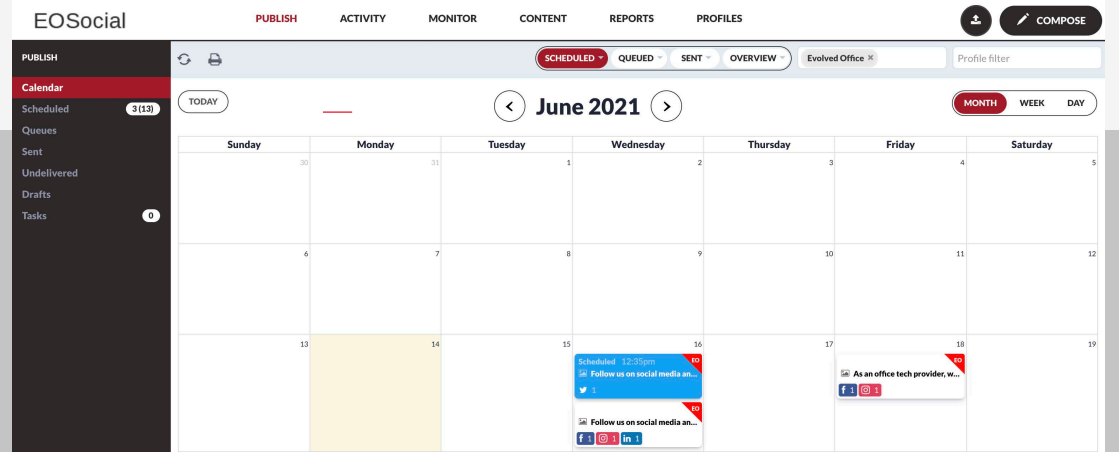
(1) You will arrive at the Publish section where you can see your scheduled posts.
The (2) Scheduled section holds all of your scheduled social media messages.
You can assign (3) Tasks to your team or other departments to boost efficiency. This area relates to messages that have been sent for approval and tasks that have been assigned:
- For me: Tasks assigned to you
- For others: Tasks assigned to your team members by you
- Completed: All completed tasks
Other Sections Definition:
Calendar: This interactive calendar displays your past and scheduled posts by day, week, or month. Each post can be dragged and dropped to rearrange your schedule. Messages can be filtered by Scheduled, Queued, Sent, Team Member, or Social Channel.
Scheduled: Dated list of your scheduled posts
Queues: Dated list of your queued posts
Sent: Posts which have already been published
Undelivered: This is a list of posts that have bounced. Posts may not send if the connection was lost between the platform and the social media site, or if another issue prevented the social site from processing your post.
Drafts: All of your drafted posts.
6. Content Management
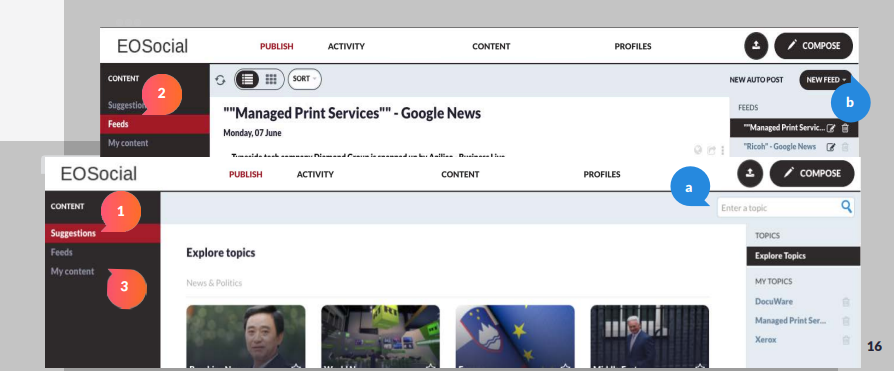
The Content section of the dashboard allows you to manage your content suggestions, RSS feeds, and Content Libraries.
(1) Content Suggestions: A wide range of topics will be provided for you to explore. You can also (a) search for content on a specific topic.
(2) Feeds Section: Add RSS feeds (b) to receive the latest news and blogs directly in your dashboard. Set up (c) Auto Post to automatically share content at a specified frequency. Posts can be published, queued, or saved as drafts.
(3) My Content: Add messages that you have written or already published via the Compose box. Save articles to read or work on later.
7. Preferences and Settings
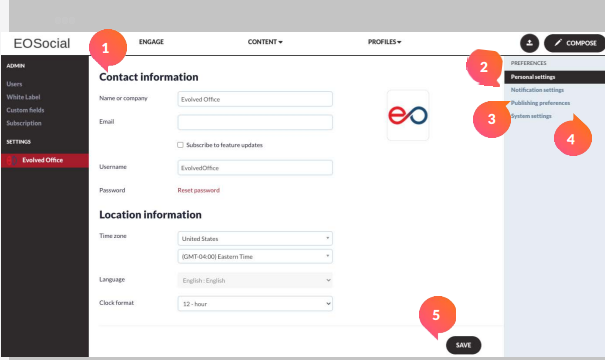
You can view a high-level overview of your account information in Preferences. To access this area:
Click on the Logged-in User’s Dropdown in the top-right corner of the dashboard.
Select Preferences, located just under Settings.
Here, you can:
View and edit your Contact and Location Information (1).
Choose whether to enable desktop Notifications (2).
Set your Publishing Preferences, such as link-shortening options (3).
Reset your cache and change your security question in System Settings (4).
Save Changes (5): After making adjustments, click Save in each section to ensure the changes are applied.

