
How to Create Forms
Welcome to the world of hassle-free form creation with EO Forms. Gone are the days of complicated form building and the need for coding expertise. We've revolutionized the process to be smooth and user-friendly, allowing you to construct your form effortlessly, right from scratch.
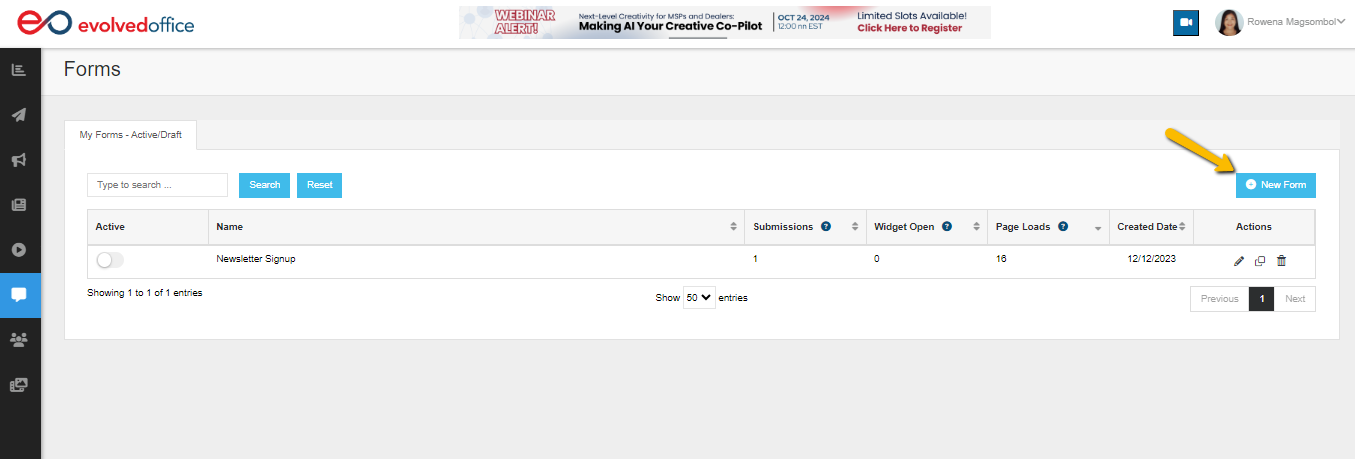
Step 1: Navigating to EO Forms
Imagine embedding a form on your website that integrates flawlessly with your existing design, requiring no additional adjustments. That's the ease EO Forms brings to you. To get started:
- Navigate to the Forms section on the left-hand menu.
- Click the prominent New Form button in the upper left corner to begin.

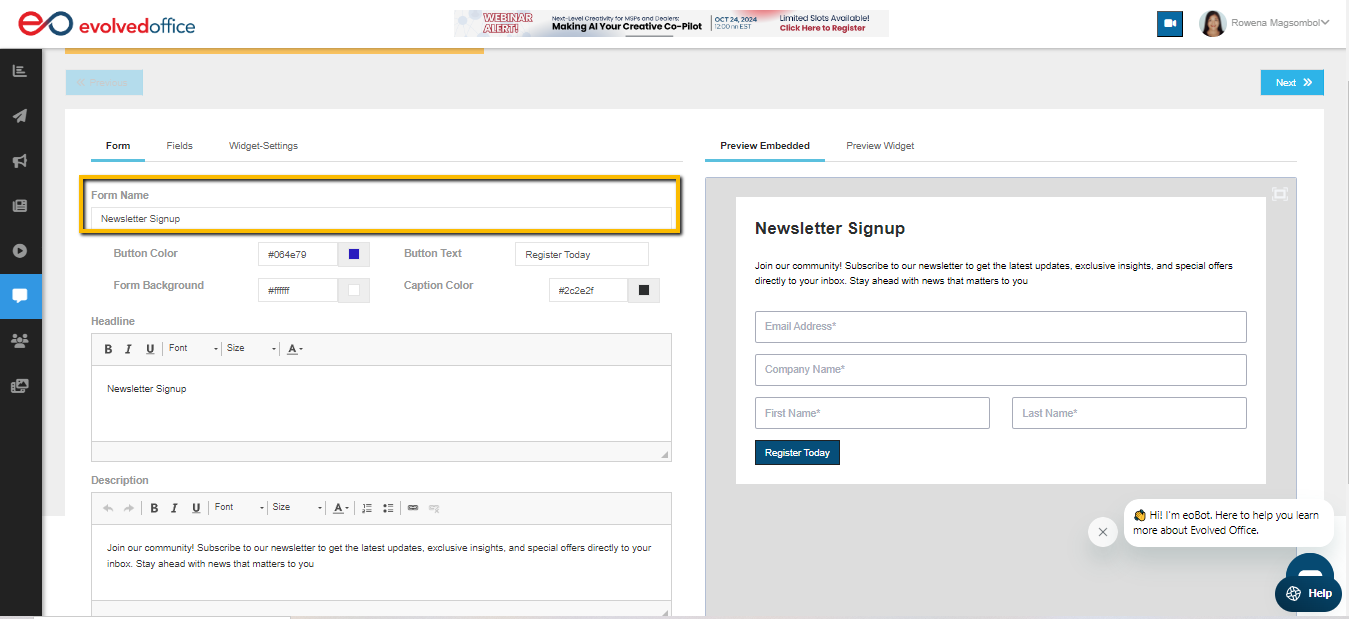
Step 2: Naming Your Form
Start by giving your form a name. For example, if it's for a newsletter subscription, you might name it Newsletter Signup.
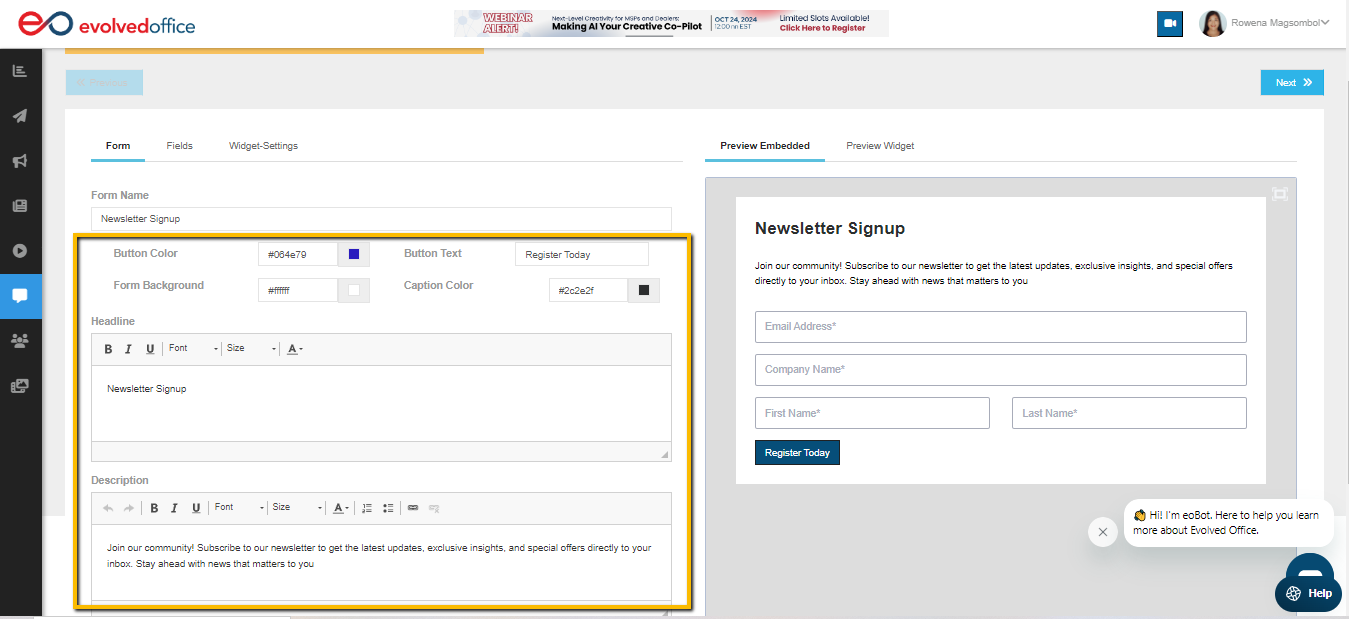
Step 3: Customizing Your Form
Customization is key with EO Forms. You can:
- Set your form's background color.
- Change the caption's color by selecting from a color palette or entering a hex code.
- Modify the button text to reflect your message.
Personalize the form by editing the headline and including a description that matches your brand's tone.
Step 4: Adding Fields
To add additional fields to your form, follow these steps:
- Navigate to the Fields Section.
- In the Identifier dropdown, select the field type (e.g., Email Address, First Name, Company Name, etc.).
- Enter a Label for the field (e.g., Email, Name, Company, etc.).
- Choose whether the field is Optional or Required.
- Select the Column option for the layout, then click "Add."
2 Options:
Column 1: This places the field side-by-side with another field, reducing the width of each field to half of the form's width (as shown in the "First Name" and "Last Name" fields in the image).
Column 2: This places the field in a single, full-width layout, ensuring the input field spans the entire form width (as shown in the "Company" field in the image).
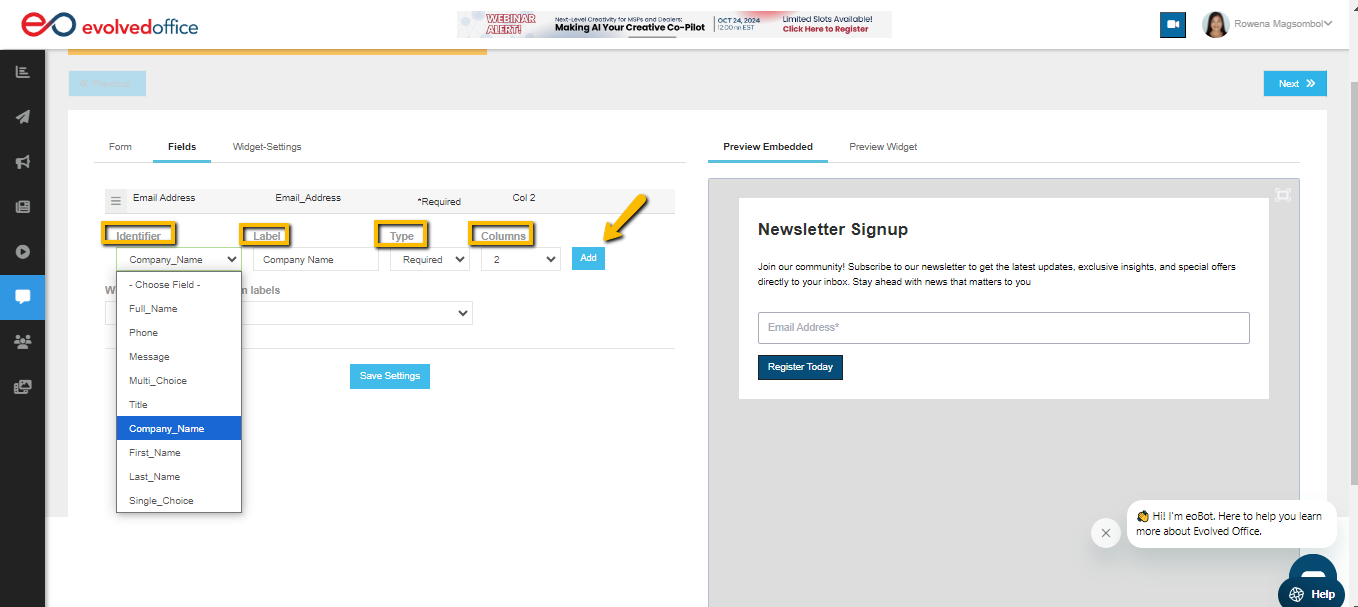

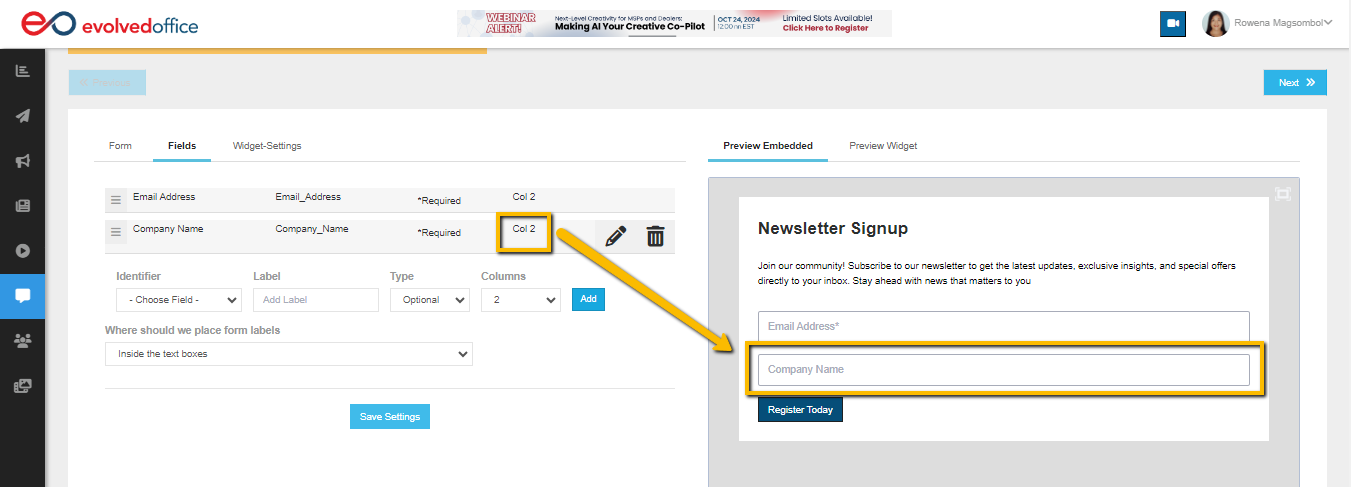
Once you're happy with the layout, click Save Settings.
Step 5: Managing Post-Signup Actions
After setting up your form, click Next to manage post-signup actions:
- Notification Emails: Enter the email addresses to receive notifications when the form is submitted.
- Confirmation Message: Customize the default confirmation message or redirect users to a specific webpage after submission by entering the URL.
- Welcome Email: To send a welcome email, check the box and compose your email message.
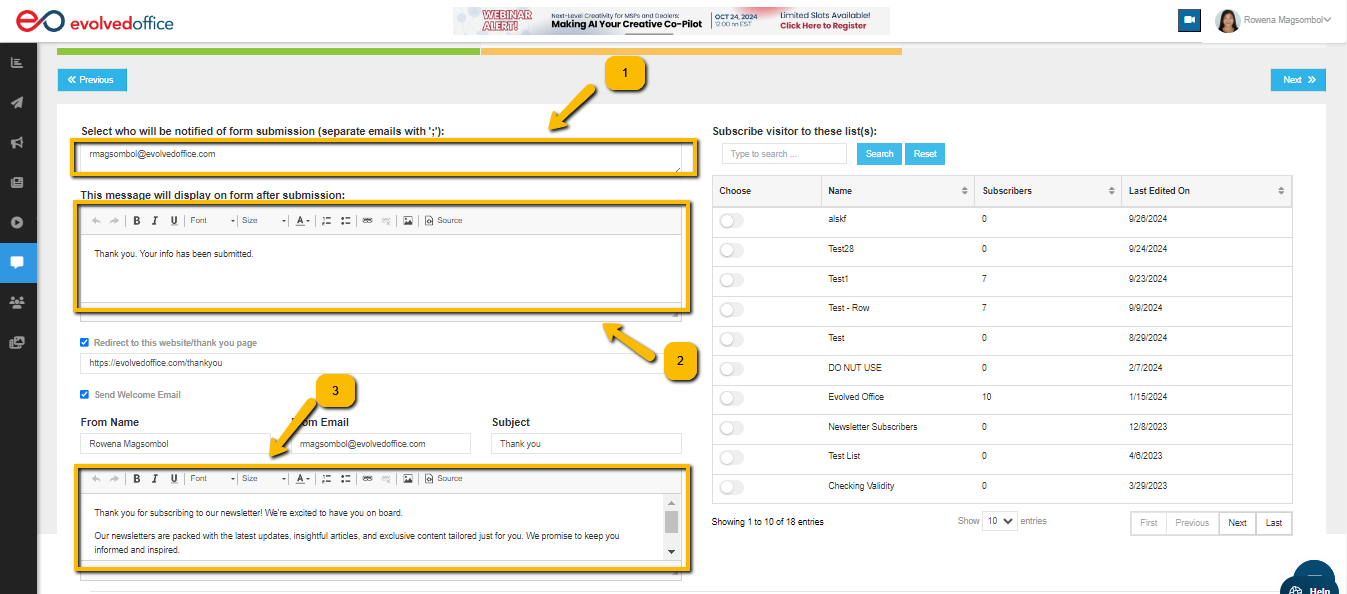
Additionally, on the right side, you have the option to add registrants to one or more email lists for future communications.
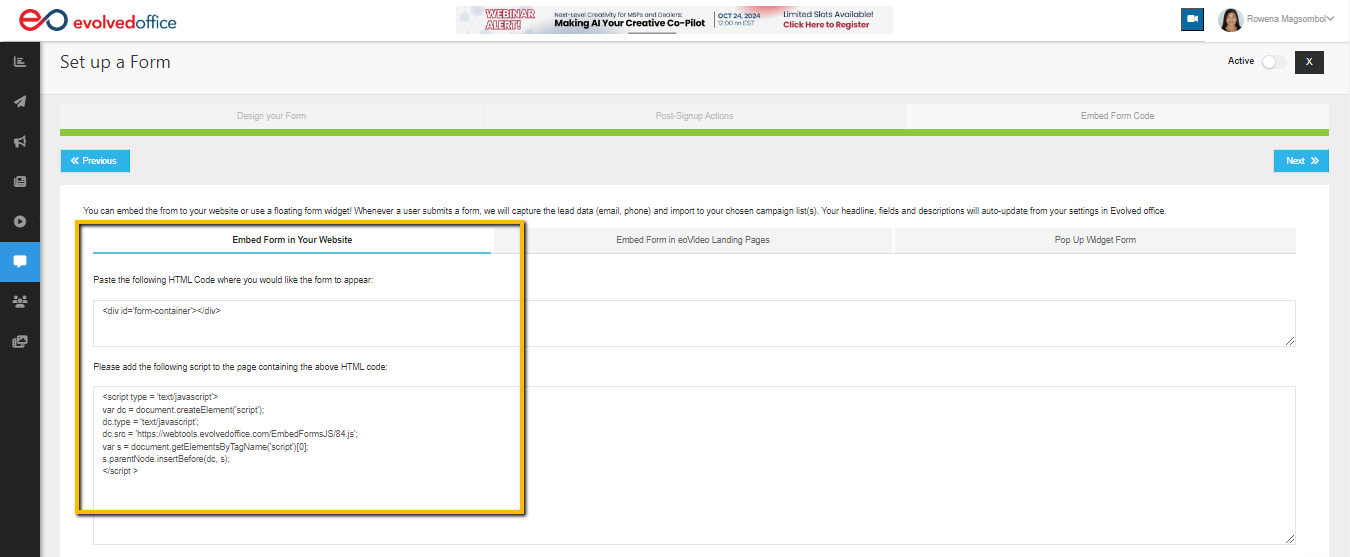
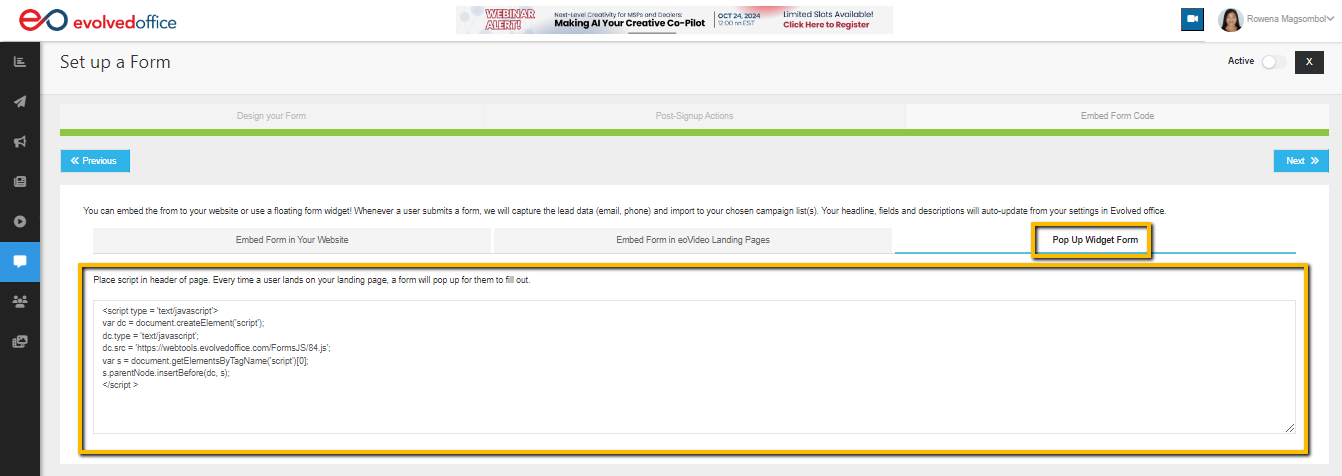
Step 6: Embedding the Form
Once you're done customizing the form:
- Click Save Settings.
- Then, click "Next" to get you the HTML code to embed the form on:
- Your website
- An eoVideo landing page
- A pop-up widget

EO Forms transforms form creation from a task into an enjoyable journey, putting you firmly in control. So why wait any longer? Dive into creating your custom forms with EO Forms today!