
Managing Your Articles: Viewing, Adding, and Editing Content
Introduction
The Articles section inside Evolved Office is where you can easily view, manage, and create marketing content. Whether you’re using ready-made articles, building your own, or leveraging AI assistance, this area provides flexible, powerful tools.
This guide walks you through:
- Navigating the Articles page
- Searching and filtering articles
- Adding new articles (with optional AI tools)
- Editing content across different layouts
Navigating the Articles Feature
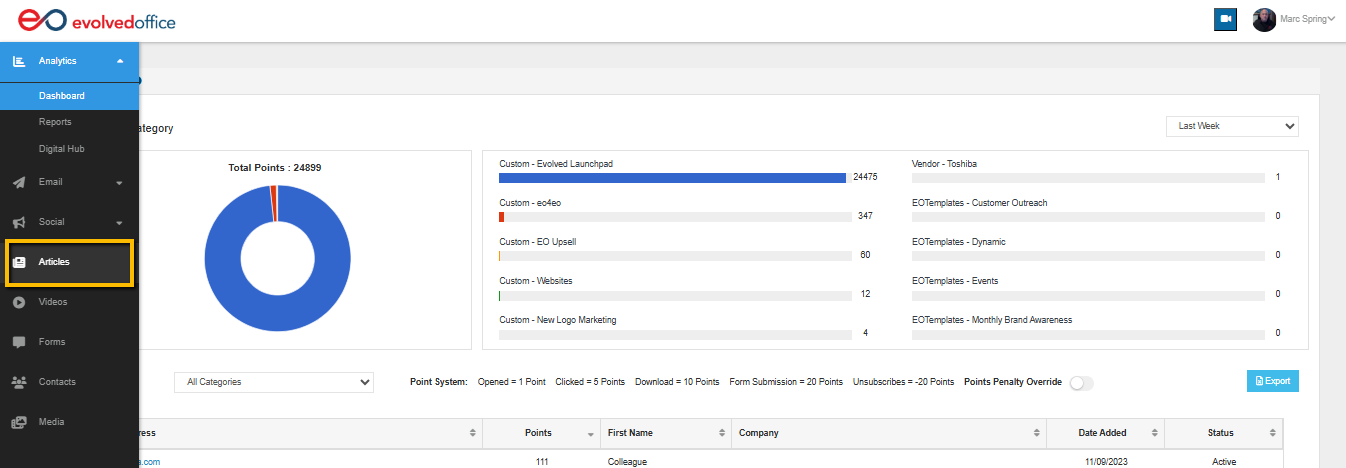
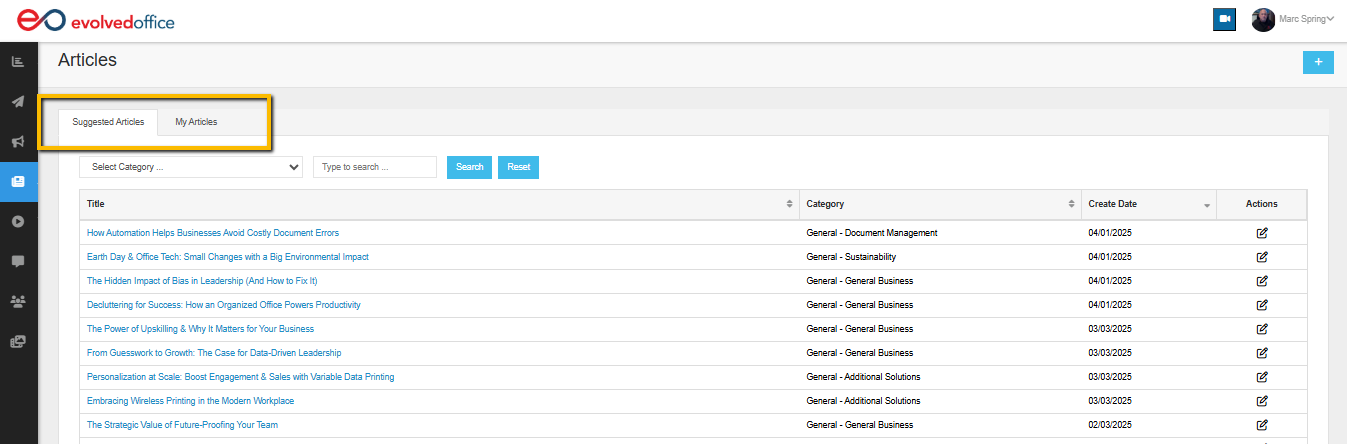
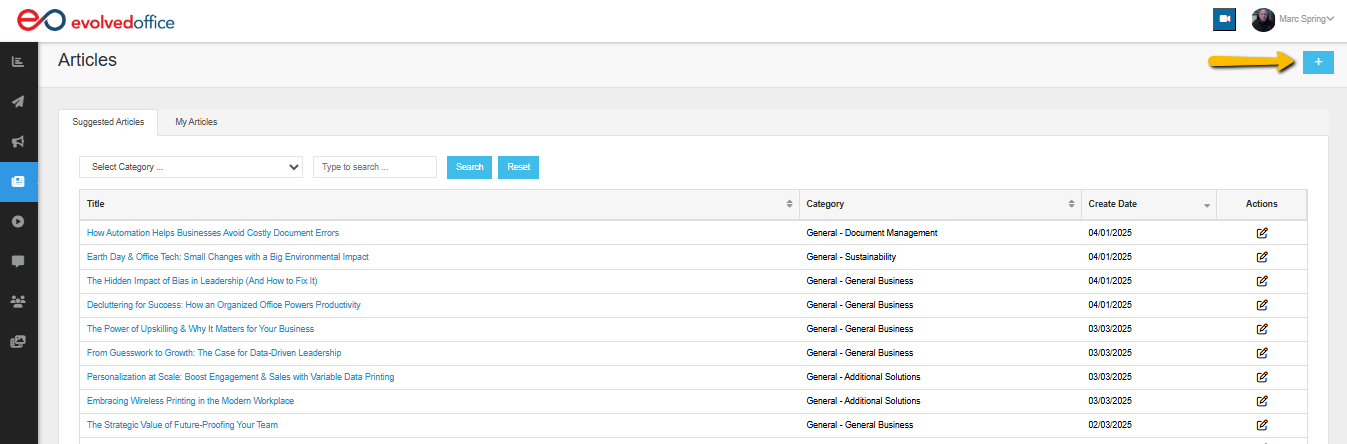
When you access the Articles section (book icon 📚 on the left sidebar), you’ll see two main tabs:
Suggested Articles:
Pre-written articles provided by Evolved Office.
My Articles:
Articles you or your team have created and customized.
🔵 Tip: Quickly switch between these tabs to view different types of content.
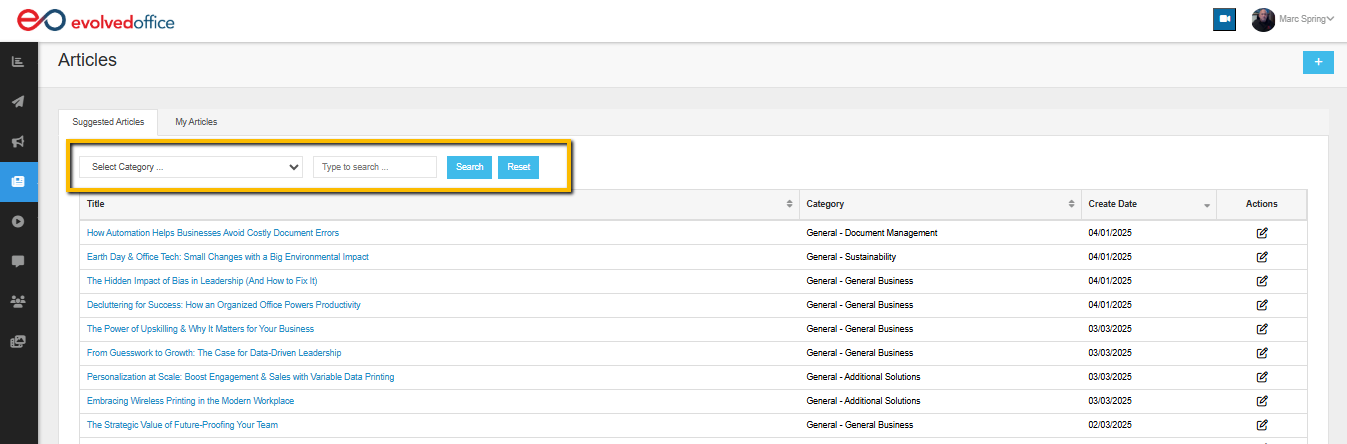
Searching and Filtering Articles
You have quick tools available:
Select Category Dropdown: Filter articles by categories like Document Management, Sustainability, or General Business.
Search Bar: Enter keywords to find articles by title.
Search / Reset Buttons: Click Search to apply filters or Reset to clear them.
Viewing and Editing Articles
In the articles table:
Title: Click to view or edit the article.
Category: Displays the article’s assigned category.
Create Date: Shows when the article was created.
Actions: Click the edit icon 🖉 to open an article for editing.
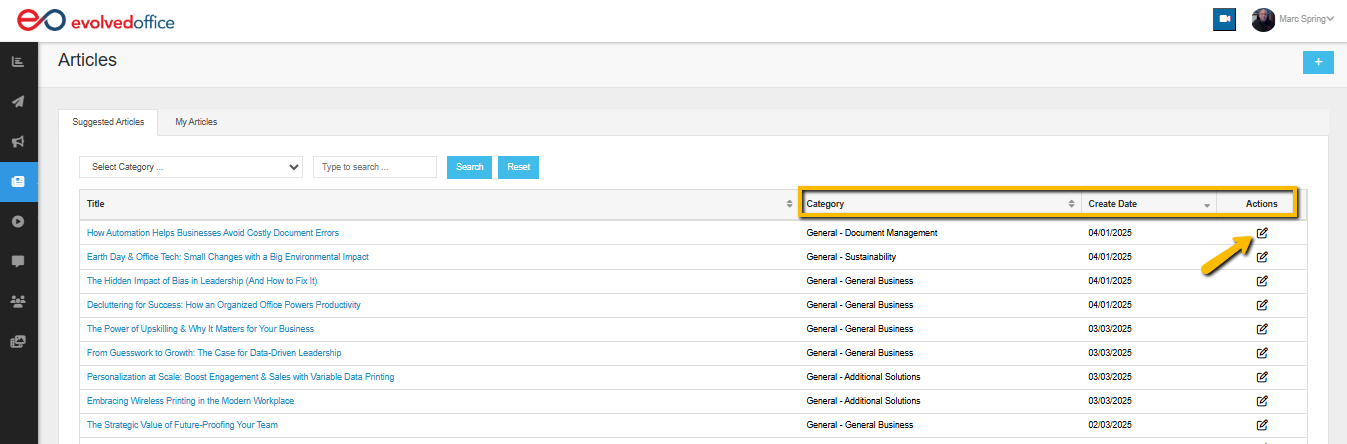
You can update content, reassign categories, replace images, or adjust formatting at any time.
Adding a New Article
To create a new article:
Click the blue plus (+) button at the top right.
The Create / Edit Article window will open.
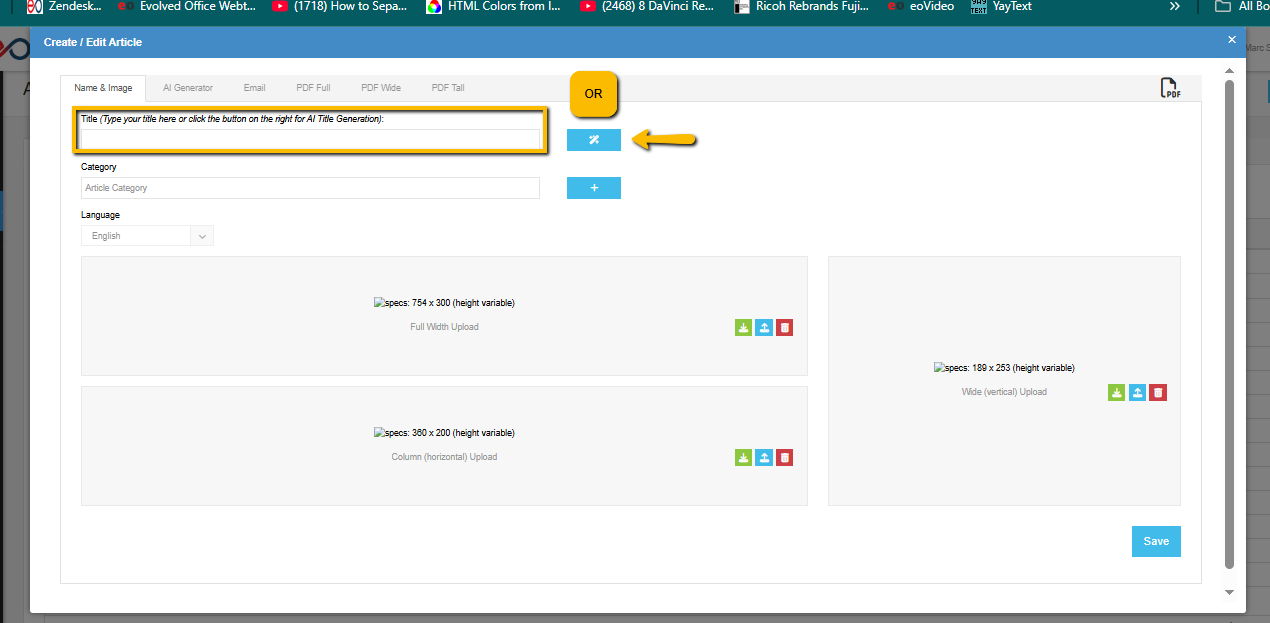
1. Title and AI Title Generator
At the top:
Manually type your article title.
Or use the magic wand button ✨ to access the AI Title Generator.
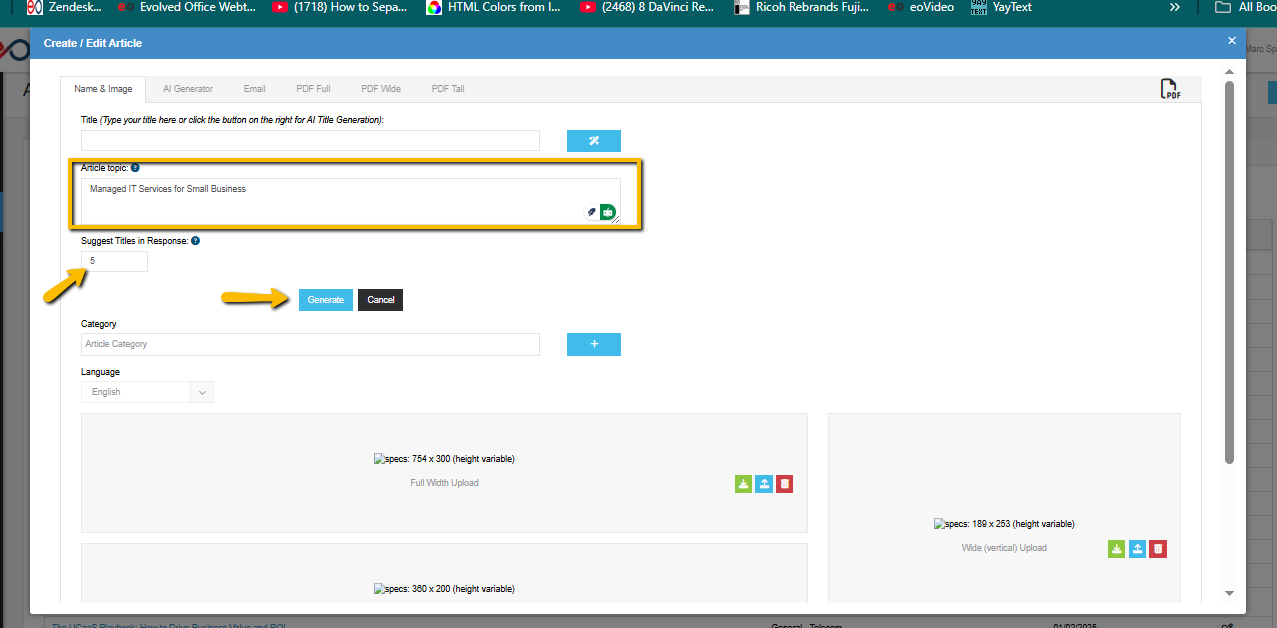
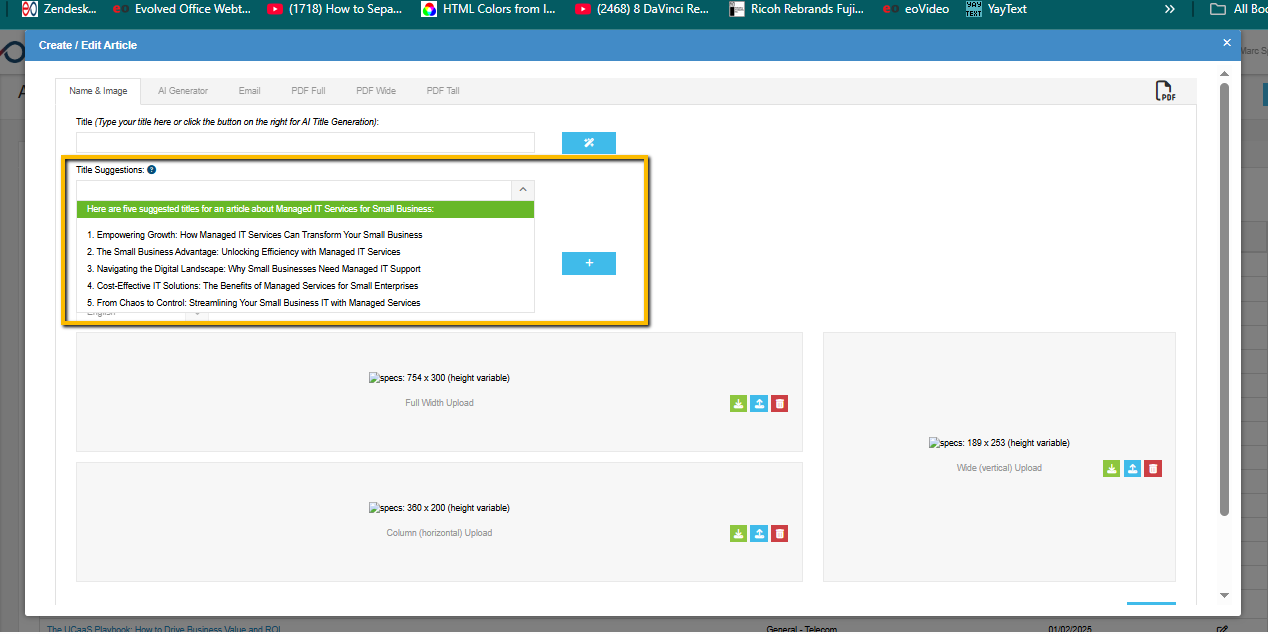
Using the AI Title Generator:
Enter your Article Topic (example: "Managed IT Services for Small Business").
Set how many title suggestions you want (default is 5).
Click Generate.
A Title Suggestions dropdown will appear — click the arrow to view and select your preferred title.
🔵 Tip: You can always adjust the topic and regenerate if needed.
2. Selecting Category and Language
Category: Choose the appropriate category for your article.
Language: Default is English (you may select others if available).
3. Uploading Images (Optional)
You can upload images in three formats:
Full Width Upload (Recommended: 754 x 300)
Column Upload (Recommended: 380 x 200)
Wide Vertical Upload (Recommended: 189 x 253)
Each upload option allows you to:
Upload new images
Download existing images
Remove images
🔵 Tip: Adding images makes your article more visually appealing.
4. Saving and Proceeding
After completing the Name & Image tab:
Click Save.
✅ Clicking Save moves you to the next step: the AI Generator tab.
Using (or Skipping) the AI Generator Tab
After saving, you'll land on the AI Generator tab.
You have two choices:
Use the AI Generator to create or edit your article content.
Skip the AI Generator and manually type or paste your article content.
🔵 Important:
The AI Generator is completely optional — you have full flexibility!
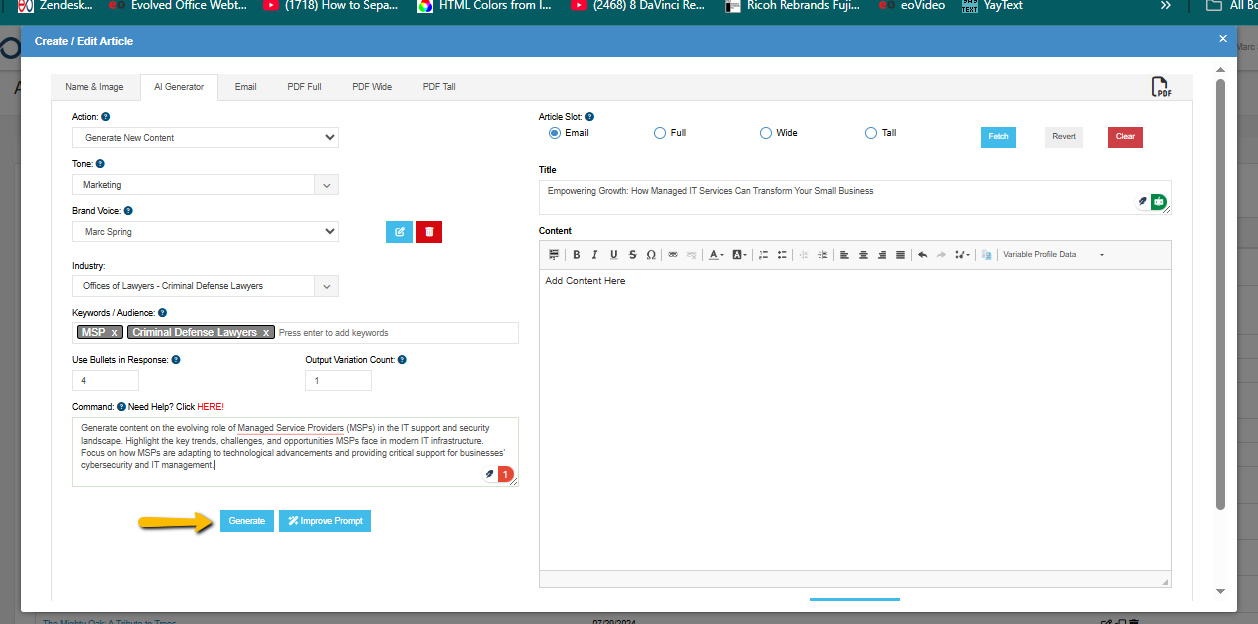
AI Generator Options:
Start by selecting an Action:
Generate New Content:
Create a brand-new article based on your settings.
Rephrase Content:
Rewrite existing text to improve or adjust style.
Summarize Content:
Condense longer content into a shorter summary.
Other AI Generator Settings:
Tone: Choose writing style (Professional, Friendly, etc.)
Brand Voice: Select or create a brand voice.
Industry: Choose the target industry.
Keywords / Audience: Enter any keywords to prioritize.
Use Bullets in Response:
Enter any number if you want the output to include bullet points.
Output Variation Count:
Set how many versions you want the AI to create (default is 1).
Command Box:
Add specific instructions for the AI.
Article Slot:
Choose the output format (Email, Full, Wide, Tall).
Final Steps in AI Generator:
When ready, use these buttons:
Push New Content:
Push the AI-generated content into the selected slot (Email, Full, Wide, Tall).
Fetch:
Fetch previously saved content from the slot.
Revert:
Revert to the last saved version in the selected slot.
Clear:
Clear out the editor for that slot.
🔵 Tip:
Always check which article slot you’ve selected before pushing or editing content.
How Content is Pushed to Slots
When you Push New Content (starting with "Email" selected),
the system automatically populates the Email, Full, Wide, and Tall slots with the same content.
✅ This gives you a starting point for each format.
🔵 Important:
The AI does not automatically format or resize content perfectly for each layout.
You should manually adjust each slot afterward to match the ideal structure for Email or PDF use.
Manually Adding Your Own Content (Instead of Using AI)
If you prefer not to use the AI Generator, you can paste your own content manually into each of the tabs:
Why Are the Different Slots Important?
Each slot serves a specific purpose:
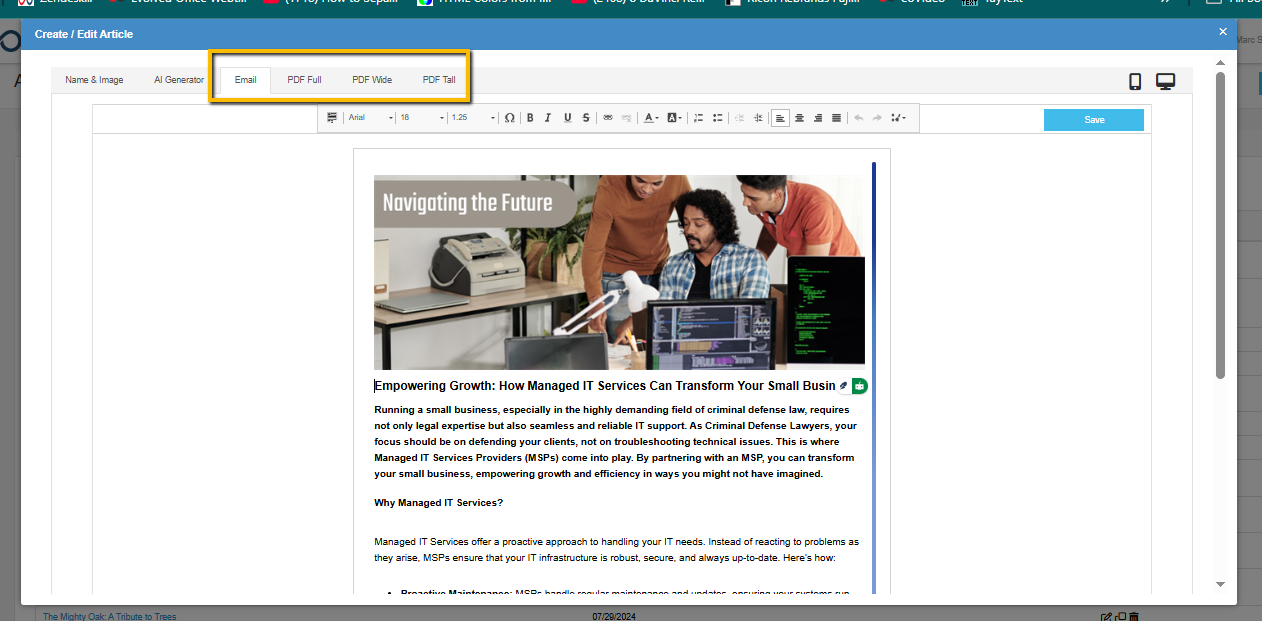
Email Slot:
Only content from the Email tab is used for email campaigns.
The system will automatically shorten the email content to fit safely within the structure and template limits, ensuring it displays correctly.
PDF Full, PDF Wide, and PDF Tall Slots:
These layouts are used exclusively for printable content, such as downloadable PDFs, newsletters, flyers, or marketing sheets.
🔵 Tip:
Start by finalizing your Email version first, then paste and adjust the content for the PDF versions to match their layout needs.
Editing in Different Slots (Email, PDF Full, PDF Wide, PDF Tall)
Each slot tab allows you to:
- Customize content individually
- Format according to the design layout
- Optimize the article for different distribution methods (email vs. printable PDF)
Maximum Content Limits Per Slot
Each slot has a maximum content size limit to ensure:
- Fast loading and sending
- Proper formatting in emails and PDFs
- Reliable system performance
🔵 Important:
The limit is enforced by the system but not visibly displayed.
If you exceed the limit, you will see a "Maximum content limit reached" warning.
Solution: Shorten your content slightly until it fits.
Summary
The Articles page is your all-in-one hub for building effective marketing content.
✅ You can manually create, AI-generate, or customize articles easily.
✅ Always complete each slot for best results across email and PDF formats.
✅ Shorten or adjust your article content as needed for different outputs.