How to Add and Manage Products in the Evolved Office Product Library (My Products)
You can easily add new products to your Product Library, which will automatically display in both your embedded I-Frame (if active on your website) and in your Evolved Office Email Editor under the “My Products” section.
This article explains how to:
- Navigate to your Product Library settings
- Add a new product
- Upload images and brochures
- Enter product details and specifications
- Ensure proper brand setup
Step 1: Go to Product Library Settings
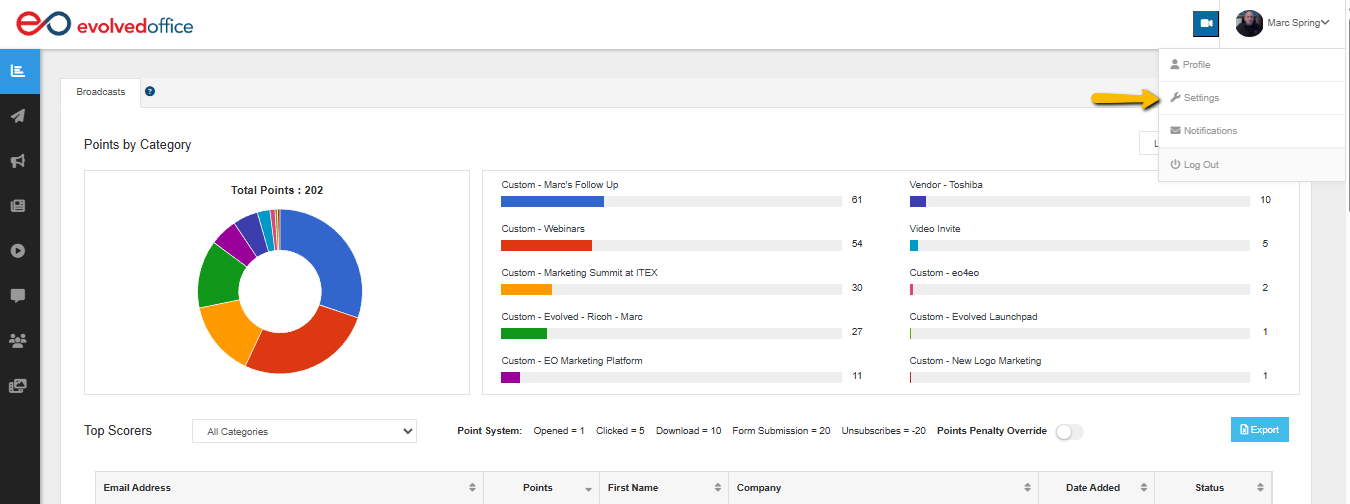
- Log in to your Evolved Office account.
- Click on your profile icon (top right corner).
- Select Settings.
- Go to the Product Library tab.
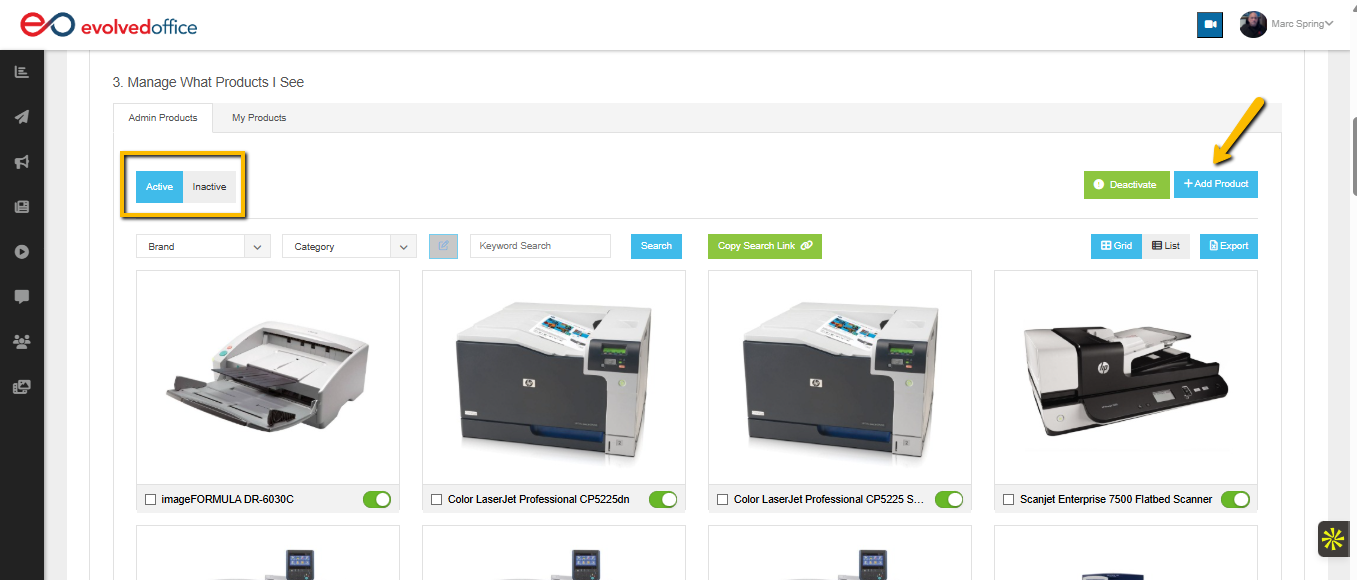
Step 2: Scroll Down to “Manage What Products I See”
Under Section 3. Manage What Products I See, you’ll find two tabs:
- Admin Products – Items added by Evolved Office (standard OEM lines)
- My Products – Items added manually by your company
Note: Regardless of where you click “Add Product” (Admin Products or My Products), your new product will automatically be added under My Products.
Step 3: Click “+ Add Product”
From either the Admin Products or My Products tab:
- Click the + Add Product button in the top-right corner.
This opens the Add New Product window where you’ll enter your product details.
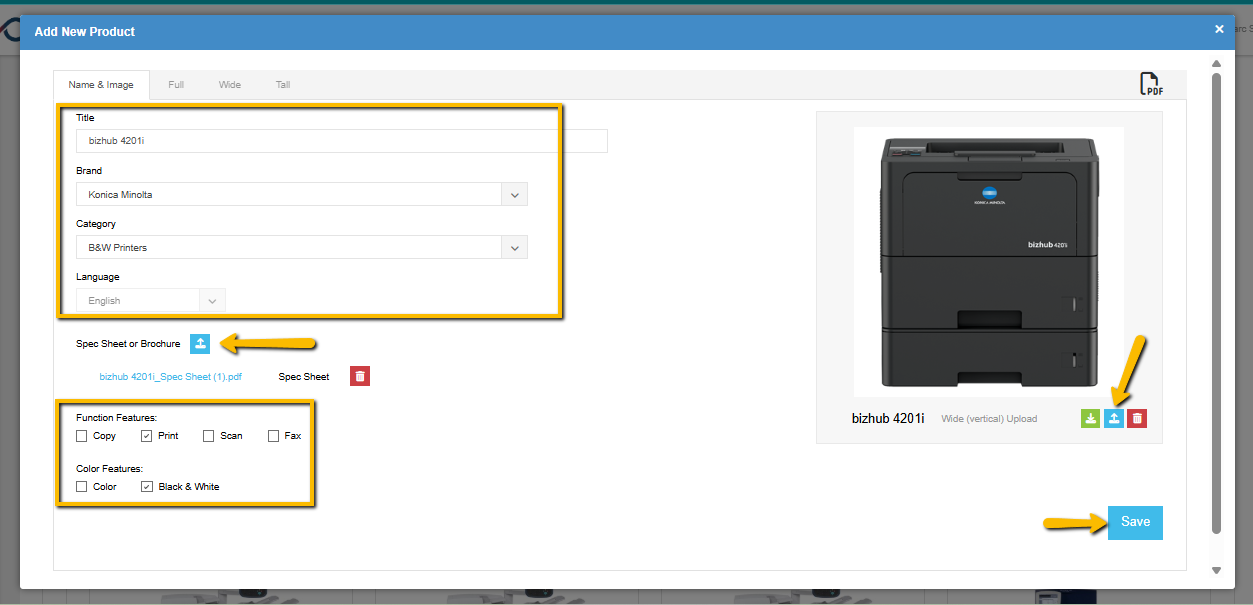
Step 4: Complete the Product Information (Name & Image Tab)
Fill out the basic product details:
- Title – Product name (e.g., Canon imageRUNNER 1643i).
- Brand – Select the brand from the dropdown list.
- Category – Choose the category that best fits (e.g., MFP, Printer, Scanner).
⚠️ If the brand is not listed, please email support@evolvedoffice.com so our team can add it on the backend.
- Language – Defaults to English.
- Spec Sheet or Brochure – (Optional) Upload a PDF document.
- Function & Color Features – Check applicable boxes (e.g., Copy, Print, Scan, Color).
- Upload your product image (recommended 360x360 px max) using the blue upload button.
When done, click Save.
Step 5: Add Product Description (Full Tab)
Next, click on the Full tab to enter your main product description and specifications.
- Use the toolbar to adjust font style, size, and line spacing.
- Recommended:
- Font: Arial
- Font size: 15
- Line height: 1.5
When finished, click Save.

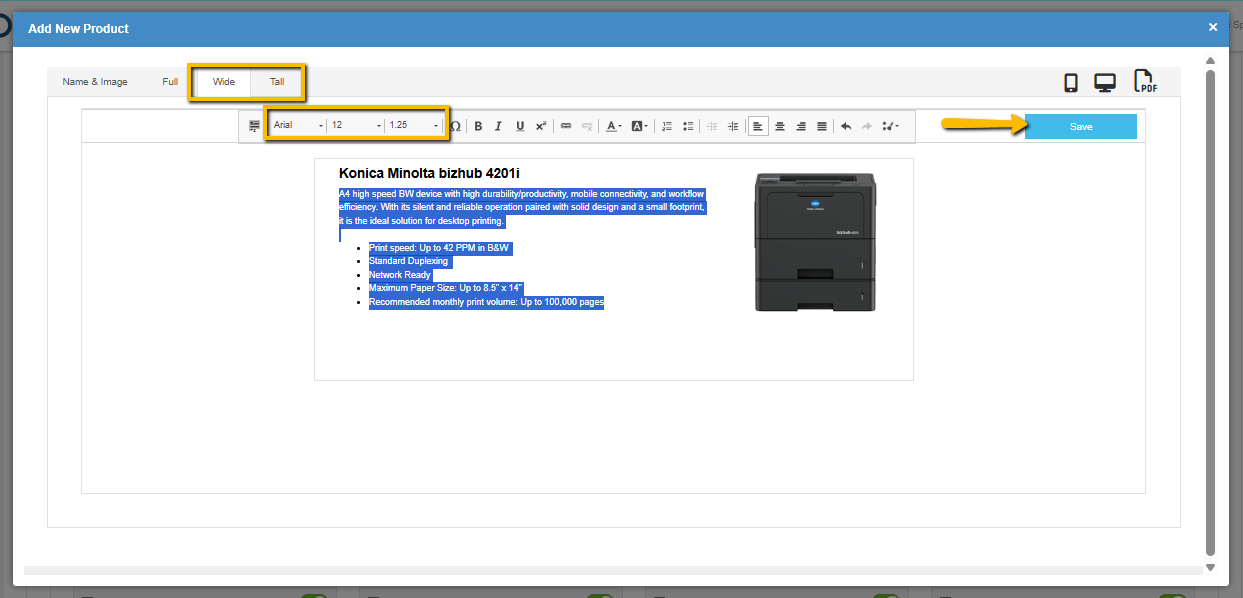
Step 6: Review Wide and Tall Tabs
Content from the Full tab automatically carries over to the Wide and Tall tabs.
- Review layout and adjust as needed.
- Use Font size 12 and Line height 1.25 for the best display in these views.
- Click Save after reviewing each tab.
Step 7: Confirm Product and Brand Visibility
After saving:
- Your new product will now appear under My Products in the Manage What Products I See section.
- Make sure the product toggle is enabled (green) so it’s visible on your I-Frame and in your Email Editor.
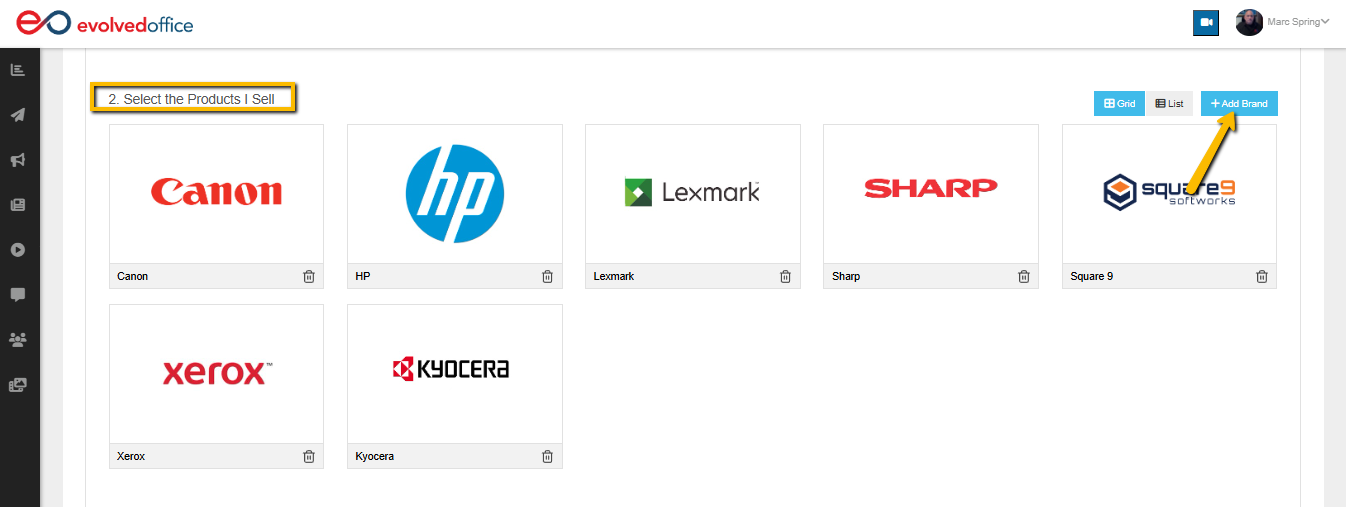
- Confirm that the brand logo is active under Section 2. Select the Products I Sell.
To add a brand:
- Click + Add Brand under “Select the Products I Sell.”
- Choose from the available brands.
- If your brand isn’t listed, email support@evolvedoffice.com to have it added.