
How to Use Evolved Office and Compass Sherpa Integration
The Evolved Office and Compass Sherpa integration allows you to easily connect your marketing campaigns with your CRM, helping you filter accounts, manage campaigns, and convert engagement data into actionable sales activities—all from within Sherpa.
What This Integration Does
- Filters Sherpa account data to build segmented, targeted lists
- Syncs lists directly into Evolved Office for campaigns and automation
- Uses rep-specific login and activity tracking within Sherpa
- Sends email engagement metrics (opens, clicks) back to Sherpa
- Allows sales managers to create actionable tasks based on engagement
1. Segmenting and Filtering Accounts in Sherpa
There are two main ways to create and filter lists inside Sherpa before pushing them into Evolved Office.
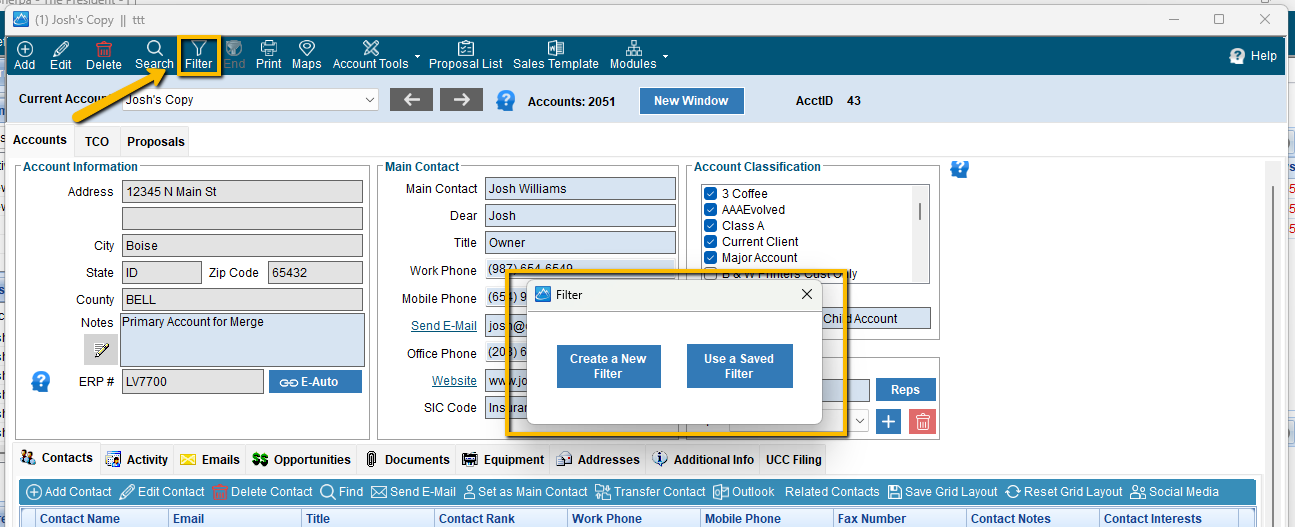
Option A – Using Account Filters
- From Sherpa Home → Accounts → Filter
- Click New Filter to define your conditions.
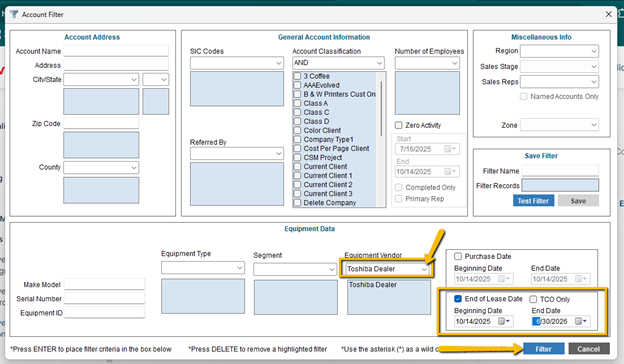
Example:
Lease Expiration: “End Lease” is between today and June 30, 2026
Equipment Vendor: “Toshiba”
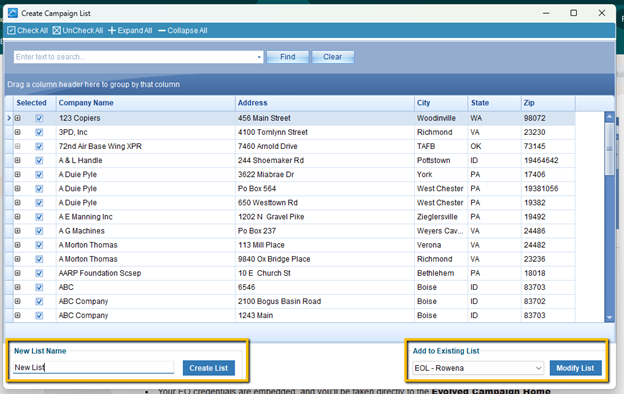
- Click Create Campaign List to add accounts to:
- An existing campaign list, or
- A new campaign list created for this segment.

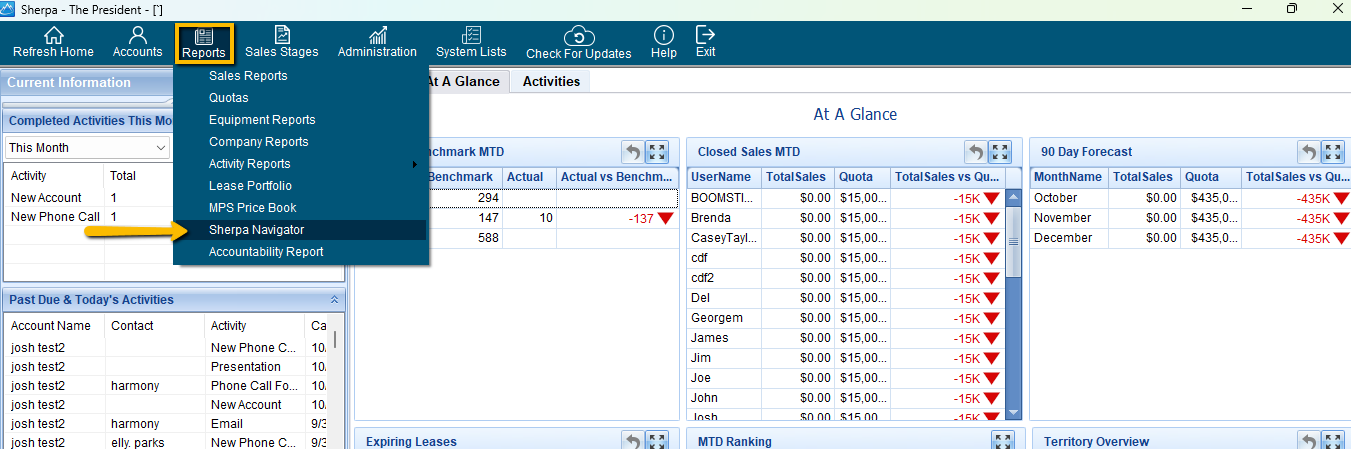
Option B – Using Sherpa Navigator
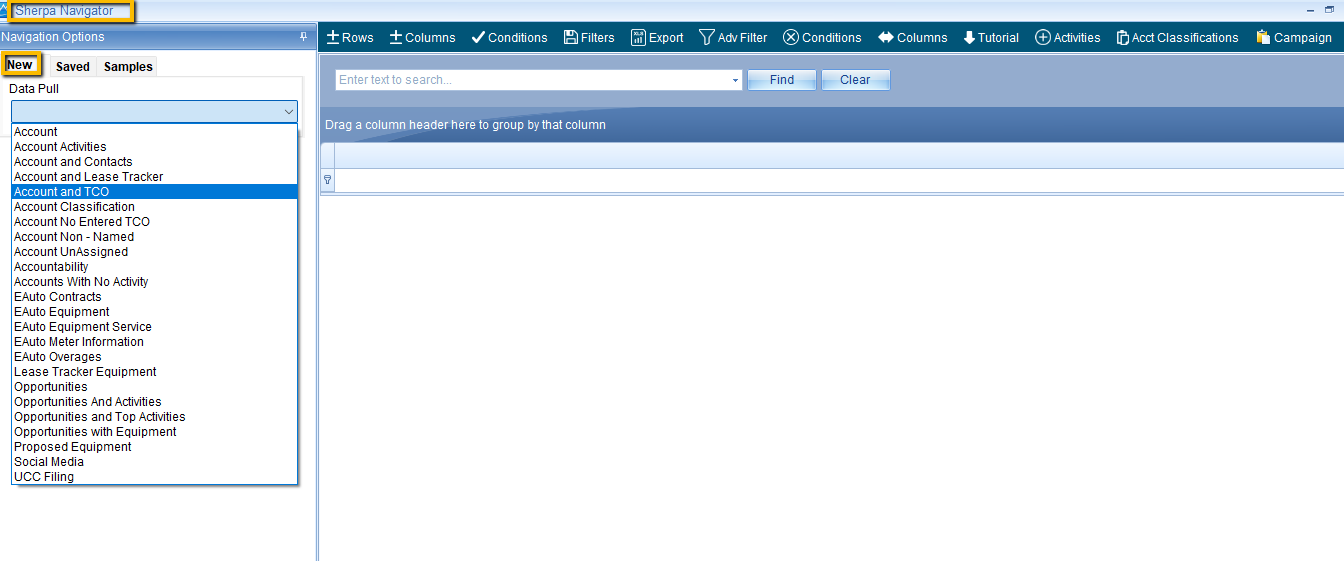
- Navigate to Sherpa Home → Reports → Sherpa Navigator
- Choose the data type (e.g. Accounts & TCO)
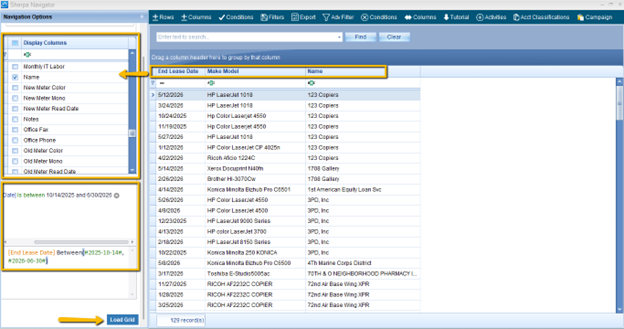
- Select at least one display column such as:
- Name
- End Lease Date
- Make/Model
- (New Update!) You can now apply filters before loading the grid:
Example: End Lease Date between 10/14/2025 and 6/30/2026 - Click Load Grid to view filtered results.
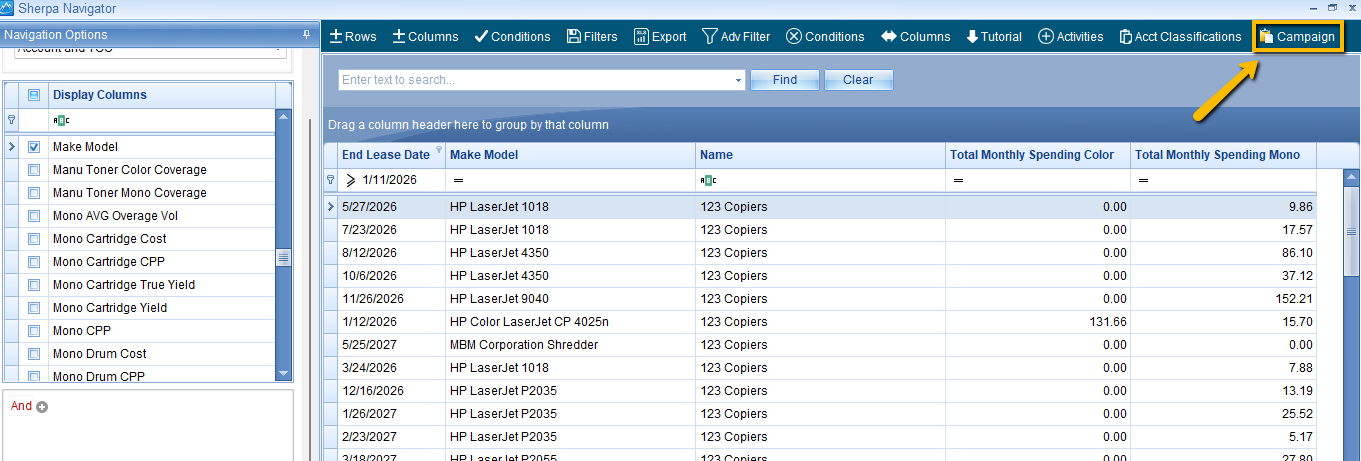
- Review and click Campaign (top right).
- This syncs the filtered list into Evolved Office for outbound marketing.
- This syncs the filtered list into Evolved Office for outbound marketing.
2. Accessing Evolved Office from Sherpa
Once your lists are ready, you can access Evolved Office directly from Sherpa.
Path:
Sherpa Home → Accounts → Account Tools → Evolved Campaigns
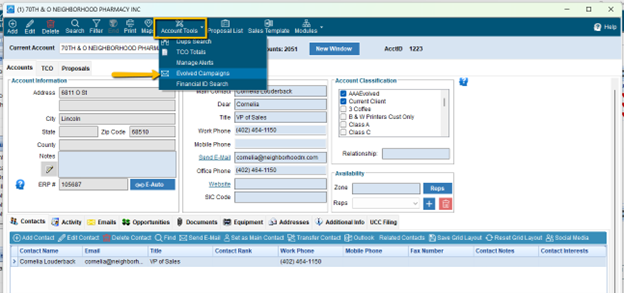
From here, you can:
- Launch or view existing Evolved Office campaigns
- Connect directly to your campaign activity data
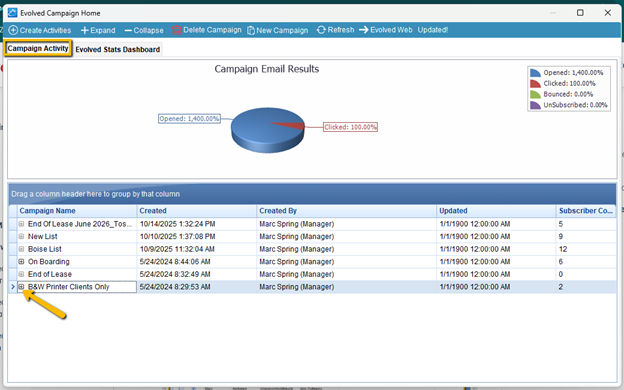
3. Converting Campaign Engagement into Sales Activities
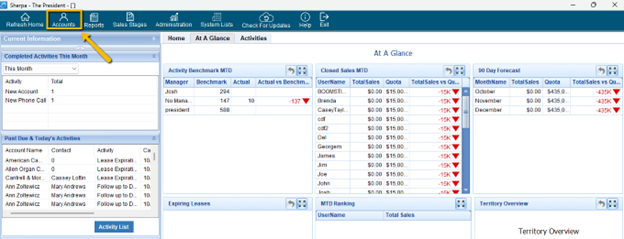
Evolved Office campaign activity data (like opens and clicks) is visible inside Sherpa.
- Go to the Campaign Activity tab.
- Click the “+” icon to expand and view engagement details.
- Select the emails with opens or clicks.
- Click Create Activities, then choose:
- Date
- Activity Type (Call, Follow-Up, Meeting, etc.)
- Assigned Rep
- Objective
- Click Create to log these activities.

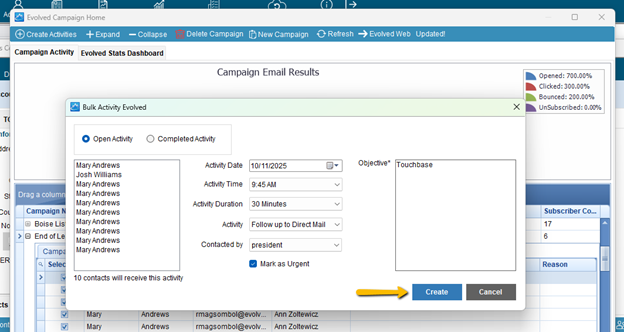
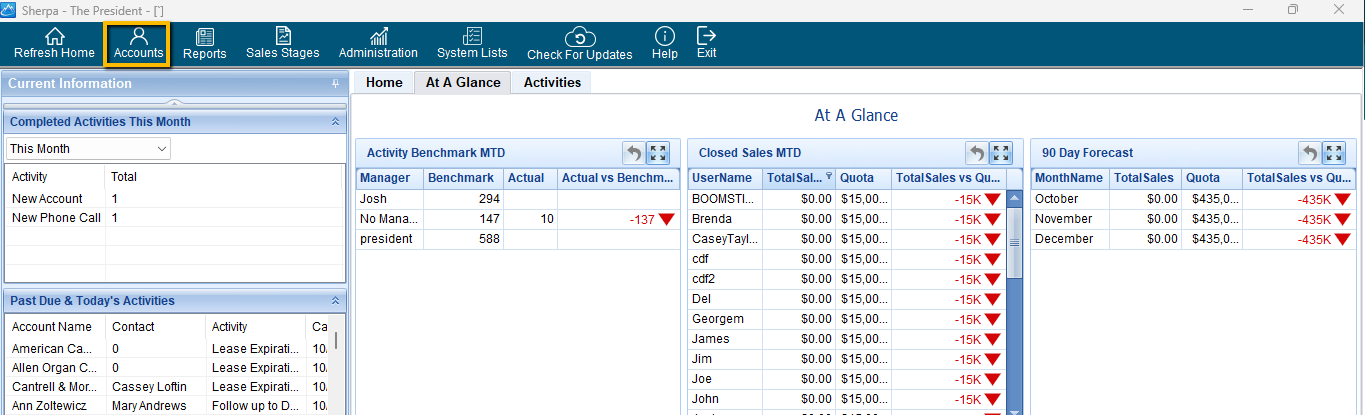
✅ All created activities are automatically visible from your Sherpa Home screen.
Tip: Focus on contacts showing high engagement (multiple opens or clicks) to prioritize your follow-up calls and meetings.
4. Adding a Company Contact or Email into a Campaign
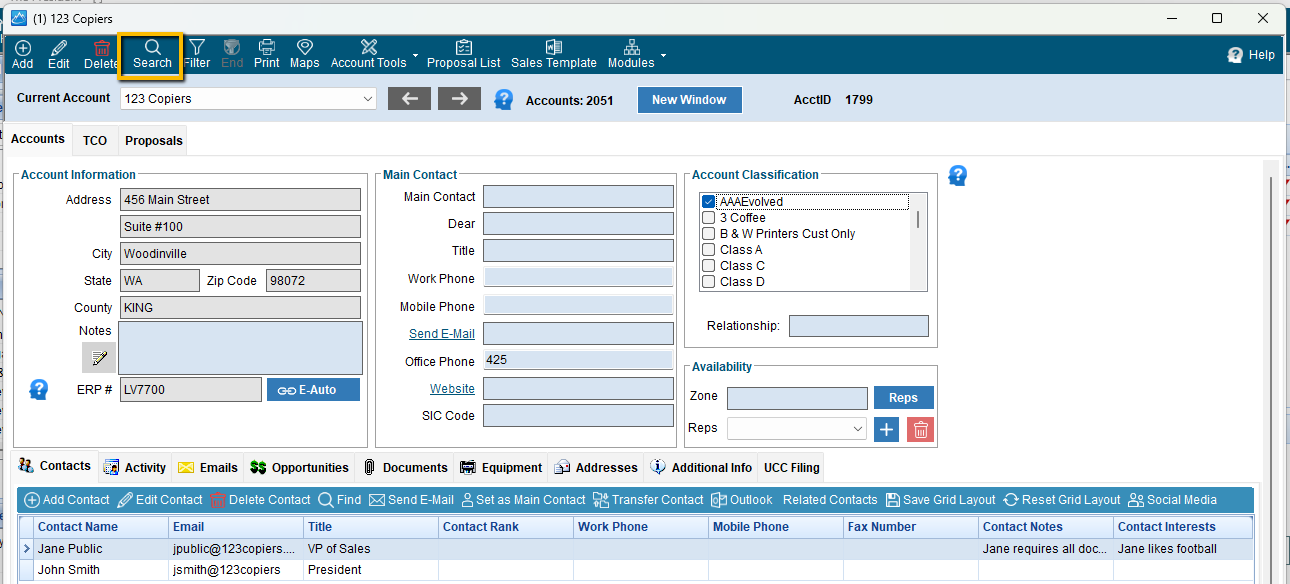
- Go to Sherpa Home → Accounts → Search
- Choose your search criteria (e.g., Company Name, Contact, Email, Equipment ID, or Zip Code).
- Select a condition (e.g., Contains) and enter the value (e.g., a name or email address).
- Click Search to view results.
- Click Create Campaign to:
- Add the results to a new campaign, or
- Include them in an existing campaign.

5. Best Practices
- Use filters strategically to target lease renewals and specific vendors.
- Create activities immediately after reviewing campaign engagement for timely follow-up.
- Keep your Sherpa and Evolved Office data in sync for better reporting accuracy.
📈 Why This Matters
This integration removes silos between your CRM and marketing platform. It provides:
- Easier list creation and targeting
- Better campaign performance tracking
- Clear follow-up workflows for reps
- More meaningful metrics tied directly to sales activity
Need help getting started? Contact our support team or watch the walkthrough video below for a full visual guide.