
Work with approval tasks and assigned messages
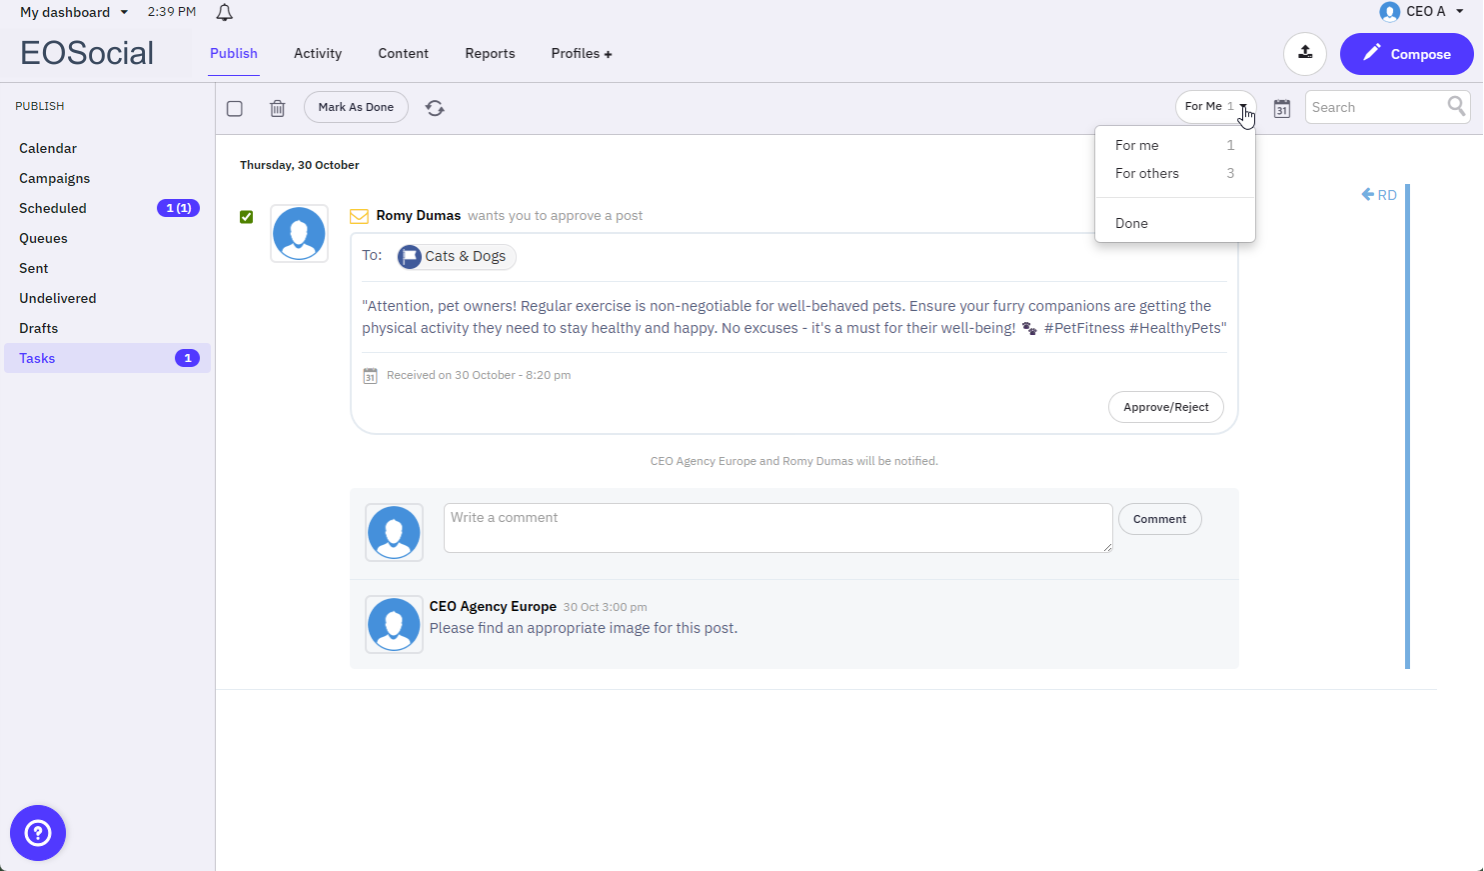
In the Publish > Tasks section of your dashboard, you can view tasks waiting for your approval (For Me) or for the approval of others (For Others). You can also view tasks that were marked as done, as long as they haven't been deleted.
The Tasks view
1. Go to Publish > Tasks. The tasks assigned to you will be shown.
2. Use the check boxes to select or deselect one or all of your tasks. You can then click the Mark As Done button or the trash bin icon to delete the selected tasks.
Caution: Marking as done is not the same as approving the task. The post will only be sent out once it has been approved.
3. You can also refresh the task view.
4. On the right-hand side, there is a calendar icon to help you filter tasks by date, or you can search for a specific task.
5. Any action taken on tasks will generate a dashboard notification that can be viewed by clicking on the bell icon in the top-left corner of the window.
Caution: When viewing your tasks, any posts that have not yet passed their scheduled date/time will display 'Scheduled for' underneath them.
Tasks past the post's scheduled date/time will say 'Received on'. Be careful. If you approve these posts, they will be sent out immediately. If you would rather reschedule them, be sure to do so before approving the post.
Messages assigned from the Priority Inbox
6. Messages in the Priority Inbox that require follow-up can be assigned as a task by clicking the three dots to the right of the message and selecting "Assign."
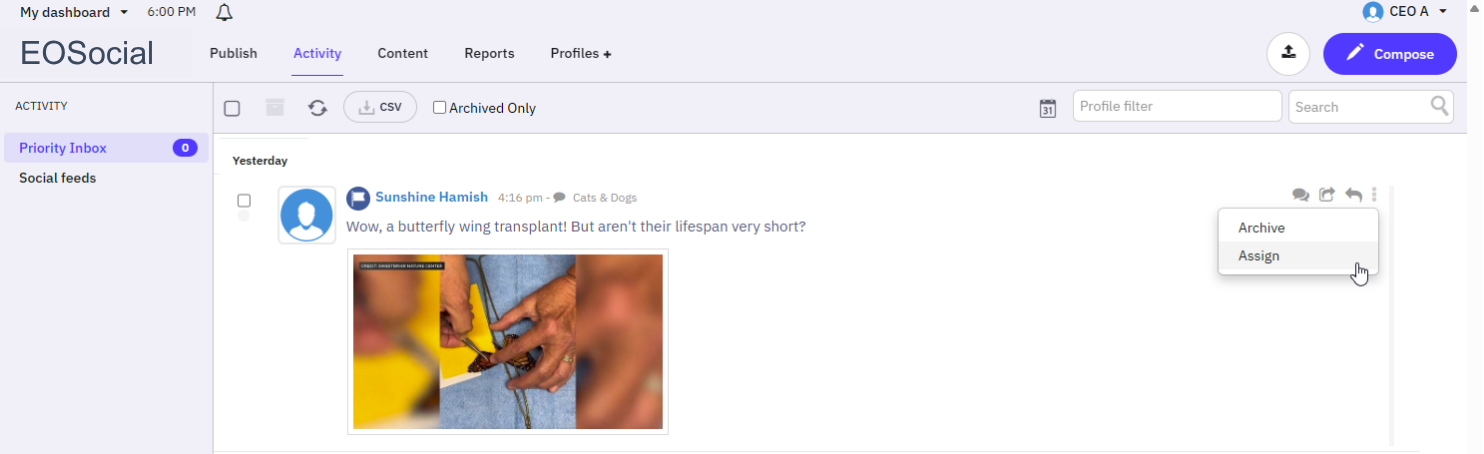
7. You can then choose who to assign it to and add a note.
8. The task will then appear in the 'For Me' area of the person to whom the task was assigned. The initials of the person who sent it will appear to the right of the message.
Work with tasks 'For Me'
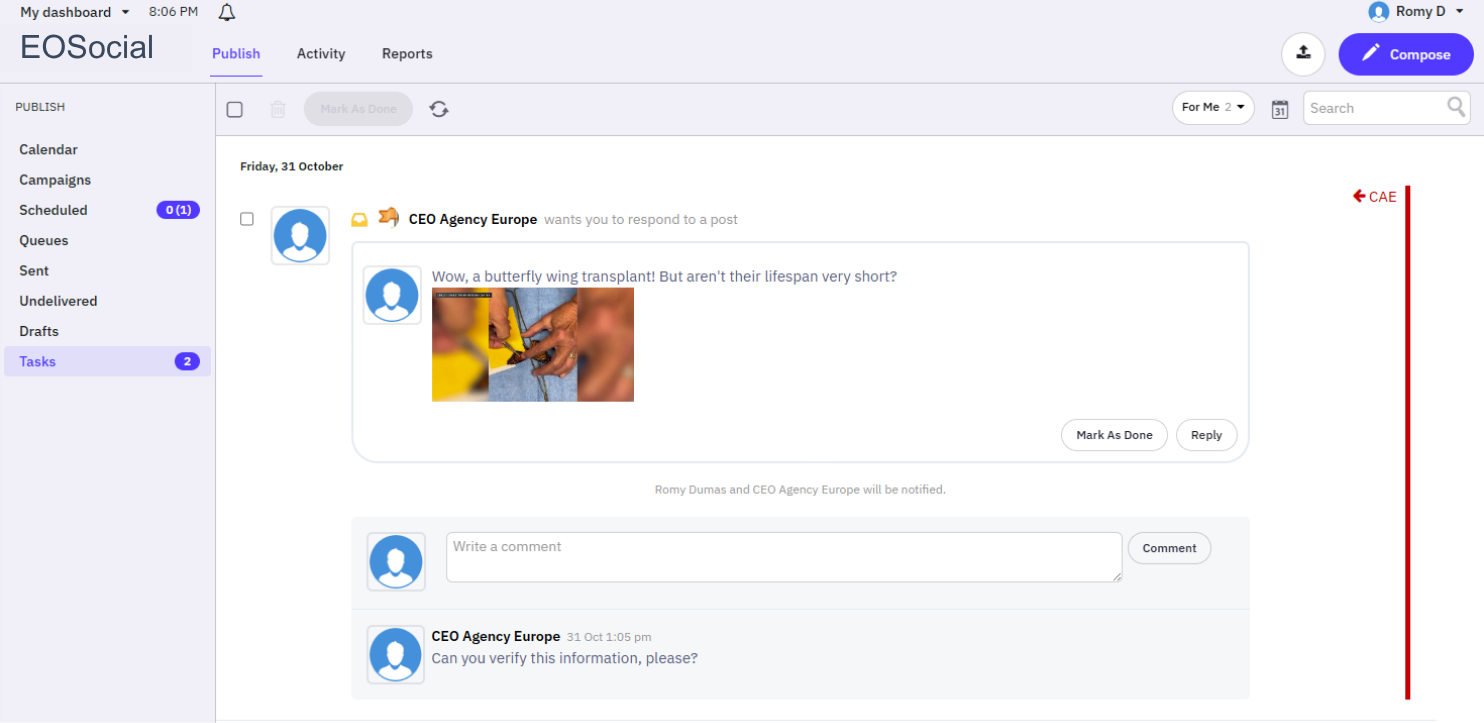
9. Go to Publish > Tasks and choose For Me from the drop-down to see a list of tasks that others have sent to you. They are shown based on the date the task was created, from newest at the top to the oldest.
10. From here, you can click the Approve & Send button to review and edit the message, if needed. You can also send it for approval, perhaps returning it to the person who sent it to you after you've made edits or perhaps to assign it to another user.
11. You can also reject the post, at which point it is returned to the task list of the user who sent it to you with a comment saying why, if provided, followed by '[Rejected]'.
12. You can also choose to write a comment for the user who assigned the message to you. This is a more conversational way to collaborate on a post. The user who sent the post for approval will see the comment in the 'For Others' area of their Tasks view. They will also receive an email notification of the comment.
Work with tasks 'For Others'
13. Go to Publish > Tasks and choose For Others from the drop-down list to see all the tasks you have assigned to other users. You can see who the task was assigned to under the post. Note that both the sender and receiver of the task will get an email notification.
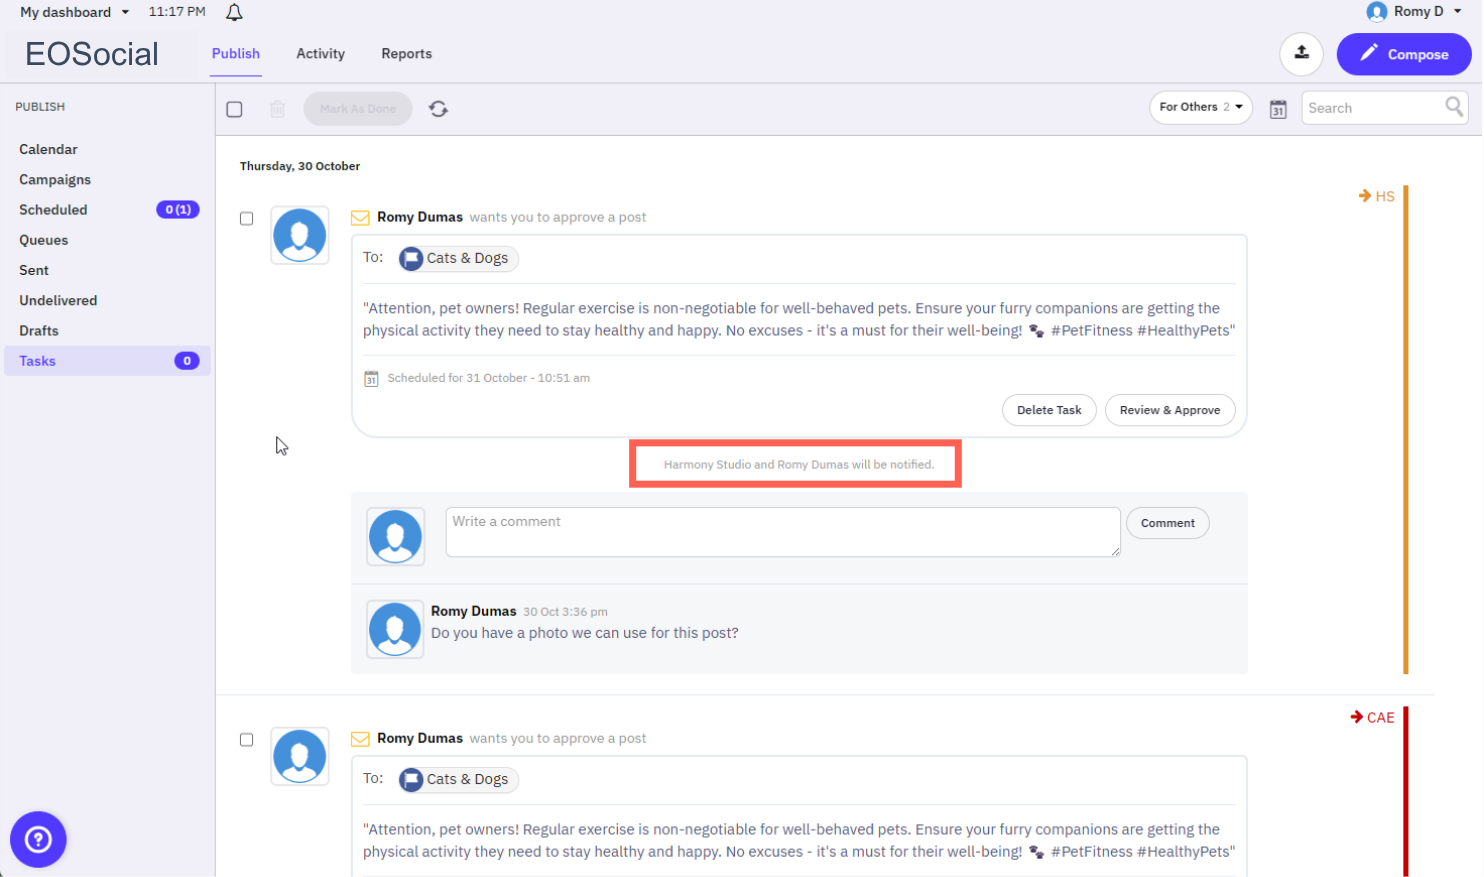
14. You can work with tasks the same way as tasks in the 'For Me' view.
15. Comments made by others to whom you have sent a task will appear here.
Work with tasks that are 'Done'
16. Go to Publish > Tasks and choose 'Done' from the drop-down list. Once a task has been 'Marked as Done' it will appear here.
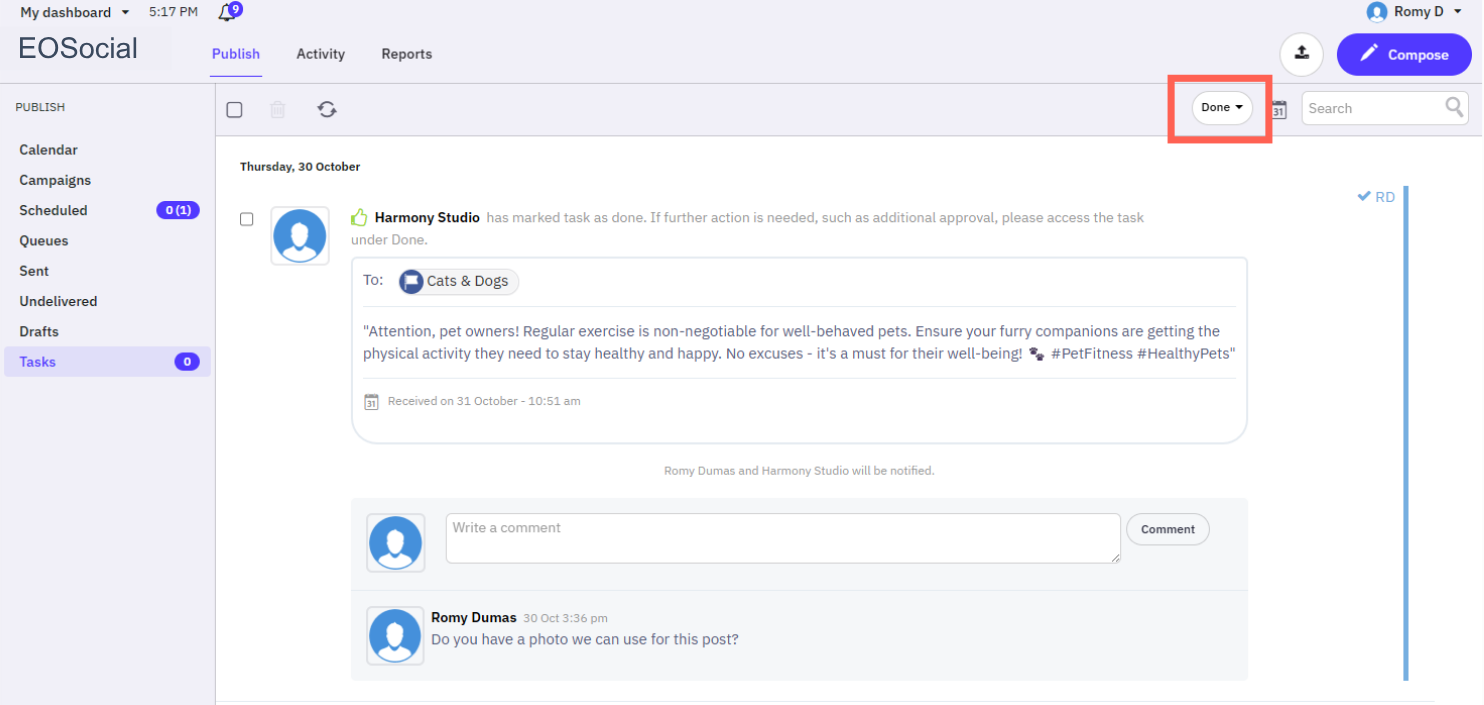
17. You can tick the checkbox/es to delete them. You will not be able to retrieve them once they have been deleted.
18. If you leave a comment on a task, it will not reopen the task. The comment will only be visible in the 'Done' view and may therefore be missed.
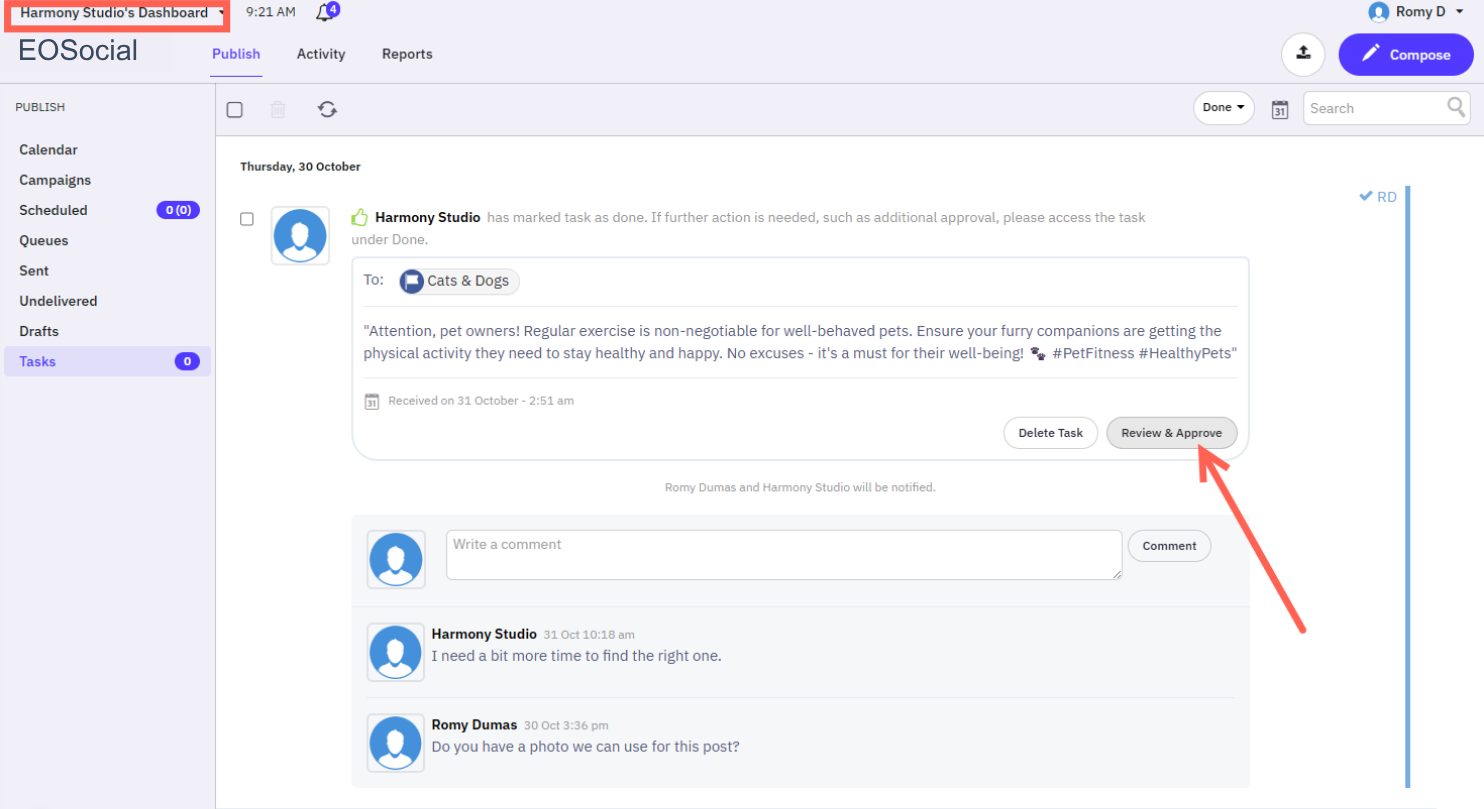
19. If you change your mind and want reopen the task, the person the task was assigned to can click the Review & Approve button to move it back to the 'For Me' and 'For Others' views again.
Have more questions?
We'd be happy to help!
Please submit a support ticket with your questions. Providing screenshots or a video to explain what you expected or wanted will help get answers more quickly!