
How to Create a Journey or Drip Campaign
An email drip campaign or “Journeys” as we call it in EO, is a series of automated emails sent in a predefined order with the goal of transferring information and inspiring the recipient to take a specific action. Drip campaigns are often used in sales outreach, and all the emails in the campaign are created in advance.
By sending a series of carefully planned emails over time, drip campaigns can be an effective way to move potential customers through the sales funnel.
Things to consider when creating an effective email drip campaign:
Identify your goal
Your goal is the fuel that powers your campaigns. Without a clear idea of what you want to accomplish, it'll be hard for any campaign or email series to succeed because there isn't anything specific and tangible at hand with which we can align our tasks accordingly; but when goals are established beforehand—whether big ones like "increase revenue" or small yet equally important details such as making sure every new lead has their name included in one list already—then nothing else matters more than getting them done! Make certain you always understand how well-established these objectives should be.
Understand your target audience
Always deliver the right content to ensure your email campaign succeeds and builds strong customer relationships. You might have an email list of who attended your tech show. You will decide the content that will make these people take action.
Decide the number of touches for your drip campaign
Keeping your email marketing fresh and exciting is important for maintaining customer loyalty. Since over 60% of customers prefer reading emails from the brand at least once every week, it's vital to have a clear idea about how many you want in each campaign so that there isn't too much or not enough space between them when they're all sent out! If creating an 11-email drip with two days' separation seems too much work, try subbing instead; this will give users more opportunities throughout their month without feeling bombarded by info overload on day 1.
Monitor your campaign
Monitoring your email campaign is essential to running a successful one. If you regularly check up on it, any challenges can easily be identified and optimized so that success continues throughout the entire process—not just after launch!
Step-by-step Guide
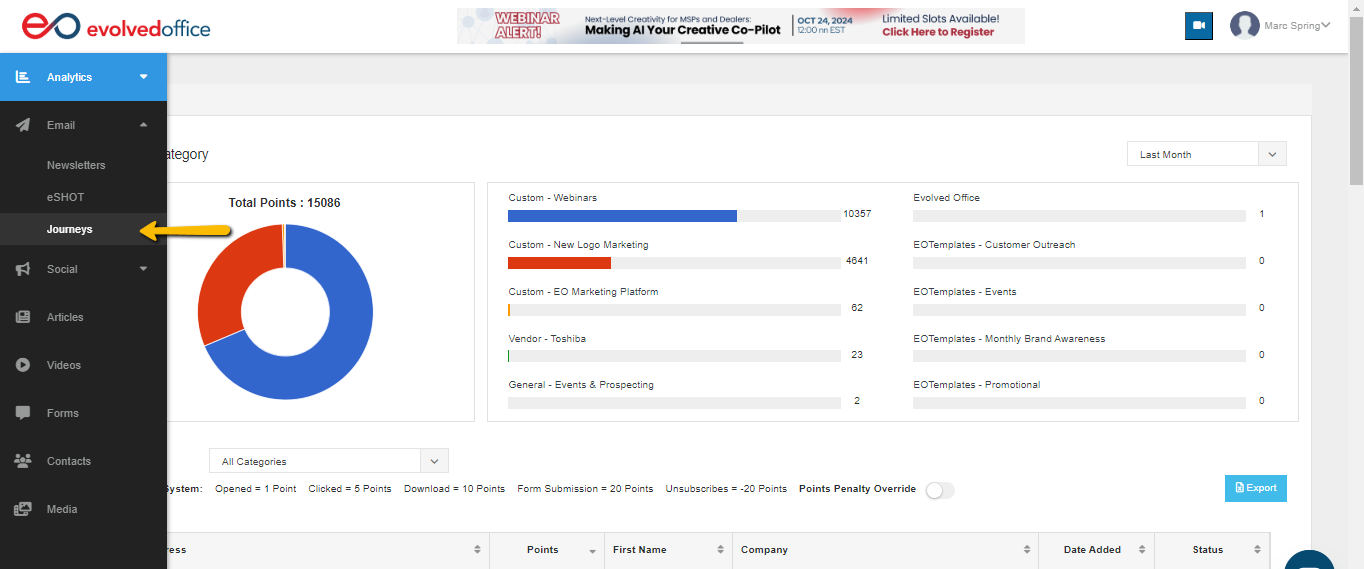
Step 1: Navigate to Journey Manager
Start by accessing "Journeys" in the menu bar.
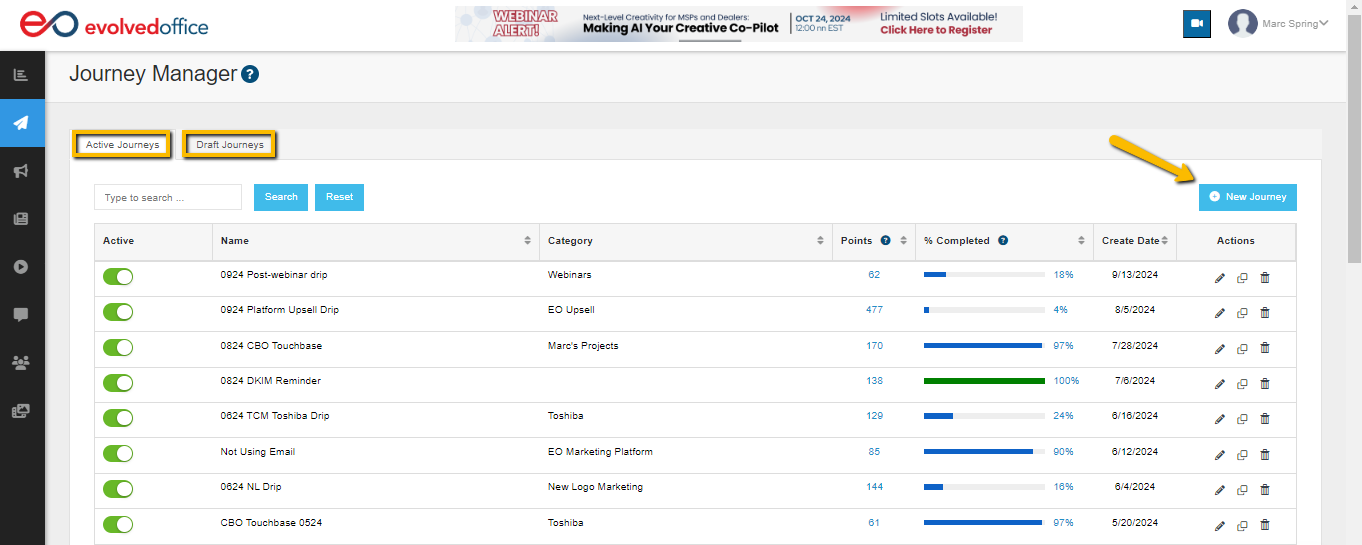
In the Journey Manager, you will find two tabs:
- Active Journeys: Lists all ongoing campaigns.
- Draft Journeys: Displays journeys that are still being created or reviewed.
Click the New Journey button at the top right to create a new drip campaign.
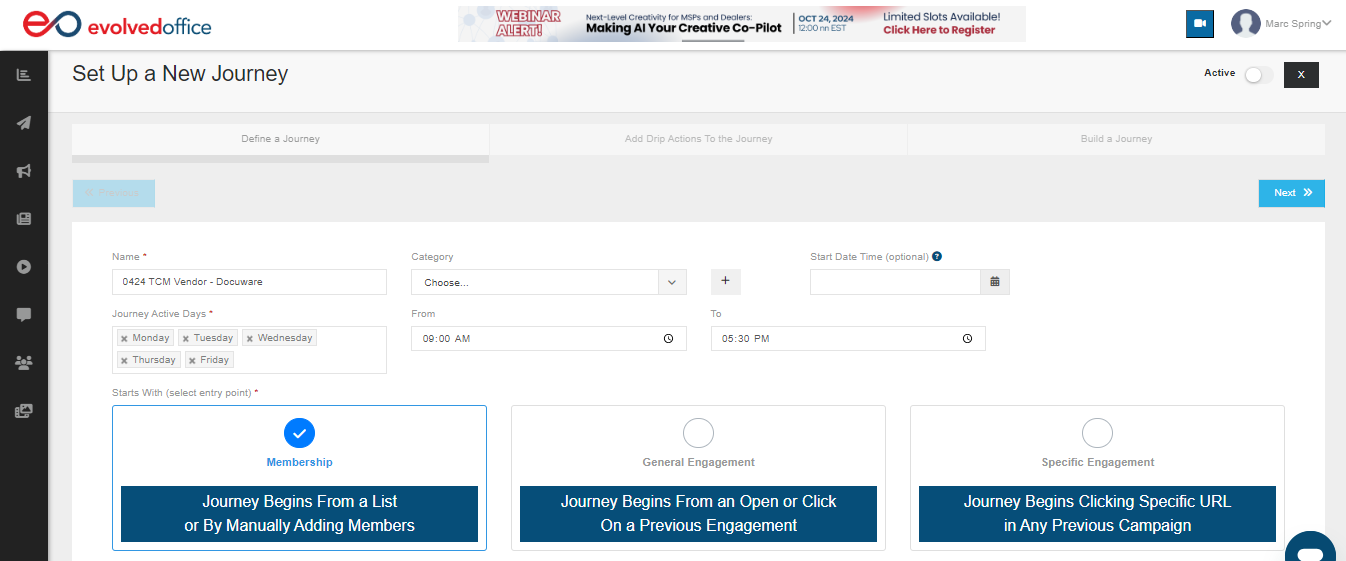
Step 2: Set Up a New Journey
After clicking "New Journey," you will be taken to the setup page.
Define Your Journey:
- Name: Give your journey a clear and recognizable name.
- Category: Choose the relevant category or create a new one.
- Journey Active Days: Select the days you want the journey to run, such as Monday to Friday.
- Time Range: Optionally, set the time range during which the journey should be active.
- Entry Point: Select how the journey starts:
- Membership: Starts when contacts are added to a list.
- General Engagement: Starts when users open or click on a previous email.
- Specific Engagement: Starts when a user clicks a link in any previous campaign.
Once defined, click "Next" to move forward.
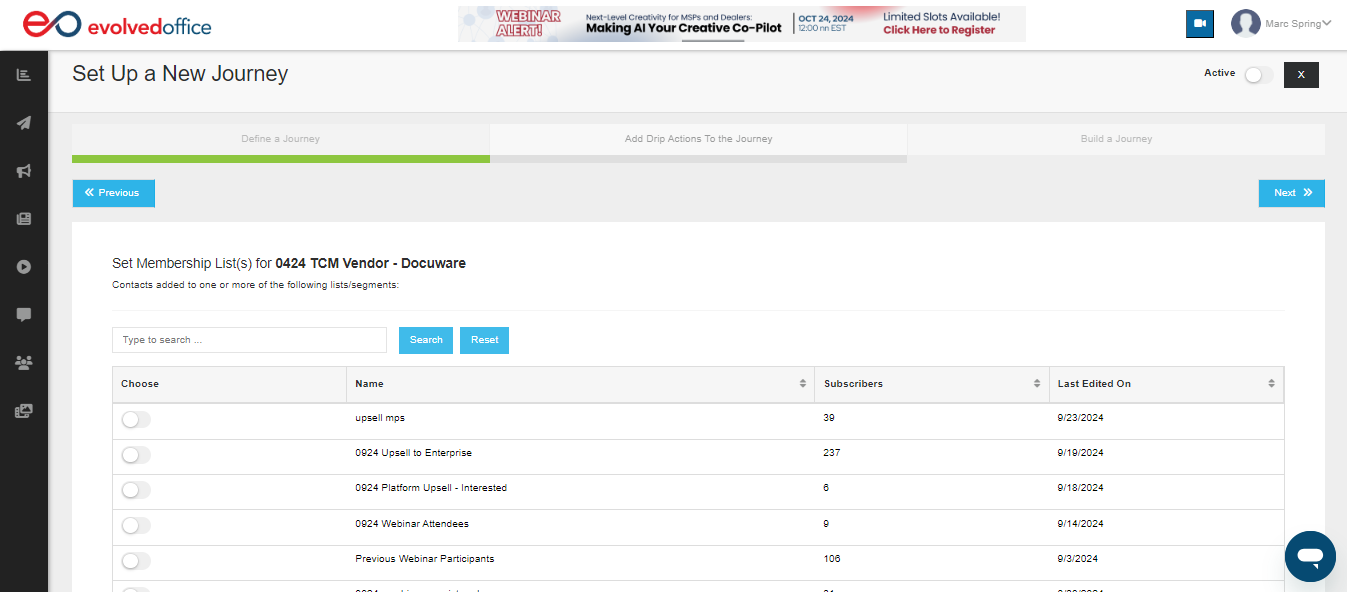
Step 3: Set Membership Lists
Next, you will select the contact list or segments for this journey. Choose the list from available options by toggling the selection button next to each list.
Click Next to continue once the list is selected.
Step 4: Add Drip Actions to the Journey
Now, it's time to configure the actions that make up your drip campaign. Here is where you will define what happens at each journey step.
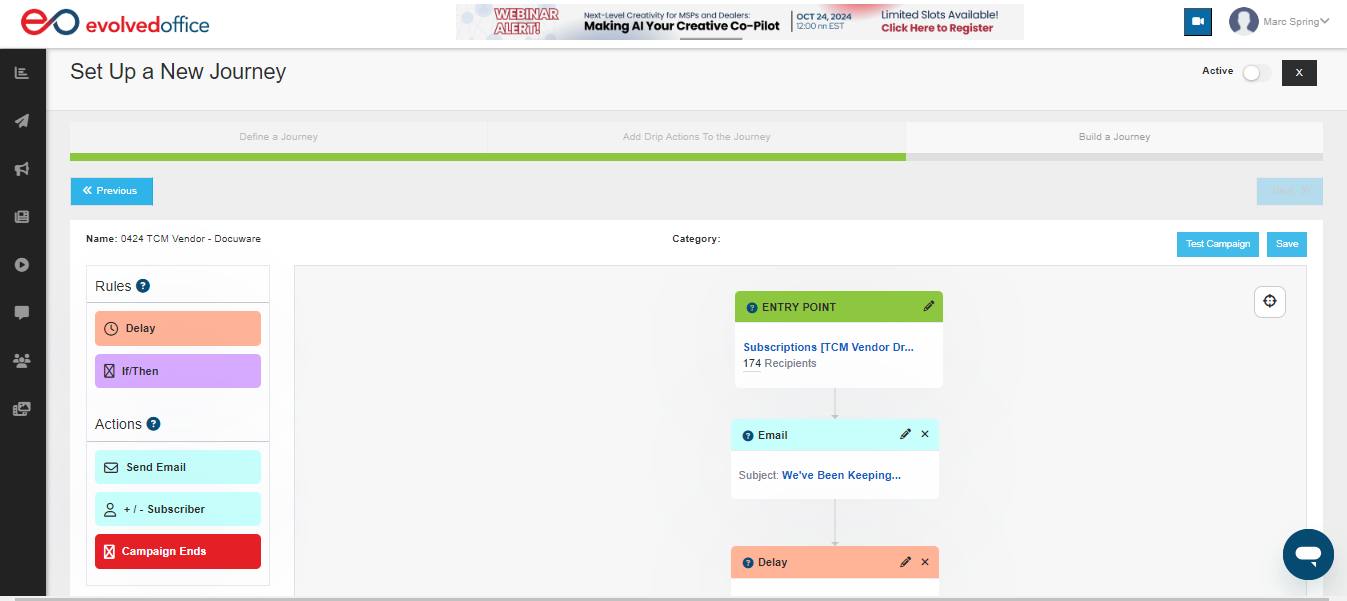
- Rules:
- Delay: This controls the timing between campaign stages, ensuring messages are spaced appropriately and not overwhelming your audience (e.g., wait 3 days before sending the next email).
- If/Then: Create conditional logic for actions based on whether a recipient opened an email.
- Actions:
- Send Email: Select an email to send at a specific journey step.
- Subscriber Addition/Removal: Add or remove contacts from lists based on their interaction.
- Campaign Ends: Set the endpoint for the campaign to segment engaged users and leads.
Check this article for advanced Journey building.
Step 5: Test, Save, and Activate Your Campaign
Before launching your journey, it is crucial to test it to ensure everything functions as intended. Here's how to do it:
- Test Campaign: Click the Test Campaign button, located at the top right of the journey builder. This will simulate the journey's flow to confirm that all rules, triggers, and actions (like emails) are working as expected.
Testing your campaign allows you to see how recipients will interact with the journey and catch any potential issues before the campaign goes live.
- Save Your Campaign: Once you're satisfied with your test results, click the Save button. This ensures that your journey setup is preserved, allowing you to make further edits or activate the campaign when ready.
- Activate Campaign: After saving your campaign, toggle the Active switch in the top-right corner to enable the journey. This will officially launch the campaign and begin automating the actions based on your defined rules and conditions.

Step 6: Track Journey Performance
Once your journey is live, you can track its performance in the Journey Manager to monitor how well it engages your audience.

In this view, you can see:
- Points: This measures the engagement level of the journey. The higher the points, the more interactions your journey is generating.
- Tip: Clicking on the Points value will take you directly to the Journey Tracking section, where you can view detailed information on the performance and actions taken within the journey.
|
- Tip: Clicking on the Points value will take you directly to the Journey Tracking section, where you can view detailed information on the performance and actions taken within the journey.
- Completion Percentage: Indicates how far along the journey recipients have progressed.
- Action Icons: Icons for editing, cloning, or deleting a campaign.
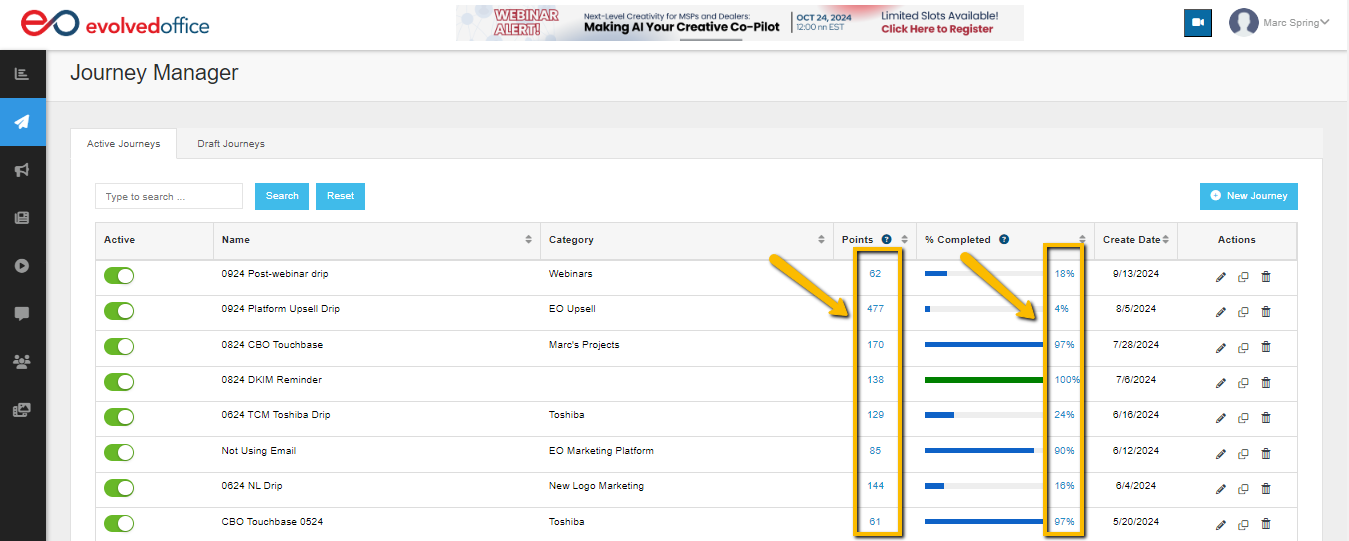

Tracking these metrics is crucial to understanding how effective your journey is and where adjustments may be necessary to improve engagement or conversions.